
All About – Delivery Bots
Delivery bots are service robots that transport items from one place to another. They can deliver food and groceries to homes and even coffee between office rooms.
Let’s say you are at home or in school and ordered noodles for lunch, the restaurant or the shop owner receives your order and then places it inside the delivery bot. The bot then travels to your location to give you the noodles you ordered. You can carry out such things without the need of getting up from your chair.
Why Delivery Bots?
Delivery robots are made to carry small goods from one place to another – they can either be small vehicles on wheels or even flying drones. They are usually used to cover small distances.
Your neighborhood store owner finds it useful to carry groceries from his shop to your house and he does not need to leave his shop. He can continue to sell and deliver items without leaving his shop. The bots also help with the current situation where robots can deliver without human contact.
Applications of Delivery Bots:
Deliver food, groceries, or other small items to homes from shops.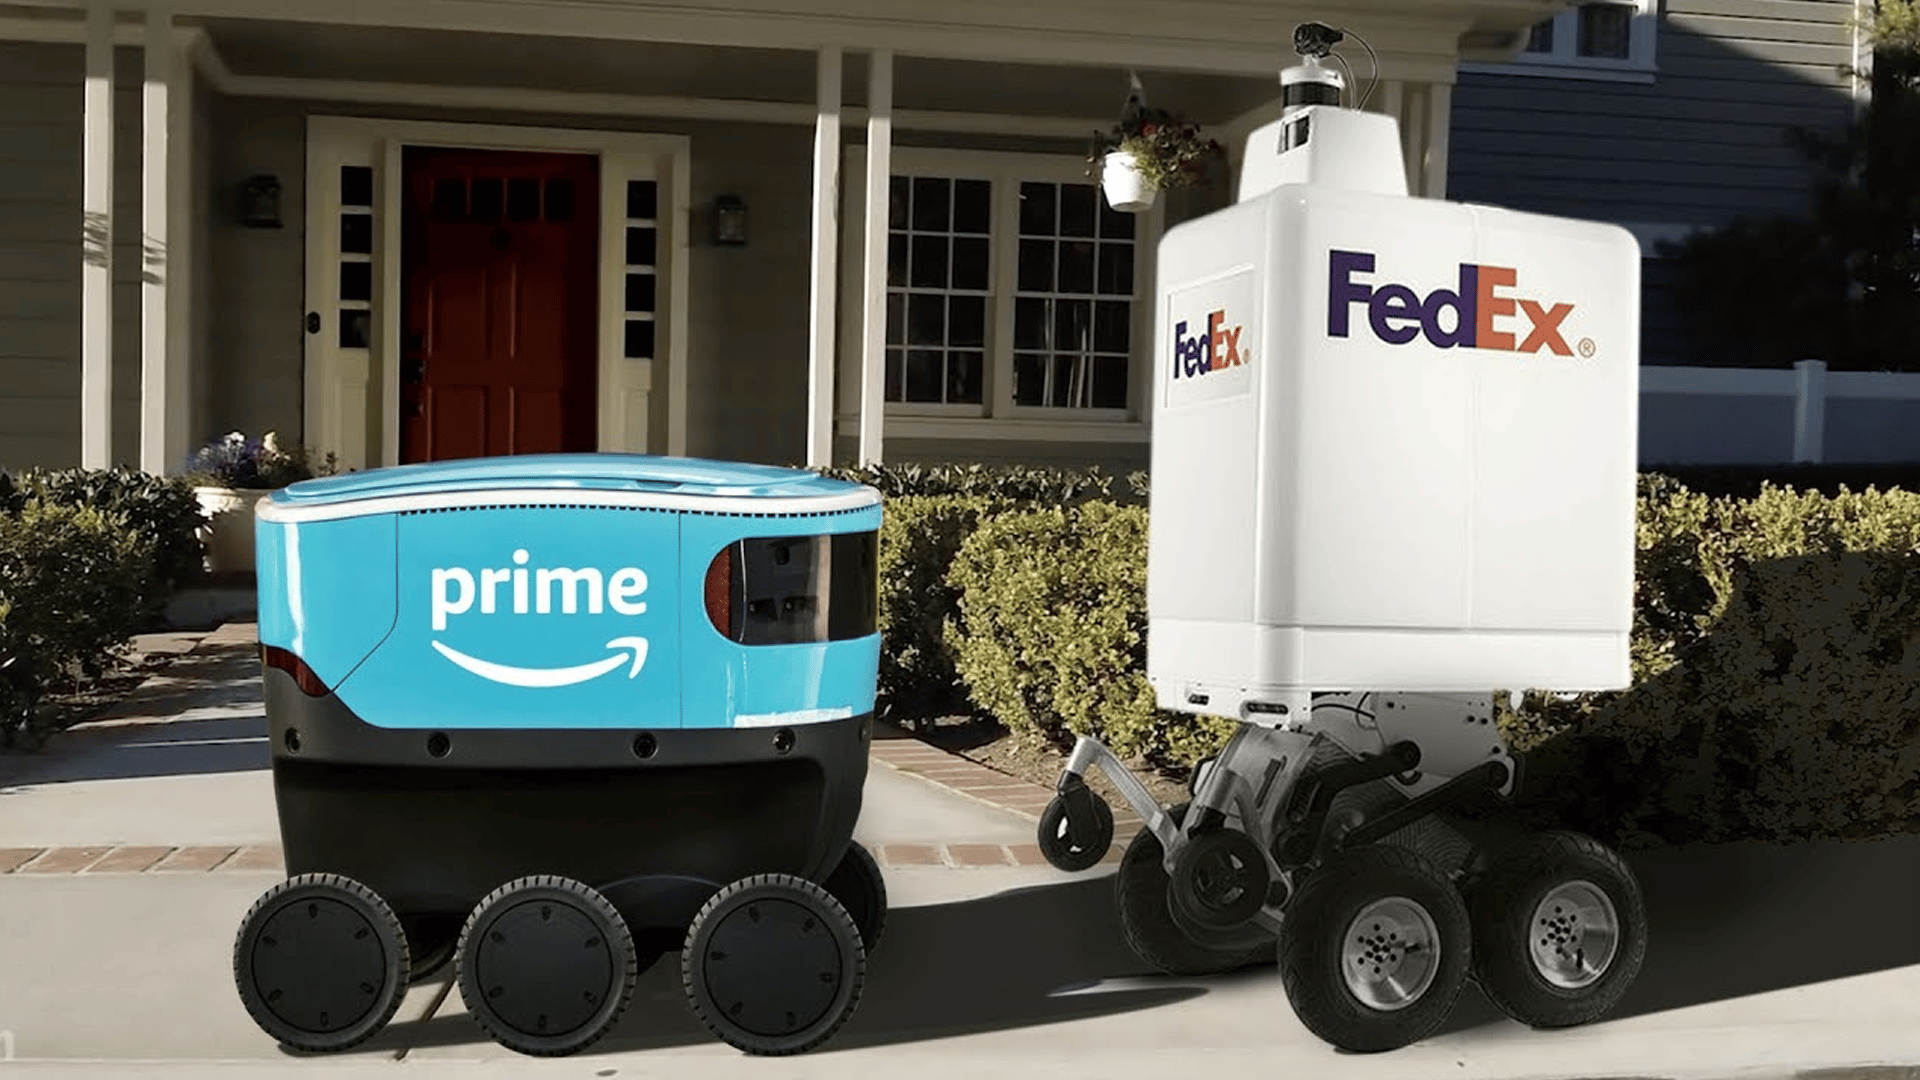
Deliver documents or other small items within small areas.
Activity 1: Detecting Numbers
Before we jump into making our AI delivery bot using Quarky, there are a few concepts that you must understand related to object detection.
All the delivery robots need a way to identify where they are or if they have reached their destination or not. That we will do this using number detection.
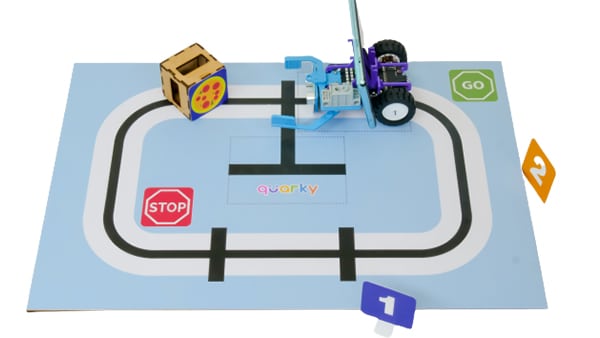
As you can see, in the arena we have 3 checkpoints, we have labeled each checkpoint with a number, like 1, 2, and 3. And to identify the checkpoints, we used the number cards. We will use this method to identify where the robot is.
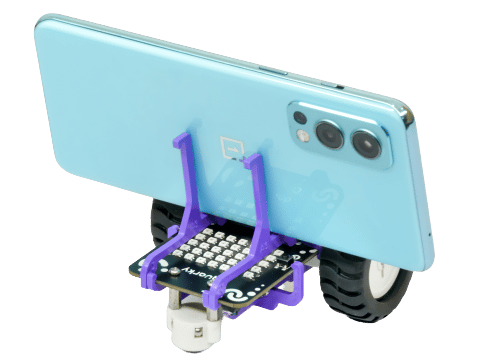
Assembling Smartphone Mount
As you would have noticed we will identify the numbers using our smartphone mounted on the robot.
Let’s see how to do it.
- To mount the Smartphone holders, first, fix them on Quarky’s front edge. Once the Smartphone holder is fixed in the front, then press on the rear side.
- Mount the Smartphone holder lock horizontally across the holder.
- Place your Smartphone on the holders horizontally or vertically (use rubber bands to secure it).

Code for Number Detection
- Create a New file in PictoBlox App.
- Connect Quarky to PictoBlox.
- Click on Add Extension and add Recognition Cards
- Create the script below.
- Now, run the script by clicking the green flag.
- Save the file as Number Detection.
You can also test other conditions like where the robot detects the number 1 when multiple cards are present
Make sure you have this thing working before moving to the next activity.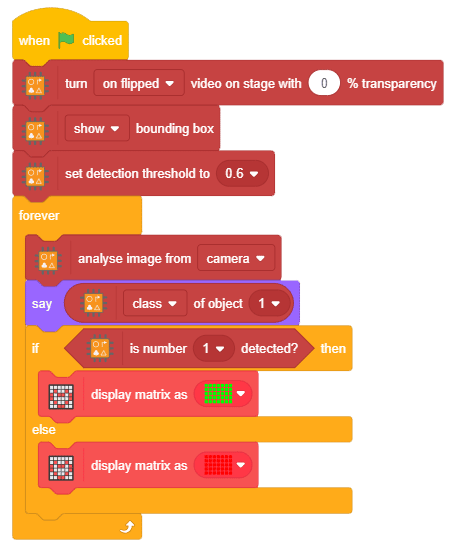
Activity 2: Quarky as an AI Delivery Bot
In this activity, our robot’s objective will be to follow the line to move forward, stop at the checkpoints, detect the number cards to check whether it has reached the correct destination, and update the delivery status by turning LEDs on it to Green.
Case 1: Going to Checkpoint 1
We’re going to use our line-following robot as an AI delivery bot. Here’s how it will work.
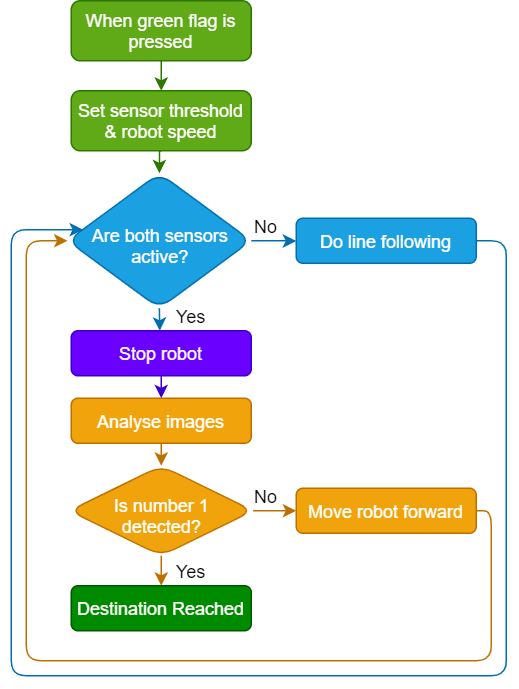
We have to do the following in order to successfully reach the number 1 checkpoint:
- Initialize the robot with its IR sensor threshold values and speed parameter so that we have our line follower ready.
- Then do line following and continuously check if both the sensors are active. If both the sensors are active, we know that we have reached a checkpoint and we have to stop.
- Then we have to analyze the camera feed for the numbers and detect numbers.
- If number 1 is detected, then we know that we have reached the destination.
- If number 1 is not detected, we have to move the robot forward, skip the current checkpoint and do step 2.
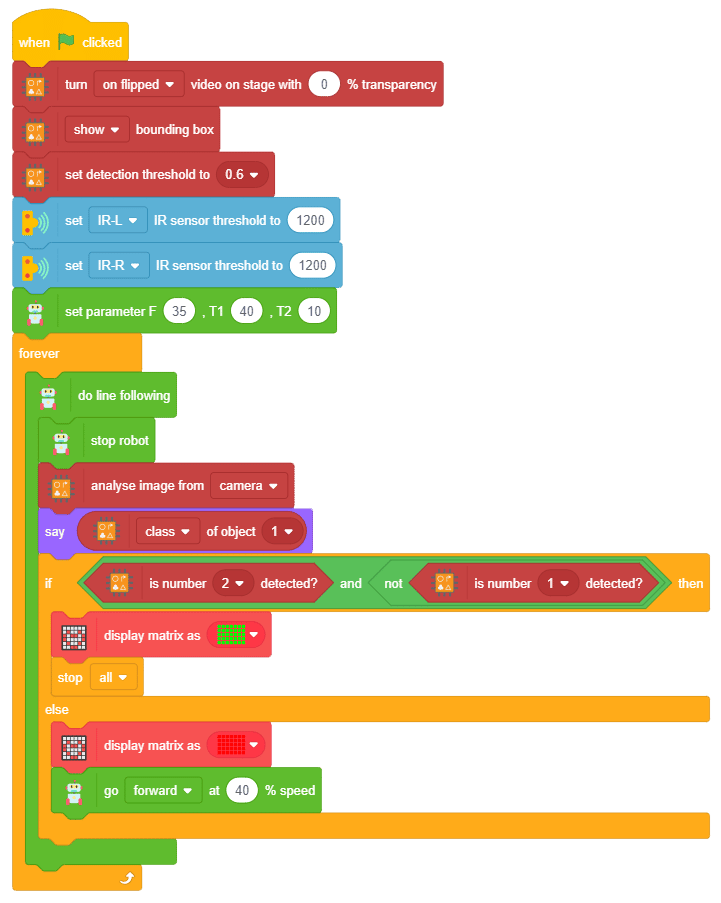
Code
Make the following code based on the logic discussed.
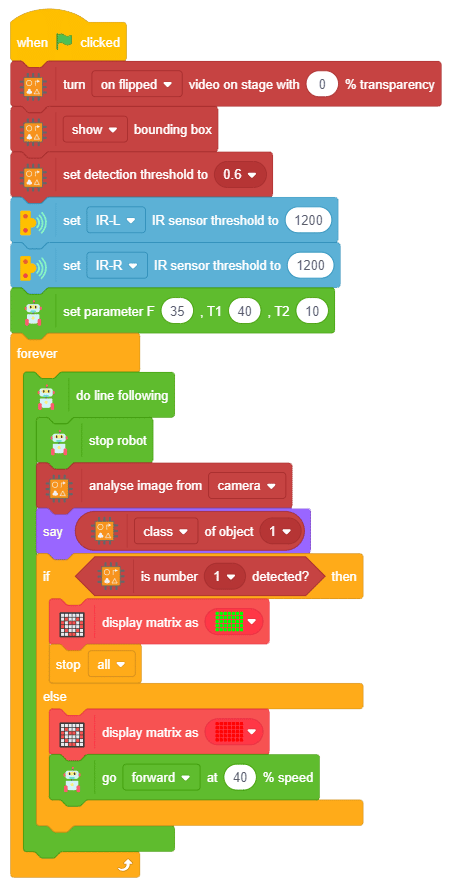
Run it by clicking the green flag and enjoy!
Case 2: Going to Checkpoint 2
All the things would be the same, but there would be one major difference. As you can notice, number 2 is detected on checkpoint 1 and checkpoint 2, but when the robot is at checkpoint 2, number 1 is not visible. And this is what we will use. Checkpoint 2 is detected only when number 2 is visible and number 1 is not visible.
Activity: Output
Make sure you finish and submit the assignment, as well as take the quiz, before moving on to the next lesson.