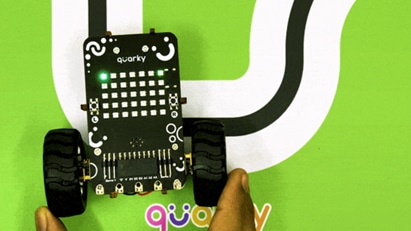

All About – Line Following Robots
Line-following robots are simple, they follow a line drawn on a surface. Just like how trains follow along a set track, they follow a dark line painted on the ground or a surface. They work by using infrared signals to detect a dark line on a bright surface or a brightly colored line on a dark surface. The line can also allow the robot to make turns.
Imagine a simple cookie factory – When the cookies are made and packed into boxes, a robot collects all these boxes and loads them onto trucks.
The robots will follow a path in the factory to carry the boxes from one place to another. These paths are drawn or painted so the robot can follow them.
Why Line Following Robots?
Line-following robots are very easy to build and easy to correct or maintain. Once built and turned on, they start to move along the path. This can be useful for tasks that need to be repeated often like in factories.
IR Sensor
Line-following robots use electronic devices called IR sensors to detect the line they have to follow. Let’s understand how they work.
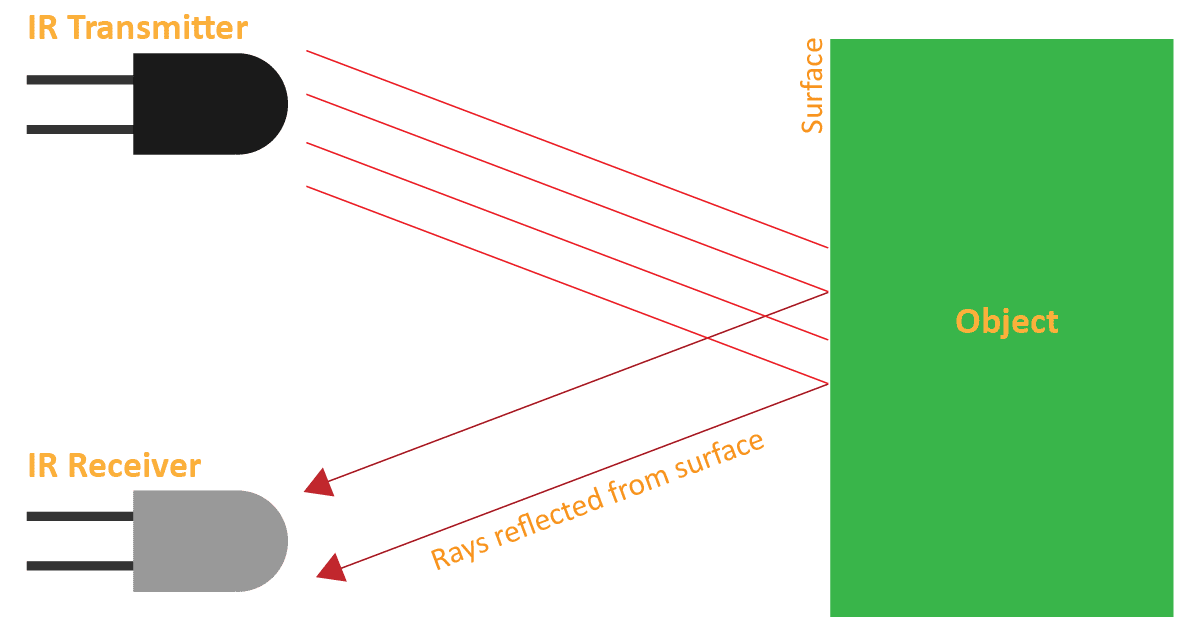
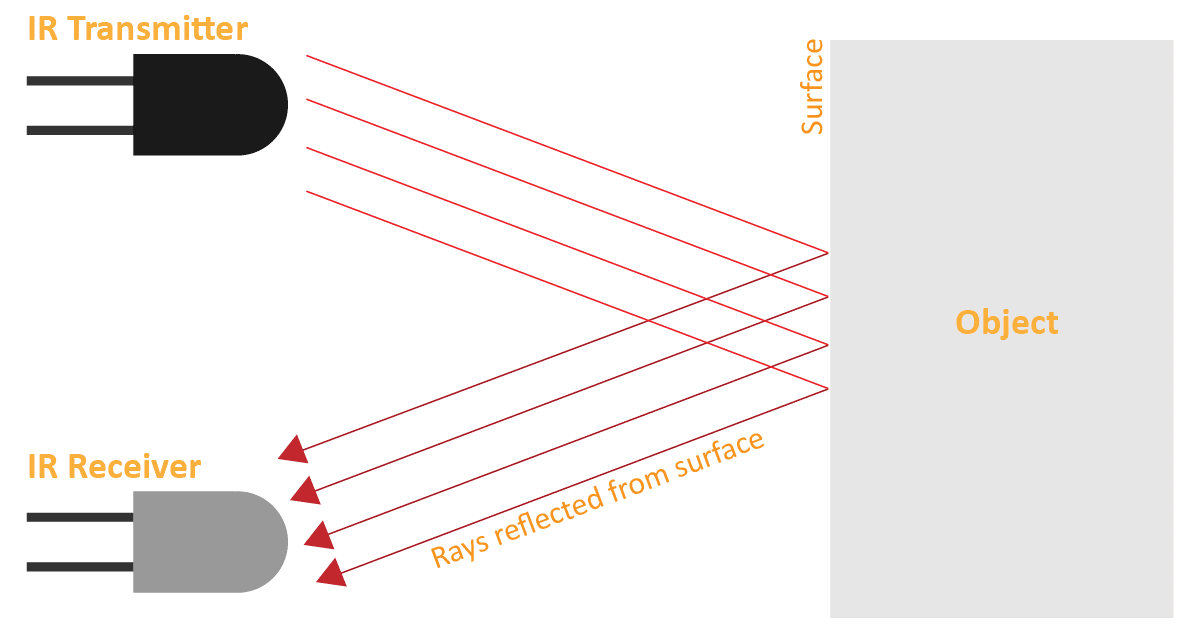
An IR sensor consists of 2 LEDs: one which transmits the IR light and one which receives the IR light. When the IR rays are transmitted, they bounce from the nearest surface and get back to the receiver LED. That’s how an IR sensor detects an object.
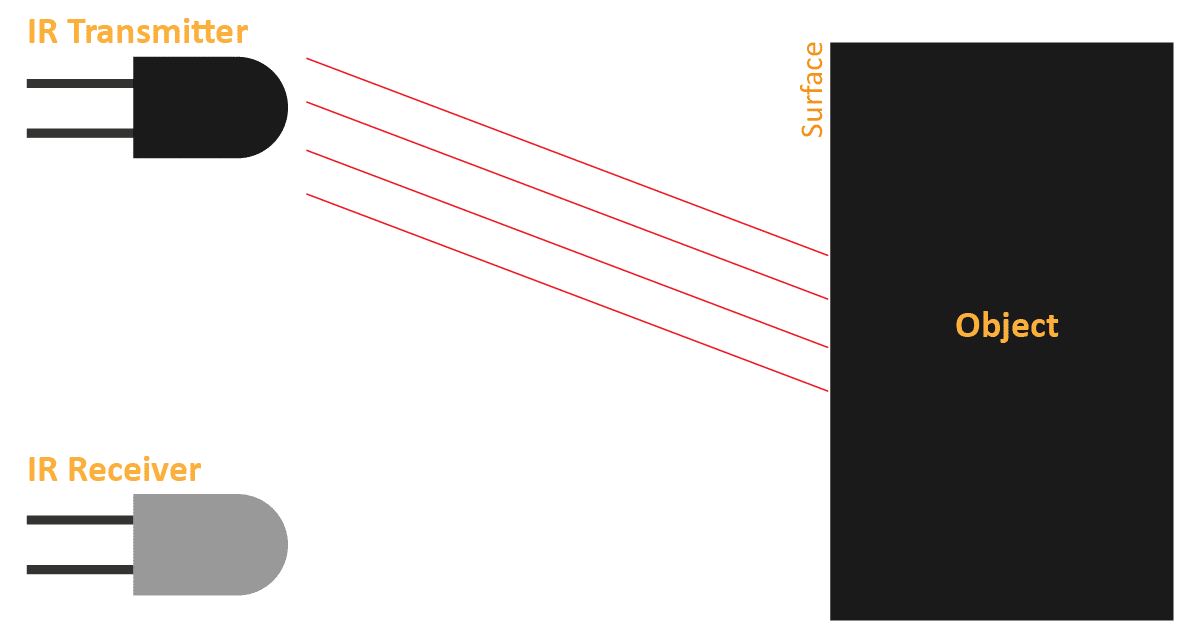
But to detect colors, we depend on the number of rays the surface reflects:
The dark surface will absorb more IR rays and as a result, the receiver will get fewer IR rays.
White or shiny objects will absorb fewer IR rays and as a result, the receiver will get more IR rays.
We can get the sensor values in PictoBlox and based on that value we can estimate whether the surface is black or white.
- If the sensor detects the black line, its output value is increased. This means that the sensor is active.
- If it detects the white area, its output value decreases. This means that the sensor is inactive.
We will call the threshold value above which the sensor detects the black line. If the sensor value is less than the threshold, it means that the sensor hasn’t detected the line yet.
Activity 1: Calibrating the IR Sensors
Before we start using our line-following robot, we need to first calibrate the IR sensors, i.e., make sure they’re working fine. For that, we’ll make a script in PictoBlox to calibrate them.
Follow the steps below:
- Create a New file in PictoBlox App.
- Connect Quarky to PictoBlox.
- Go to the Variables palette and create a variable named Sensor Value.
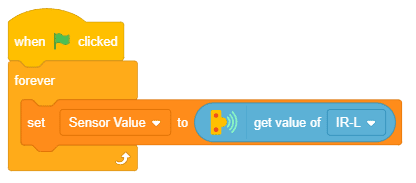
- Next, make the following script to keep updating the variable value to the left IR sensor value.

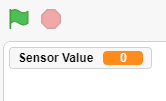
- You will notice that it appears in the top-left corner of the stage. We’ll use this variable to find out the threshold value for our IR sensors.
- Let’s first find out the threshold value of the first IR sensor, i.e. the Left Sensor.

- Take out the track from your Quarky kit and bring the black line pretty close to the left sensor. Observe the change in the variable value on the Stage. Note this value.
- Then bring the white space close to the sensor. You’ll notice that the value decreases. Note down the new value. The threshold value will be in between these two values. g., if the value when the sensor detects the black line is 2000 and when it detects the white space is 500, then we will keep the threshold at 1200.
- Repeat the process for the right IR sensor. Note that it is possible for the values of both sensors to be different.

Getting Feedback via LEDs
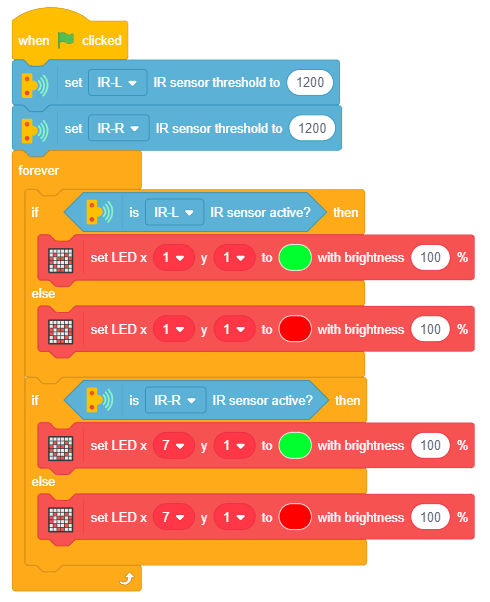
Make the following code to check the status of the black line detection:
Now, run the script by clicking the green flag. Make sure you have the left and the right sensors calibrated properly before you move ahead.
Logic of Line Following Robot
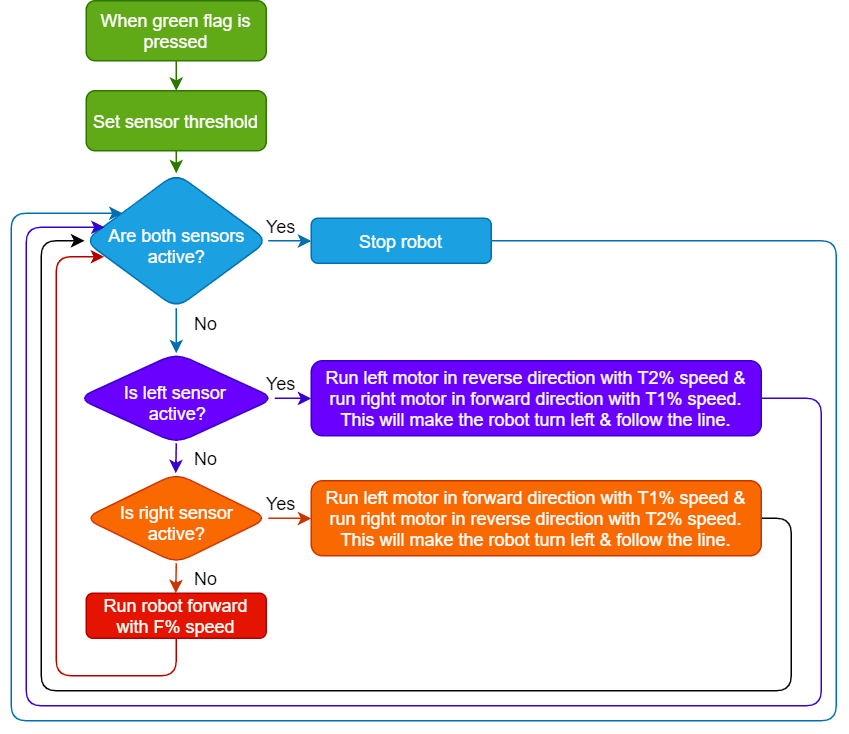
The logic behind the working of a line-following robot is simple:
- First, we will set the left and right IR sensor thresholds.
- If both the sensors are active, it means that the robot is at a crossroads and therefore must stop.
- If only the left sensor is active, this means that the robot is drifting towards its right and we need to bring it back on track. Therefore, we must make it move a little toward the left.
- If only the right sensor is active, this means that the robot is drifting towards its left. Therefore, we must make it move a little toward the right.
- If none of the sensors is active, it means that the black line is in between them and the robot is going in the right direction. Therefore, it should keep moving forward.
- Repeat steps 2-5.
There are 3 important things we will use in a line following robot:
- F: The speed with which the robot will move forward when it has not detected a black line.
- T1 & T2: When the robot is following the line and if one of the sensors say the left one, detects the black line, then the robot is off track and has to turn left in order to get back on track. And we know how to turn the robot left. The left motor moves backward and the right move forward. But if both are moving at the same speed, then the robot’s motion will become jerky and inefficient. Hence, we will have two speeds for turning T1 and T2, where
- T1 will be the speed with which the motor will move forward and
- T2 will be the speed with which the motor will move backward.
- We will have to set F, T1, and T2 during the programming and calibrate it for effective line following.
Coding Steps
- Create a New file in PictoBlox App.
- Connect Quarky to PictoBlox.
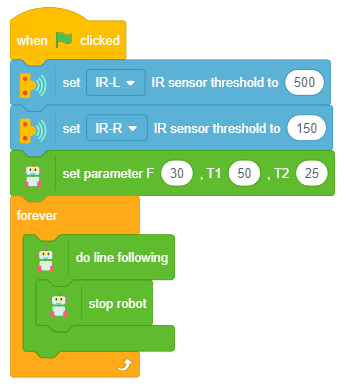
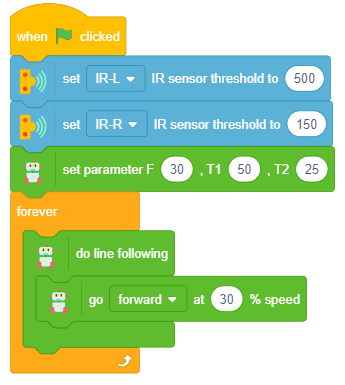
- Add a green flag block in the scripting area and two set () IR sensor threshold to () blocks and set the left and right IR sensor thresholds.
- Go to the Robot palette and drag and drop a set parameter F (), T1 (), T2 () block. Set the parameters as default.
- Add a forever block below the set parameter F (), T1 (), T2 ()
- Now, from the Robot palette, add a do line following block inside the forever block. This block will take care of ALL the line following conditions that we had to check individually in the logic.
- Next, add a stop robot block inside the do line following block.

- Now, place your robot on the track and run the script by clicking the green flag.
- Save the file as Line Following.
Activity: Output
Calibrating the Robot
We have to calibrate the robot’s F, T1, and T2 speeds to make it work efficiently. Let’s see what happens with the change of each parameter:
- F: This controls how fast the robot moves forward. If the robot is overshooting and does not follow the line, then decrease the value.
- T1 & T2: This controls how much the robot turns to get back on track. If they are less, then the robot might not get time to get back on track and if they are high then the robot will jerk a lot. You can see how the robot is turning too much in this case. You can keep the T2 speed between 0-20 and change the T1 to get the most appropriate result.
Calibrate the F, T1, and T2 parameters and remember them as we will use them in the coming lessons.
What happens at the Checkpoints?
As you would have noticed, the robot detects the checkpoints in the line follower block, we can do whatever we want at that checkpoint. Like in the previous code, we made the robot stop at the checkpoint.
You can make the robot go forward as well to have it moving on the track without interruption like this:
Make sure you finish and submit the assignment, as well as take the quiz, before moving on to the next lesson.