
All About – Pick and Place Robot
 Pick and the place is arguably the most frequent robotics application nowadays and is unquestionably well-liked. They are extensively used in today’s manufacturing and industrial environments.
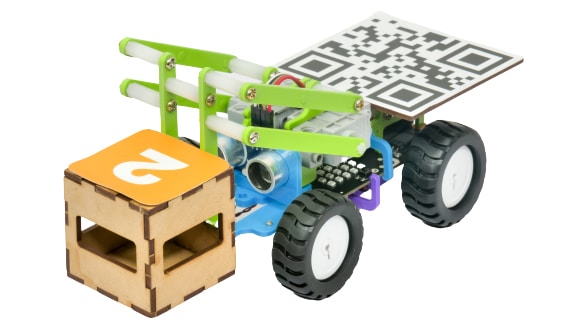
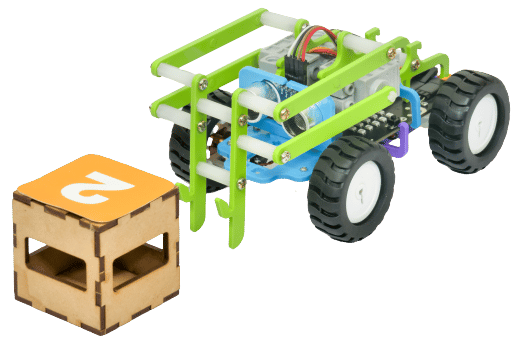
A Pick and Place robot, as the name implies, can quickly pick up an object from one position and drop it in another. They take care of the repetitive tasks that tend to be mundane and burdensome for humans. Inspecting, transporting, and packaging products are just a few of their jobs in manufacturing and other industries.
Advantages of Pick and Place Robot
Let’s now have a look at some of the Advantages of Pick and Place robots.
- Accuracy: One of the most dependable aspects of a robot is its consistency and precision in what they perform. This is because there is no room for human error. They have a level of precision that human assembly cannot match.
- Speed: In comparison to humans, pick-and-place robots work faster and accelerate the process. Furthermore, as it substitutes humans, it allows them to focus on more complex tasks, resulting in a higher production rate.
- Flexibility: They are successful in meeting every demand because they have a wide range of applications, whether it is assembly tasks or delivering objects.
Assembling the Robot
We are starting with the Horizontal Robot.
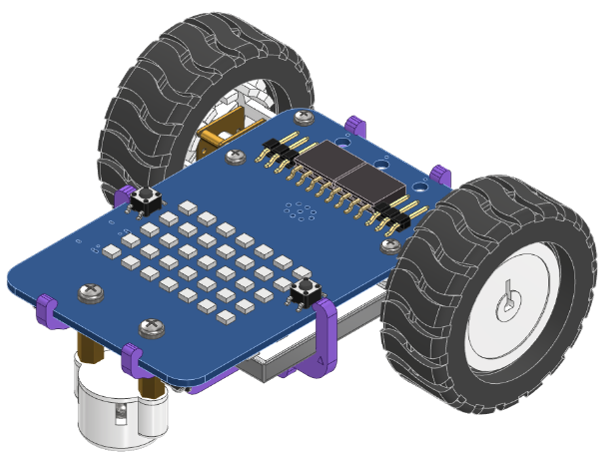
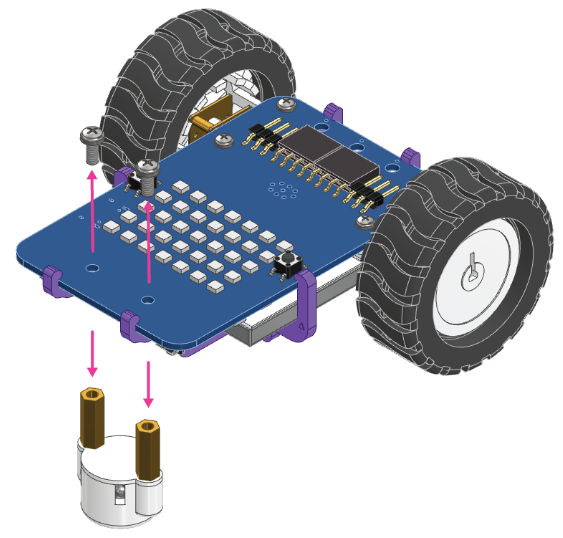
- First, detach the Castor Wheel from the Quarky Robot by removing the Bolt.

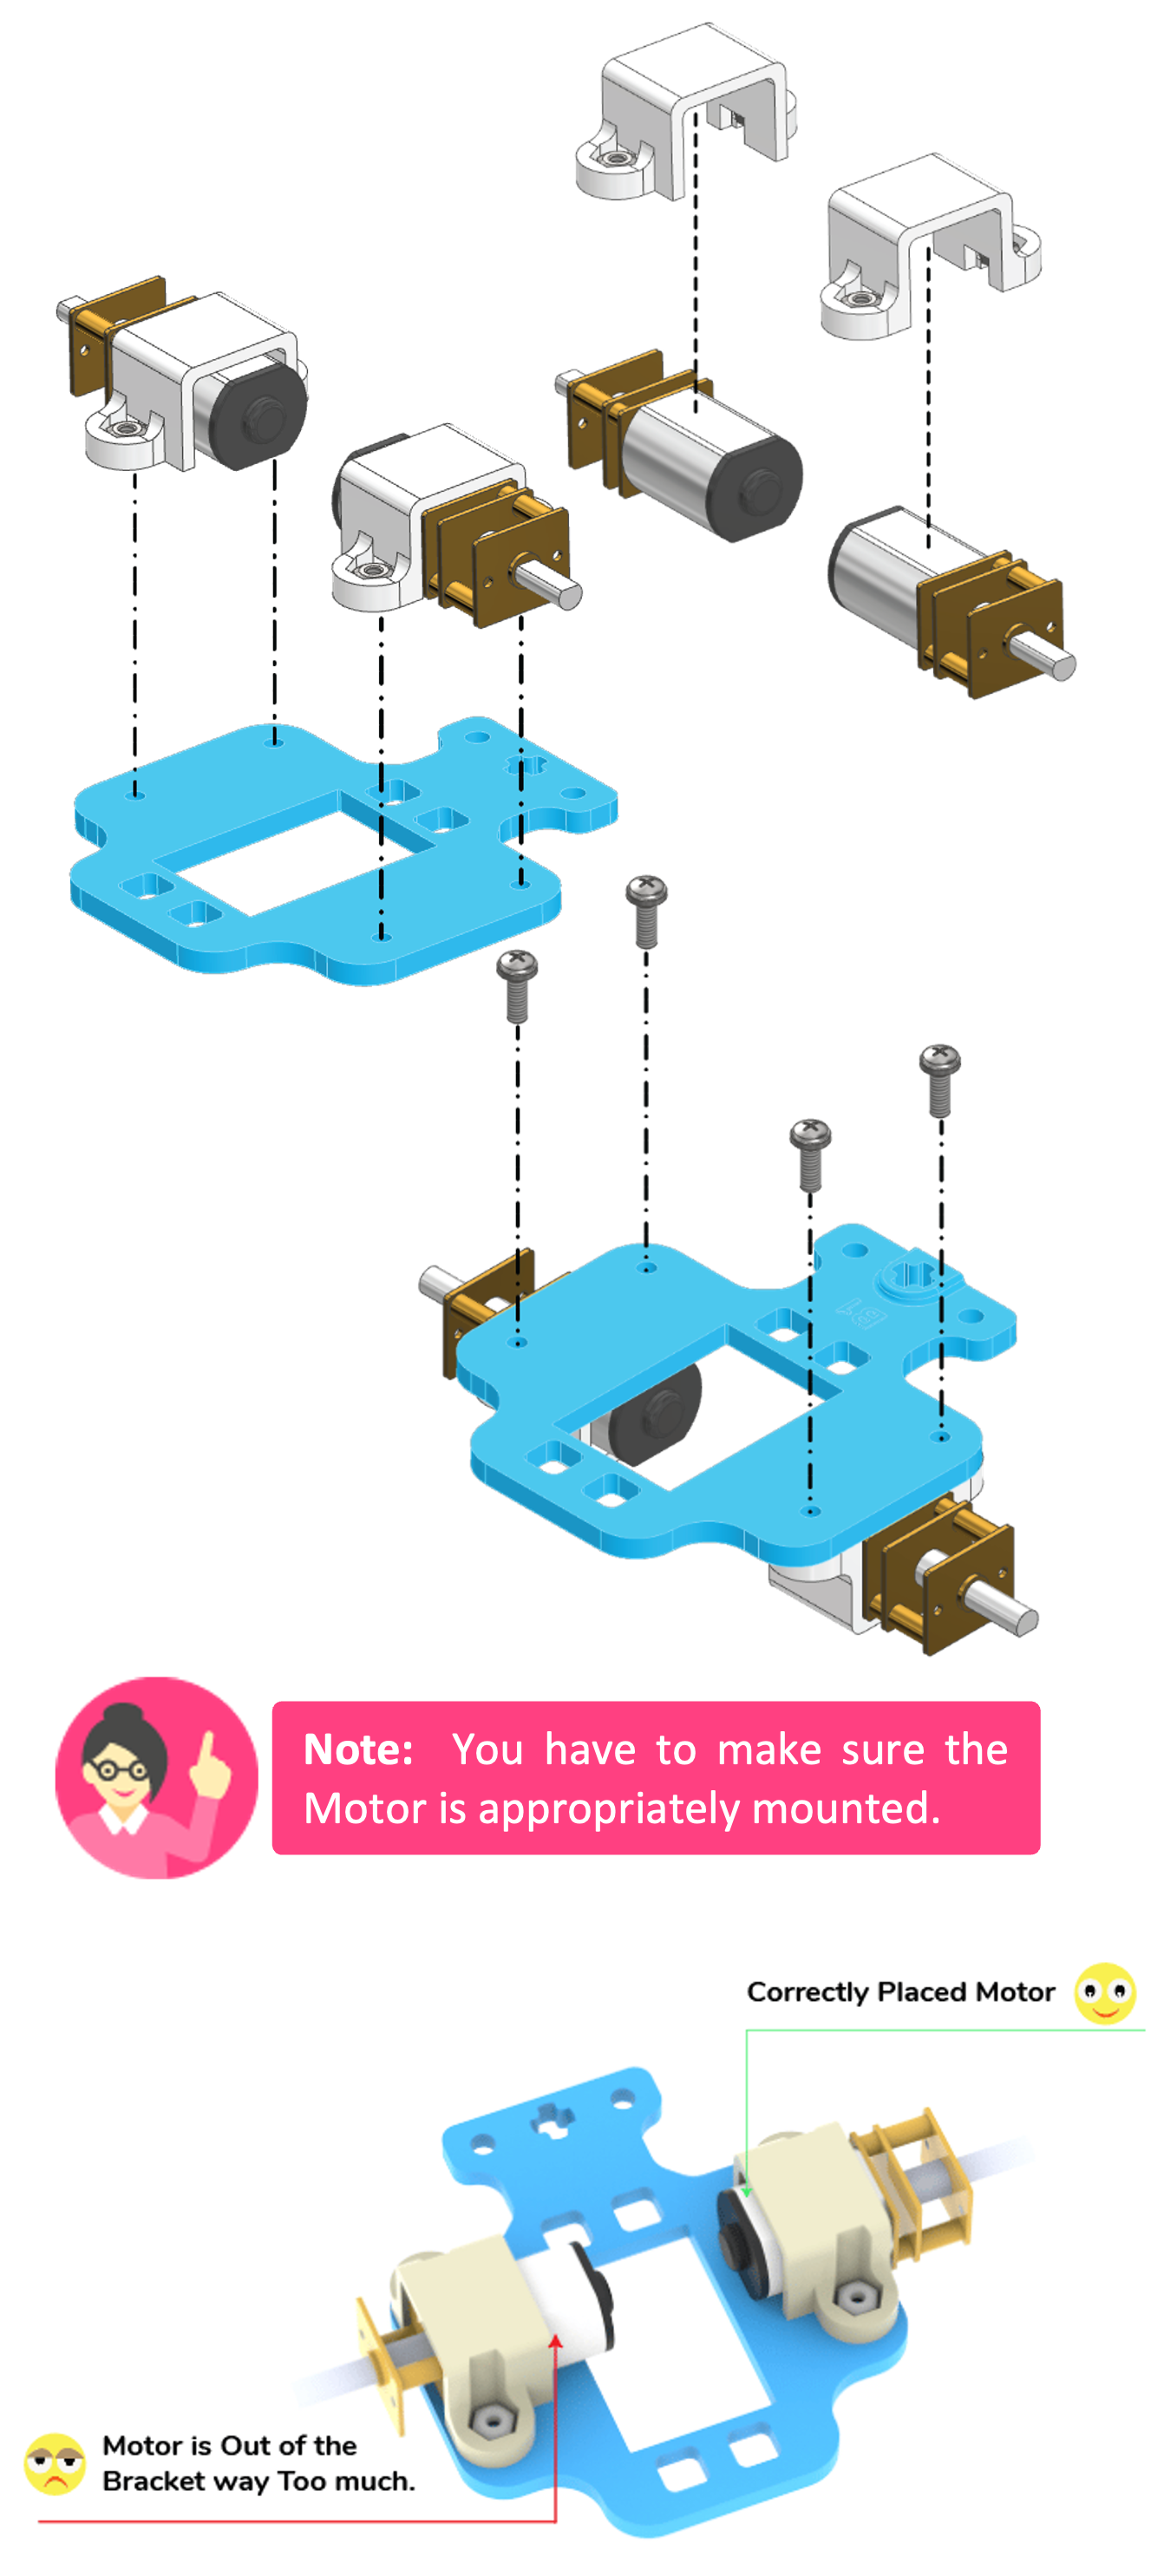
- Place the Motors on the top of the B1 Plate using the Motor Mount Bracket. Fasten it using M2 Bolt and M2 Nut that you get with Motors.

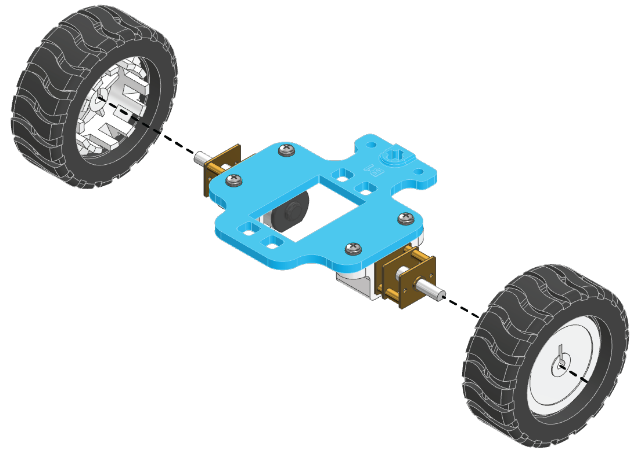
- Now attach the Wheels to the Motors.

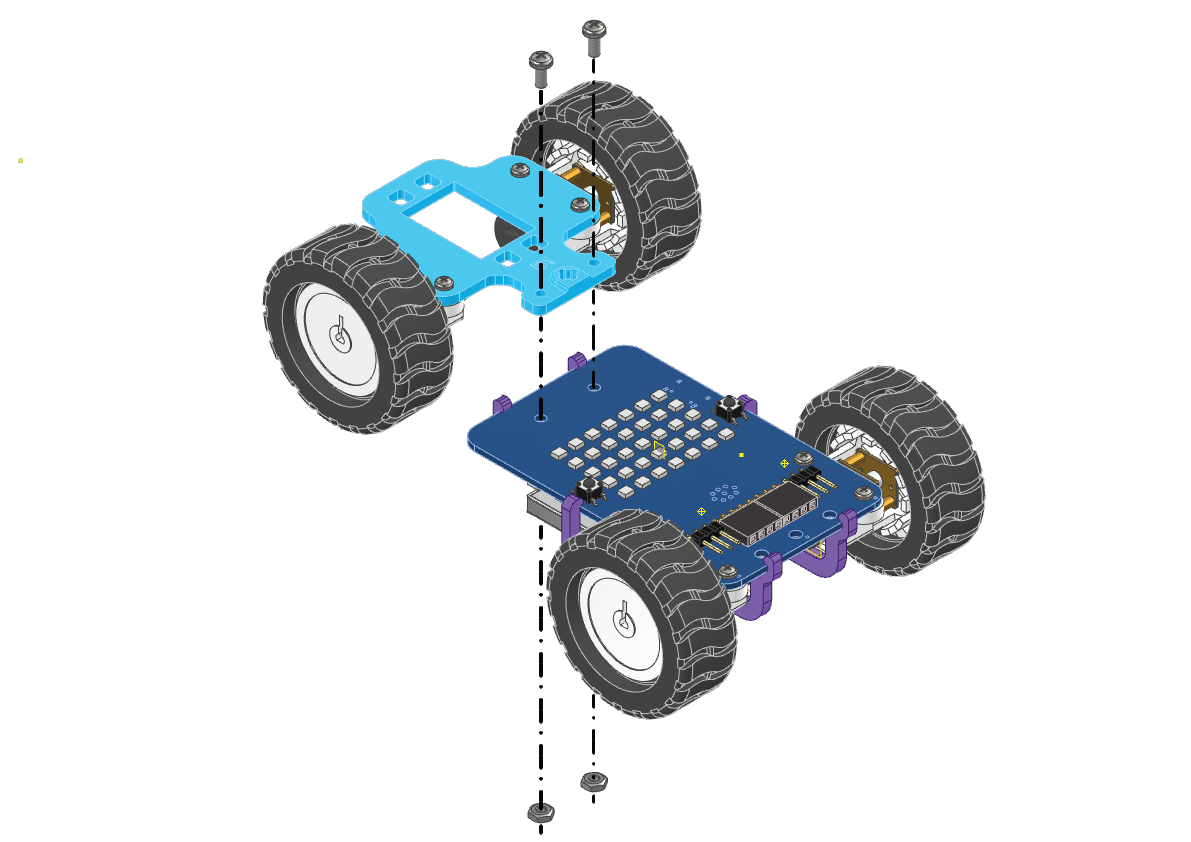
- After that, attach the Wheel sub-assembly (with wheels) in front of the Robot. Fasten it using M2.5 Nuts and Bolts.

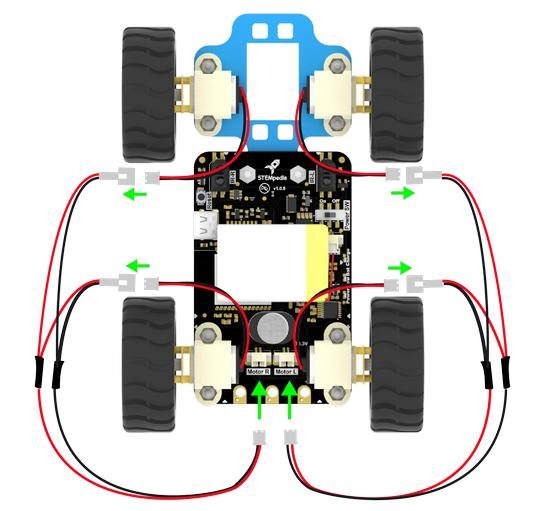
- The motor connection is similar to the Four-Wheel Drive Robot. Connect the two left motors and then connect the wire to the Board. Do the same for the right motors.

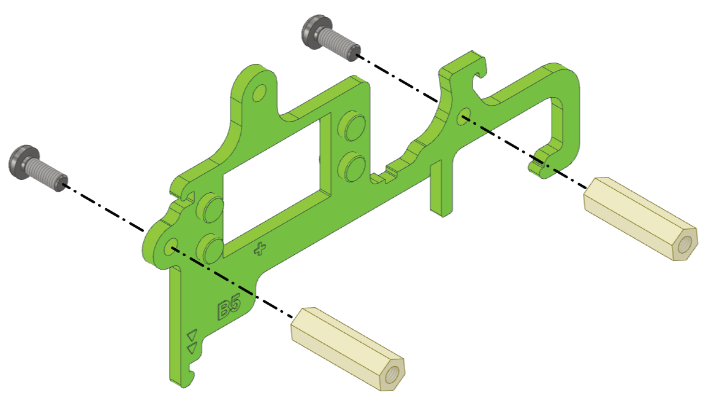
- Fasten two Spacers on the B5 Plate with an M3 Bolt of 8mm Length as shown below.

- Fasten another Spacer on the B5 Plate with an M3 Bolt of 8mm Length as shown below. The spacer will be on the opposite side of the other spacers.

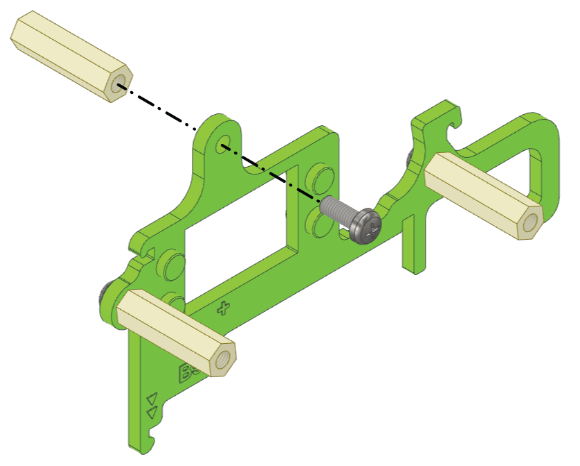
- Fasten another Spacer on the top of the other B5 Plate with an M3 Bolt of 8mm Length.

- Align both the B5 Plates on Spacers as shown below and fasten them using two M3 bolts of 8mm Length.

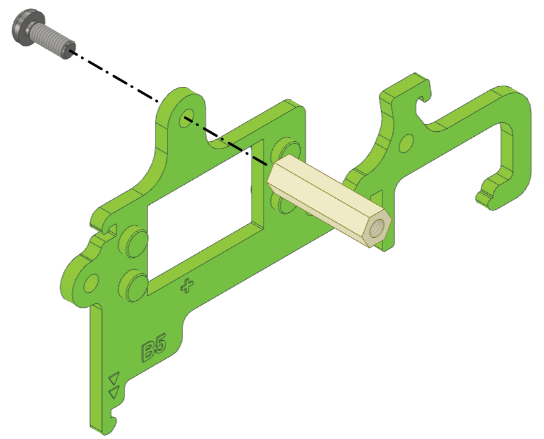
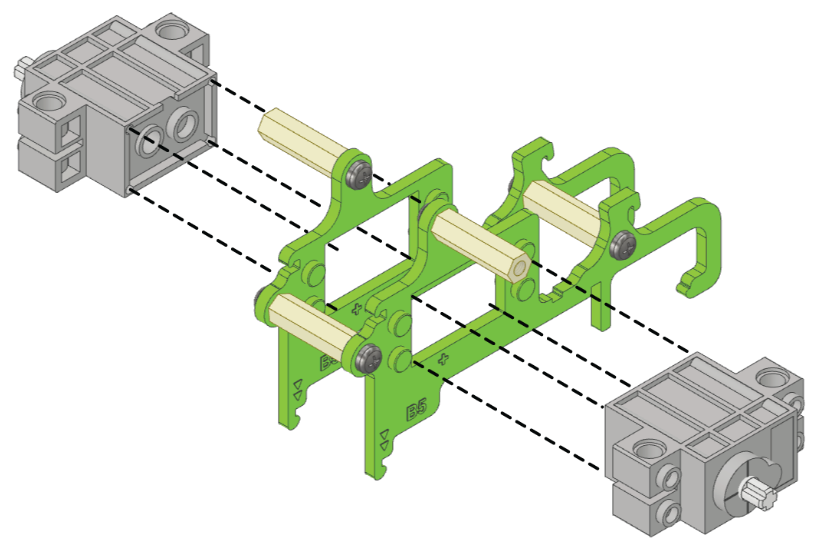
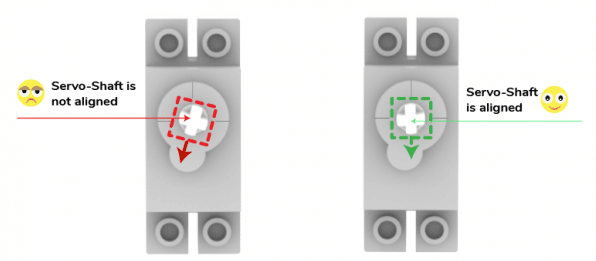
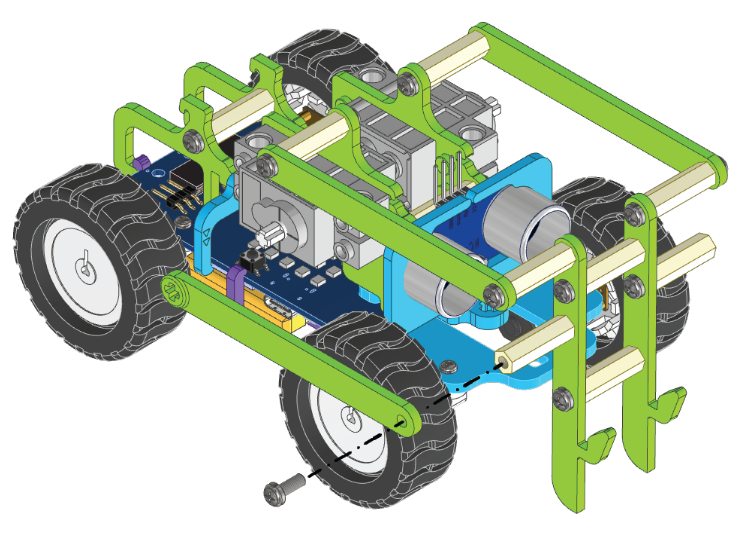
- Insert the Servo Motors in the B5 Plate and snap it tight. You have to make sure that the wire of the servo motor is coming from the inside. The Servo Motor shaft aligns with the ‘+’ mark on the B5 Plate.

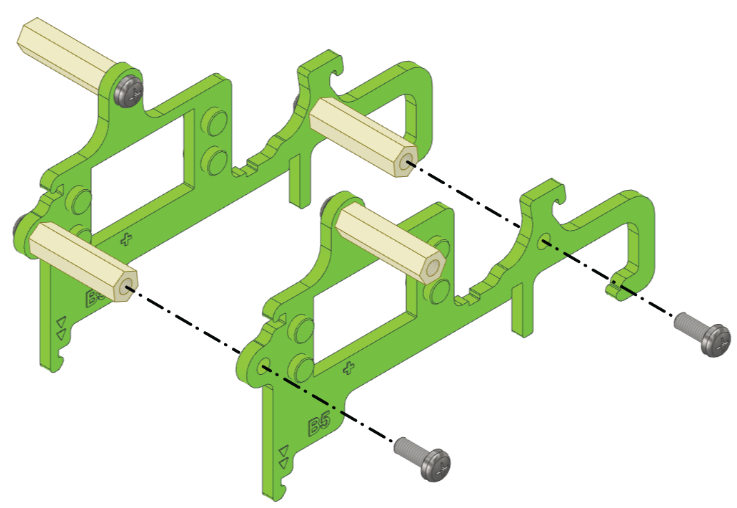
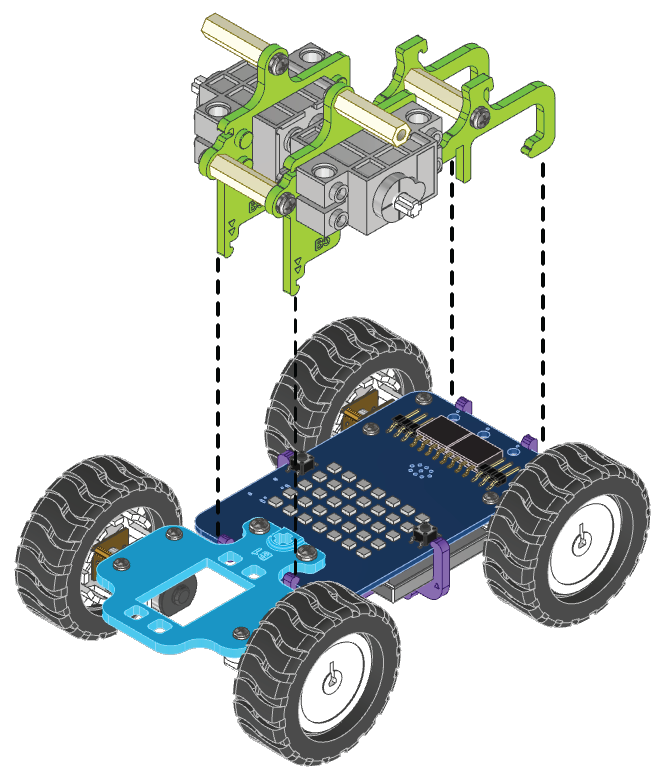
- Snap the A5 Plates on the Quarky Robot as shown below.

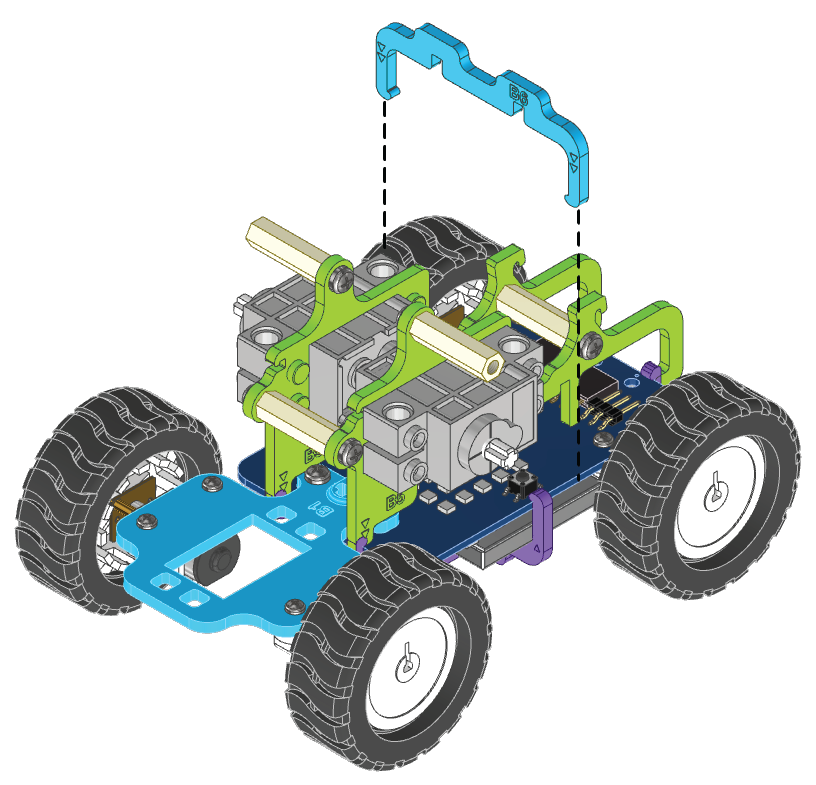
- Snap the B6 Plate on the A5 Plates.

- Connect the Left Servo Motorto the Servo 1 and the Right Servo Motor to the Servo 2.

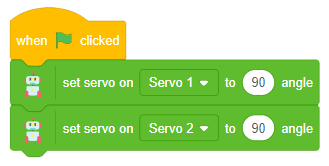
- Open PictoBlox and set the Servo Motor angle to 90 degrees. The servo head should get aligned properly.


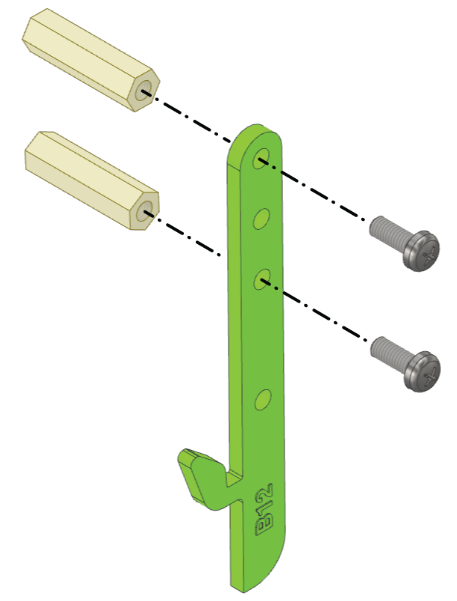
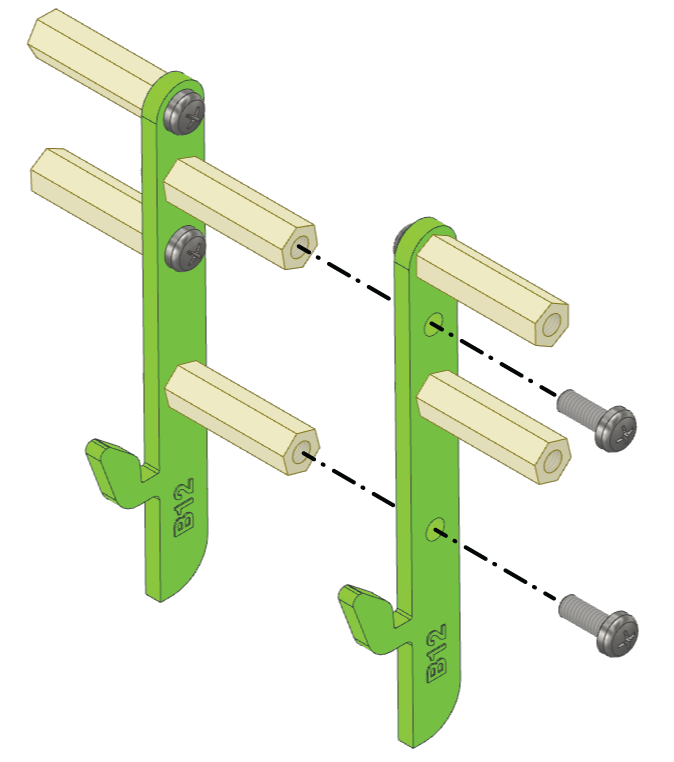
- For the next sub-assembly, Attach the 2 Spacers to the B12 Link with the M3 Bolt of 8mm Length.

- Now attach 2 more Spacers to the same B12 Link with the M3 Bolt of 8mm Length.

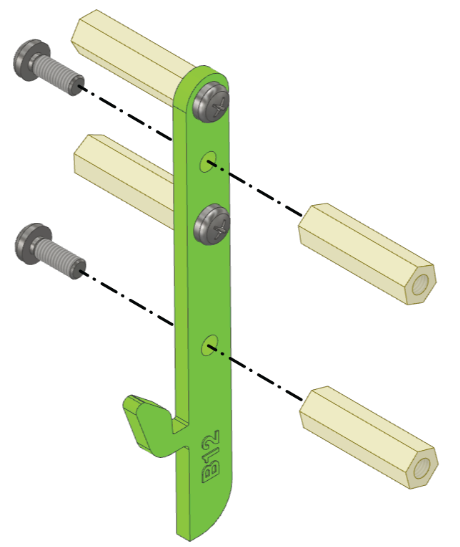
- Now attach2 more Spacers to the other B12 Link with the M3 Bolt of 8mm Length on the opposite side.

- Align two B12 Links and fasten with the M3 Bolt of 8mm Length. We will call this subassembly – Hook Assembly.

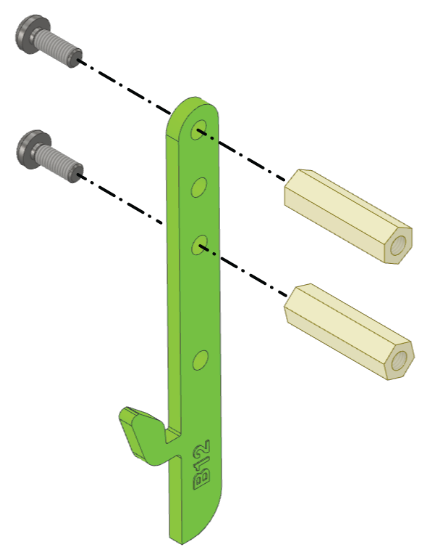
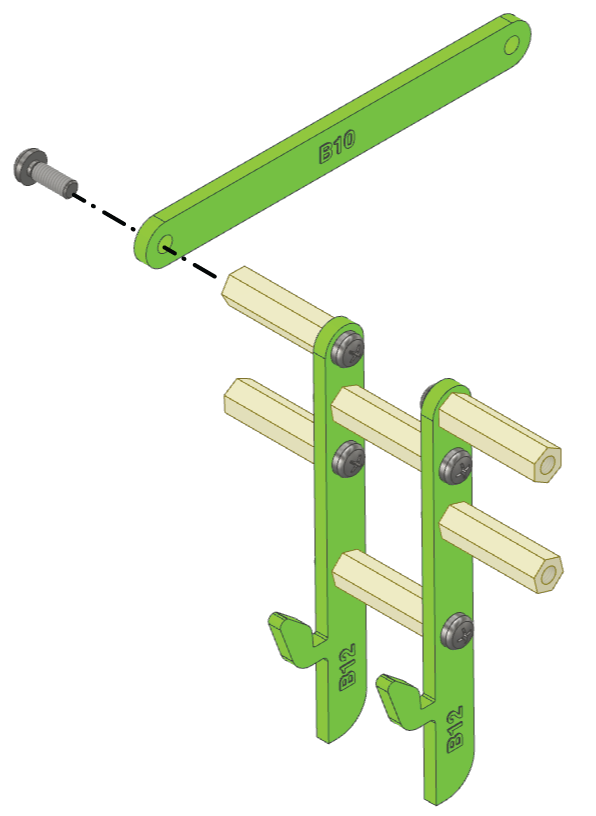
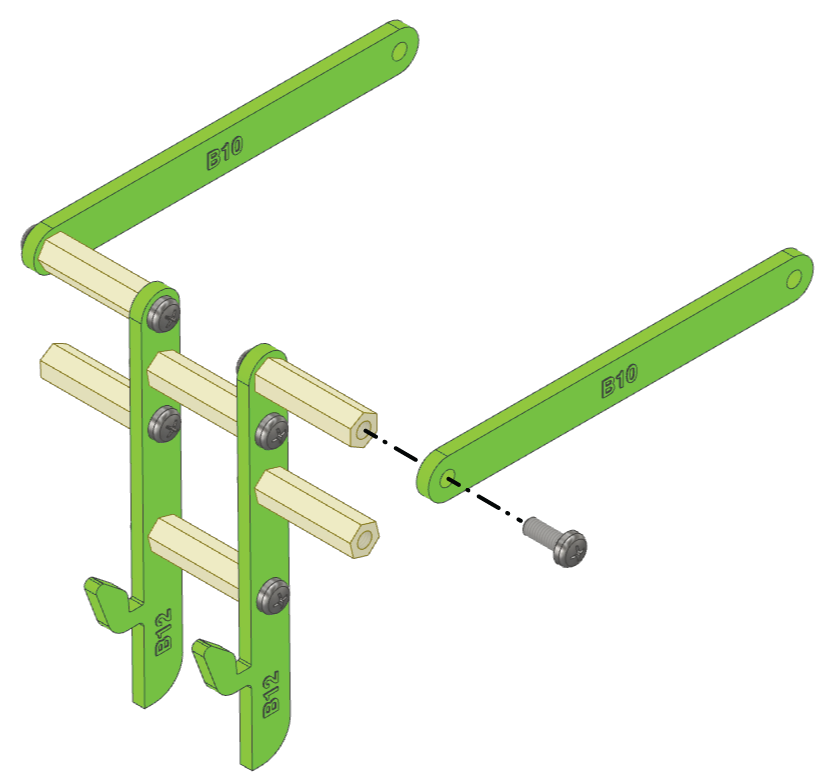
- Align & attach the B10 Link to the Spacers of the Hook Assembly with the M3 Bolt of 12mm Length.

- Align & attach the other B10 Link to the Spacers of the Hook Assembly with the M3 Bolt of 12mm Length.

- Mount the B10 Plate to the Spacer of the B5 Plate with the M3 Bolt of 12mm Length.

- Snap the B11 Link on the Servo Motor Shaft. On the other side of the B11 Link attach it to Hook Assembly with the M3 Bolt of 12mm Length.

- Snap the other B11 Link on the Servo Motor Shaft. On the other side of the B11 Link attach it to Hook Assembly with the M3 Bolt of 12mm Length.


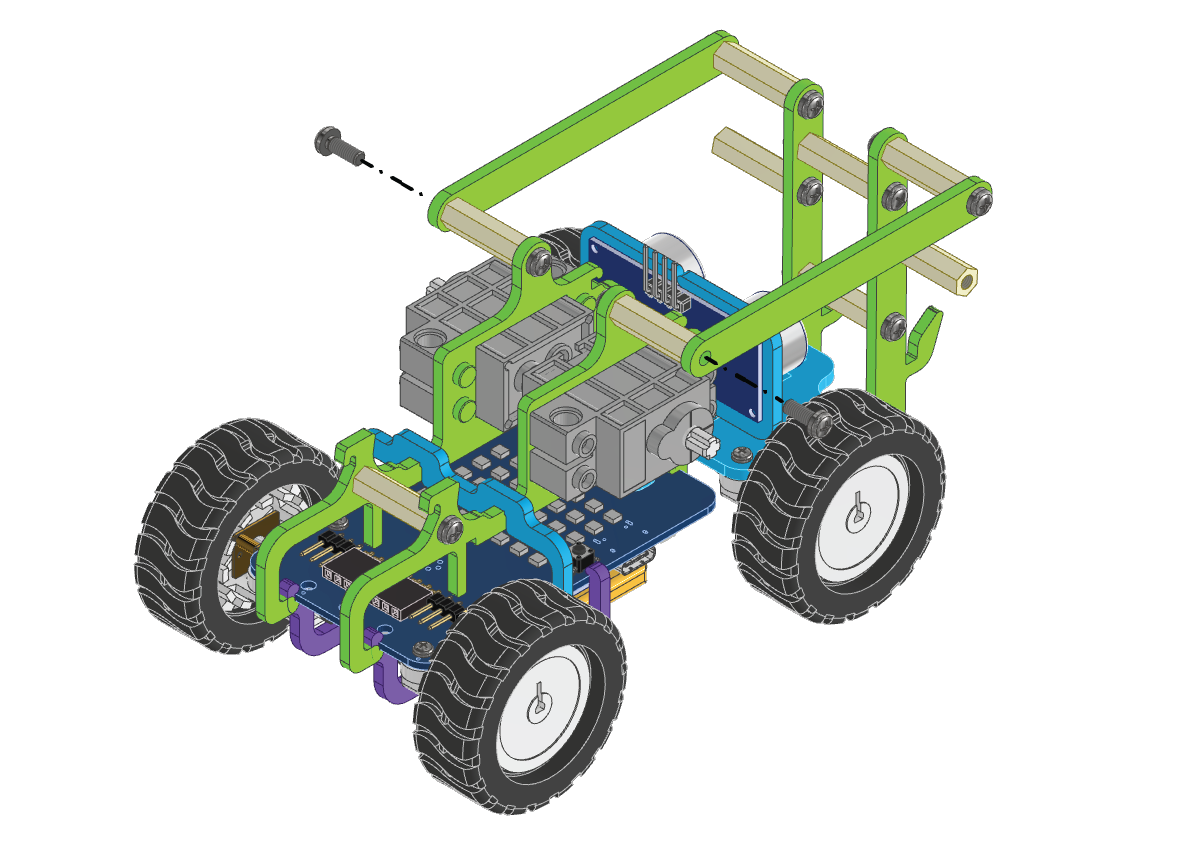
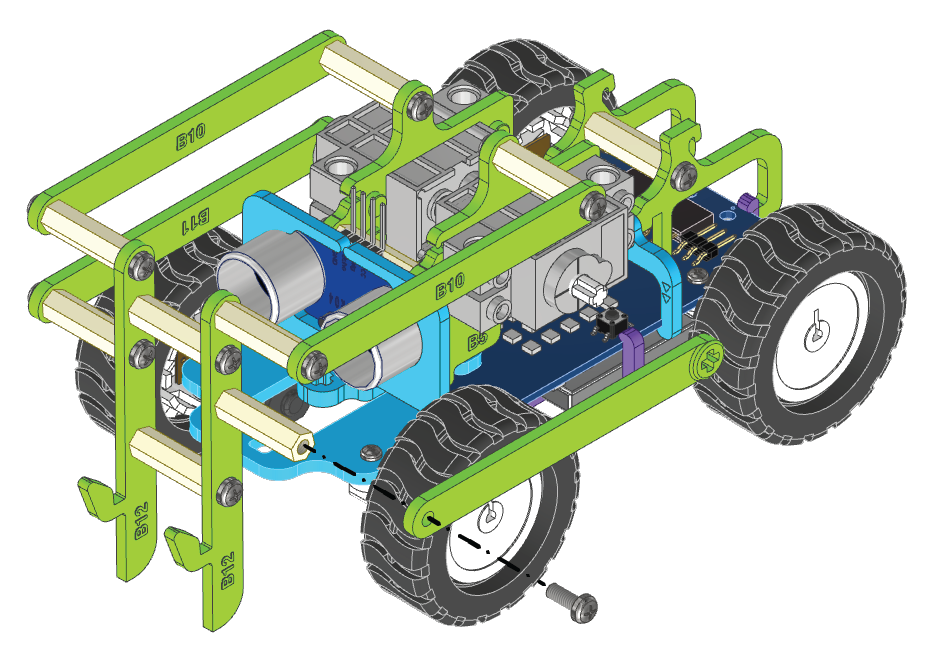
The assembly is complete.

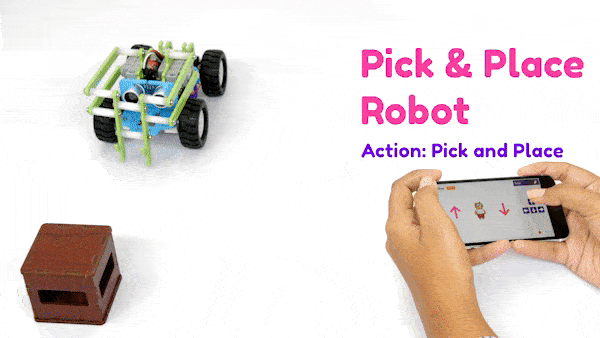
Activity: Pick and Place Action
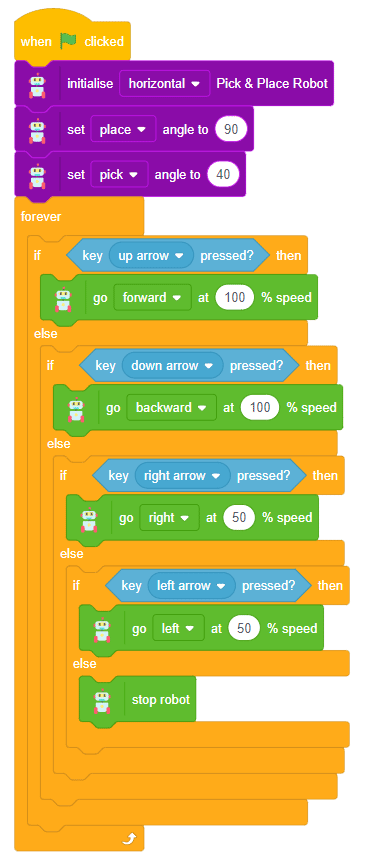
Using the arrow keys, the robot should be able to move in four directions: forward, backward, left, and right. It should also be able to pick and place the object with the help of the up and down arrow sprites. Let’s look at how to make a script for it.
- Create a New file in PictoBlox App.
- Connect Quarky to PictoBlox.
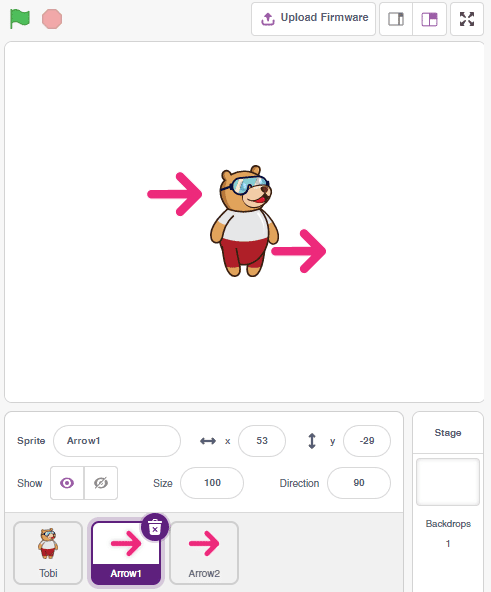
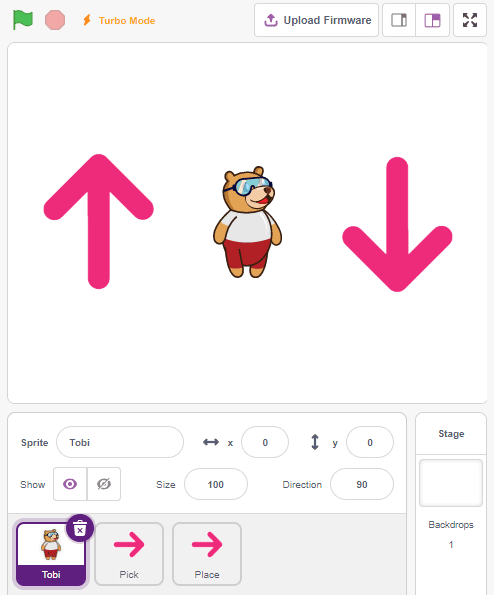
- Add two Arrow sprites to the stage from the sprite library.
- Rename the Arrow sprites to Pick and Place.

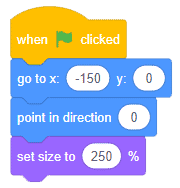
- Click on the Pick sprite and add the script to go to -150, 0 positions, point in 0 degrees, and set the size to 250%.

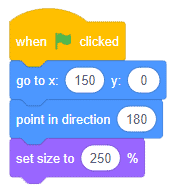
- Click on the Place sprite and add the script to go to 150, 0 positions, point to 180 degrees and set the size to 250%.

- Finally, click on the green flag to set up the stage.

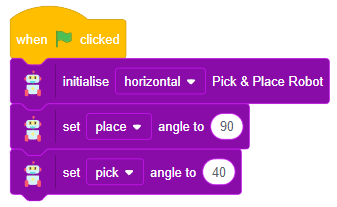
- Add Quarky Ultimate Extension.

- Select Tobi Add when green flag clicked block.
- Add initialize () Pick and Place Robot block from the Quarky Ultimate Robot palette. Select the orientation as horizontal.
- Add set () angle to () block. Select the action as place and angle to 90.
- Add another set () angle to () block. Select the action as pick and angle to 40.

- Pick Action: Click on the Pick sprite and add when the sprite is clicked block from the Control palette. This will start the script when the Pick arrow is clicked. Add the pick block from the Quarky Ultimate Robot palette.

- Place Action: Click on the Place sprite and add when the sprite is clicked block from the Control palette. This will start the script when the Place arrow is clicked. Add the place block from the Quarky Ultimate Robot palette.

- Test the Code.


Manually Controlled Robot – Code
Activity: Output
Make sure you finish and submit the assignment, as well as take the quiz, to complete your course and get your certificate for the same.