
Shapes
A shape is an external form, boundary, or outline of an object. Different shapes include circles, rectangles, squares, triangles, ovals, stars, diamonds, and pentagons.
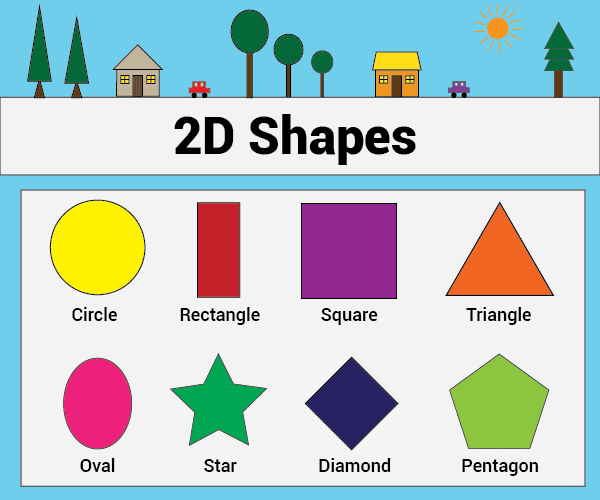
Circle: is a closed two-dimensional figure in which the set of all the points in the plane is equidistant from a given point called “centre”.Rectangle: is a closed 2-D shape, having 4 sides, 4 corners, and 4 right angles (90°). The opposite sides of a rectangle are equal and parallel.Square: is a two-dimensional plane figure with four equal sides and all four angles are equal to 90 degrees.Triangle: is a three-sided polygon that consists of three edges and three vertices.Pentagon: is a geometrical shape, which has five sides and five angles. Here, “Penta” denotes five, and “gon” denotes angle.
Pen Extension
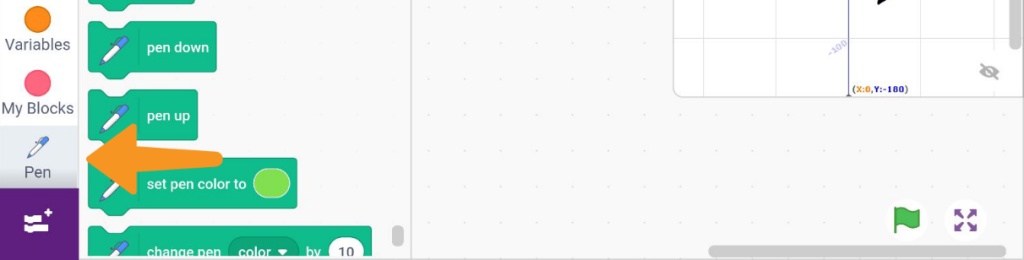
The pen extension allows sprites to control their pens, as well as stamp themselves onto the stage and remove all pen marks. The pen extension has the following blocks which are of our interest:
Pen down– The block will make its sprite continuously pen a trail wherever it moves until the Pen Up block is used. The colour, size, and transparency of the trail can be changed with other blocks.

Pen up– If a sprite is currently using the pen because of the Pen Down block, then this block will cause the sprite to stop drawing a trail.

Erase all– The block removes all marks made by the pen or stamping. It is the only pen block that the Stage can use.

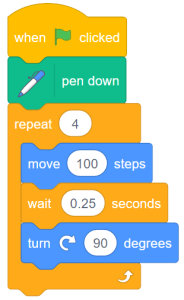
Activity 1: Drawing Square
In this activity, we will draw a square shape using PictoBlox.
Coding Steps
Follow the steps below:
- Open
PictoBlox App, go toMy Space, and click on the+button to create a new file. - Add a new backdrop named
Xy-grid. You can refer to the process of adding the backdrop from Lesson 1 Activity 2 Step 2. - Add a new sprite named
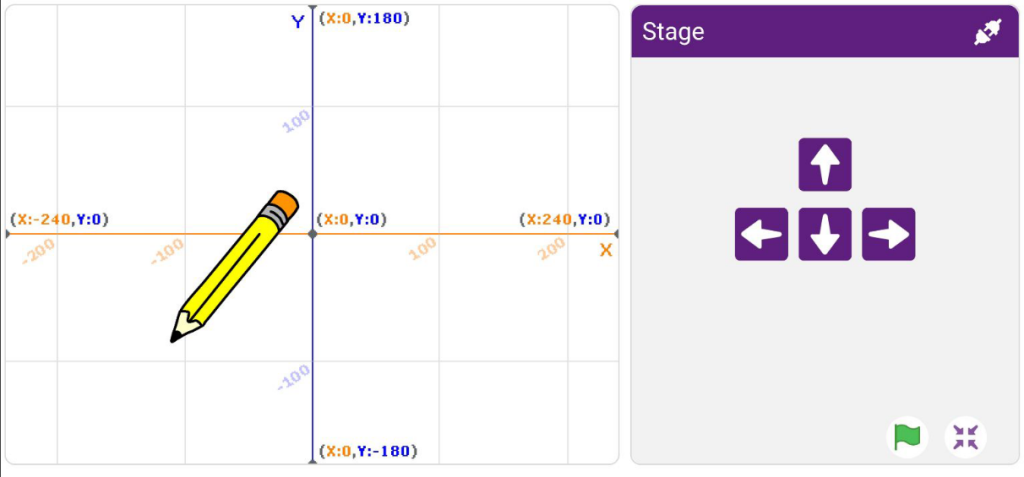
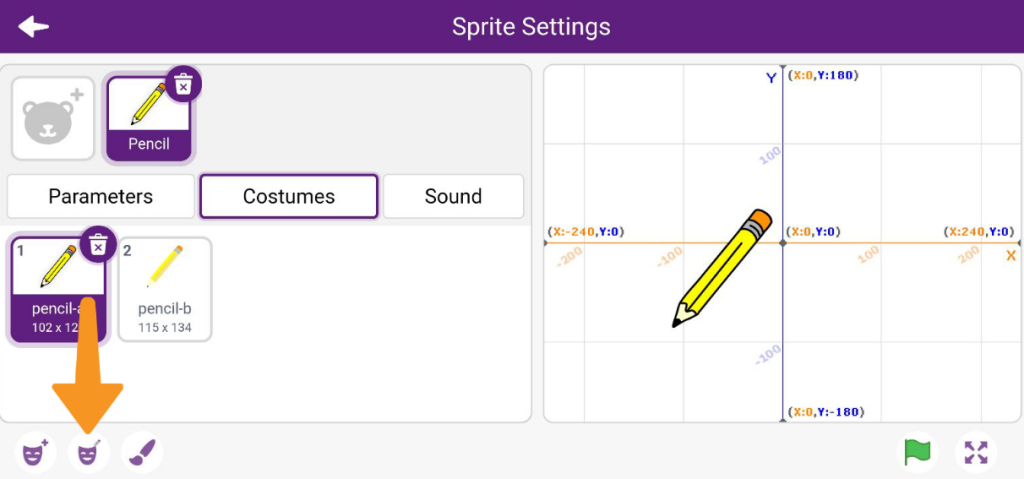
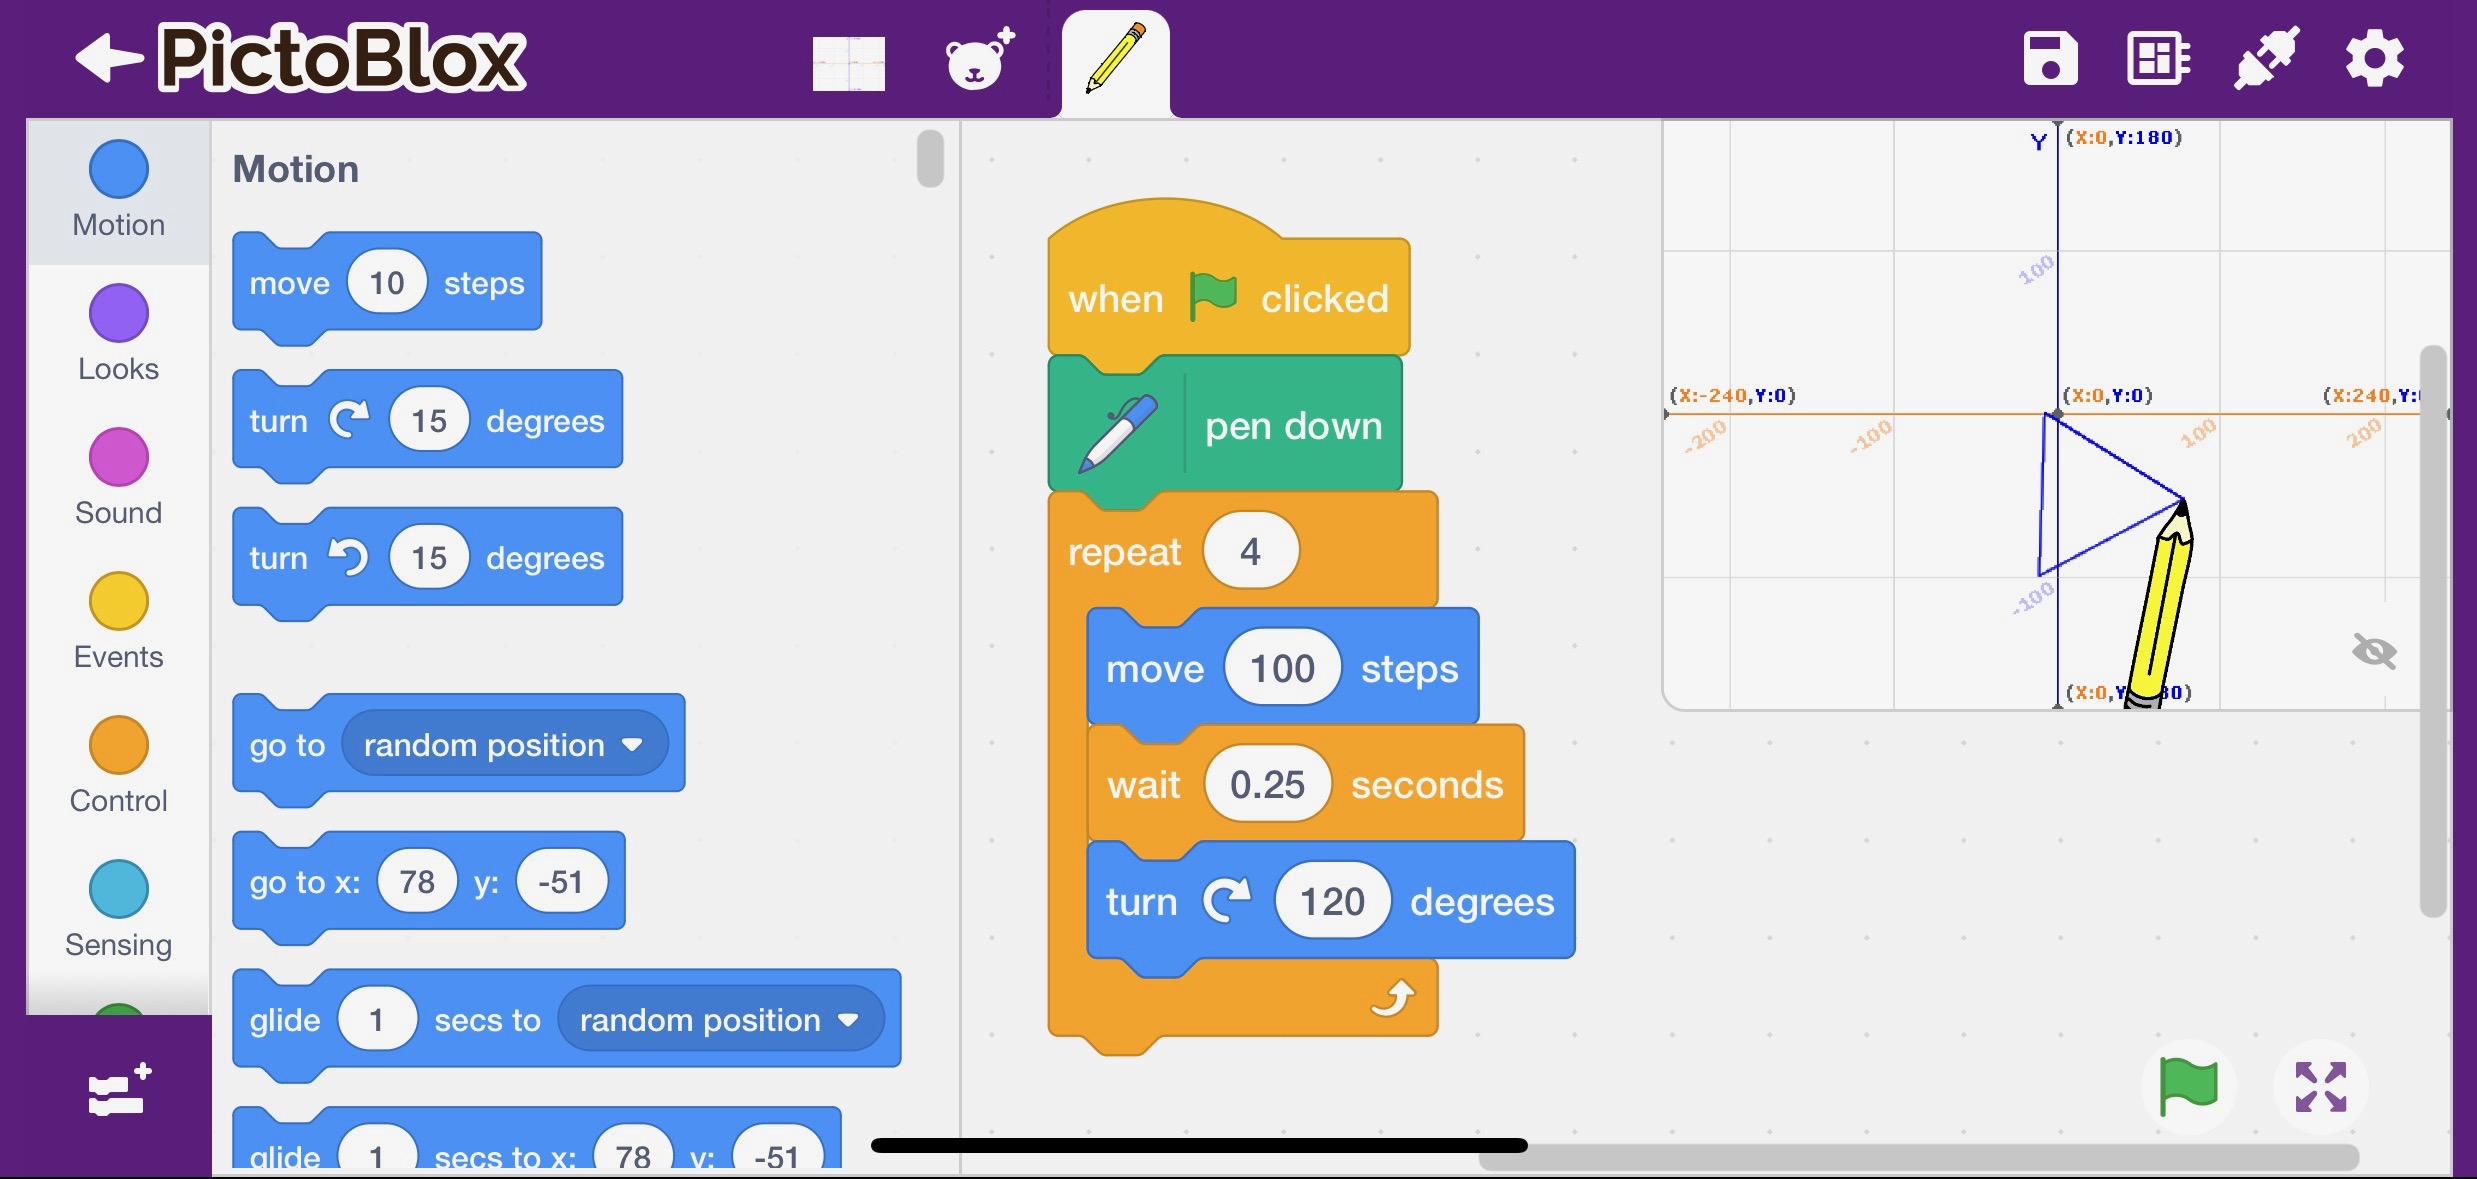
Pencil. You can refer to the process of adding the sprite from Lesson 1 Activity 2 Step 3. - Delete the Tobi sprite by clicking on the sprite and selecting the delete option. You can refer to the process of deleting the sprite from Lesson 1 Activity 2 Step 4. You will have the following scene with you on the stage.

- Editing the costume: The Pencil tip is not at the centre, so we need to edit the costume.
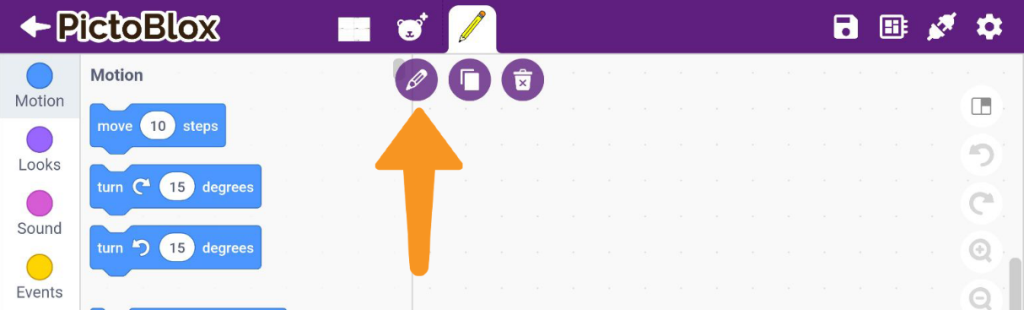
- Click the
Pencilsprite and you will see the edit button popup. Click theEdit Sprite.

- You will see the Sprite Settings. Under it select
Costumes. You will see the buttons to edit the costume on the bottom left. It’s the second item. Click on it.

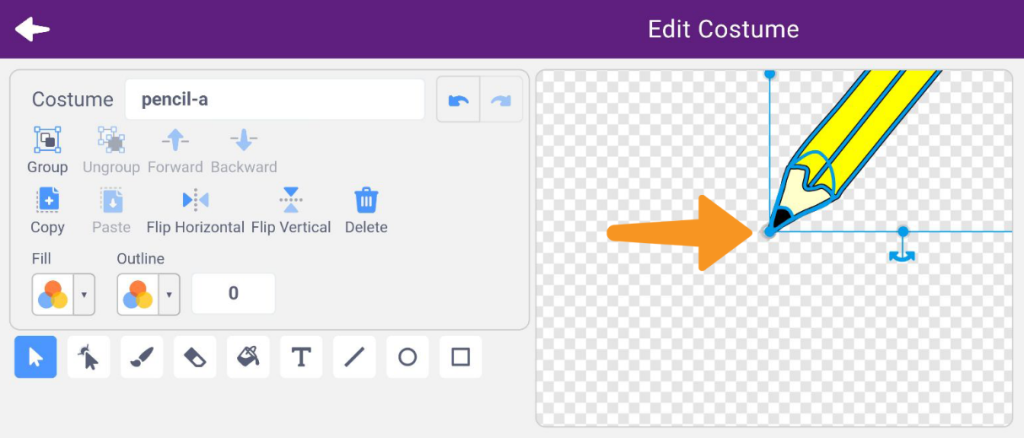
- Select the full costume by clicking on one end of the editor and dragging across the costume. The pencil will get highlighted. Now, we can move the pencil around.

- Click on the pencil and drag it in such a way that the tip of the pencil overlaps the center dot on the editor. After aligning them release the pencil.
- Go back to the project editor.
- Click the
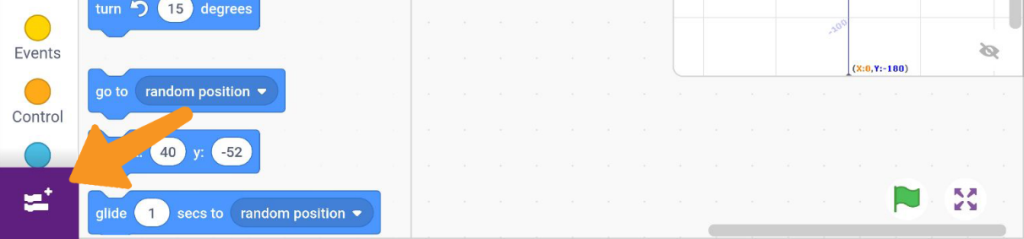
Pen Extension: To make any shape on the stage we are going to use the Pen extension.- Click on the
Add Extension.

- Find the
Pen Extensionand click on it to add it to the project. - You will find the Pen blocks added to the Block Palette.


- Click on the
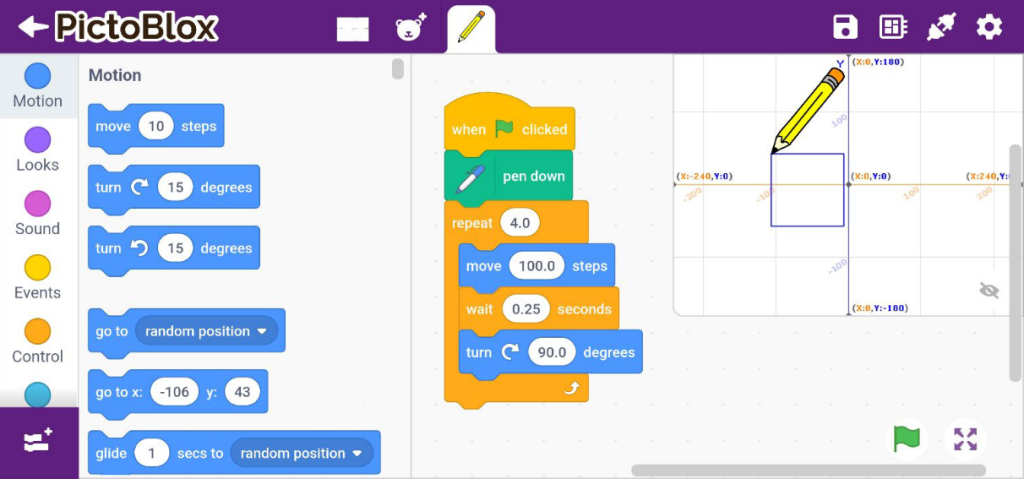
- Making the Square using Script:
- Open the
Eventspalette and drag and drop the when flag clicked block into the scripting area. - Next, open the
Controlpalette and drag and drop the repeat block below the when flag clicked block. This block is used when you want a set of blocks to keep running for a specific time. Because we are making a square, we need to run a repeat loop four times. - Place a pen down block above the repeat block from the
Penextension to draw the square. - After this just go to the
Motionpalette and drag and drop the move 100 steps. - Then put the wait block for 25 seconds.
- Lastly, add the turn clockwise 90 degrees block from
Motionpalette. We need to put these three blocks between the repeat loop.
- Open the
- Click the green flag to start the animation.
- Save the file as
Square.

Activity 1: Output
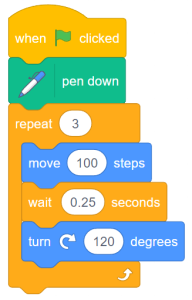
Activity 2: Drawing a Triangle
To draw an equilateral triangle, you must repeat the same actions three times. First, move in one direction. Then, wait for a specific amount of time. Finally, turn clockwise 120°. This process needs to be repeated three times, instead of four, because a triangle has three sides.
Coding Steps
Follow the steps below:
- Continue with the last project.
- Edit the parameter in the repeat block to 3.
- Edit the angle in the turn clockwise () degrees block to 120.

- Click the green flag to start the animation.
Activity 2: Output
Explore
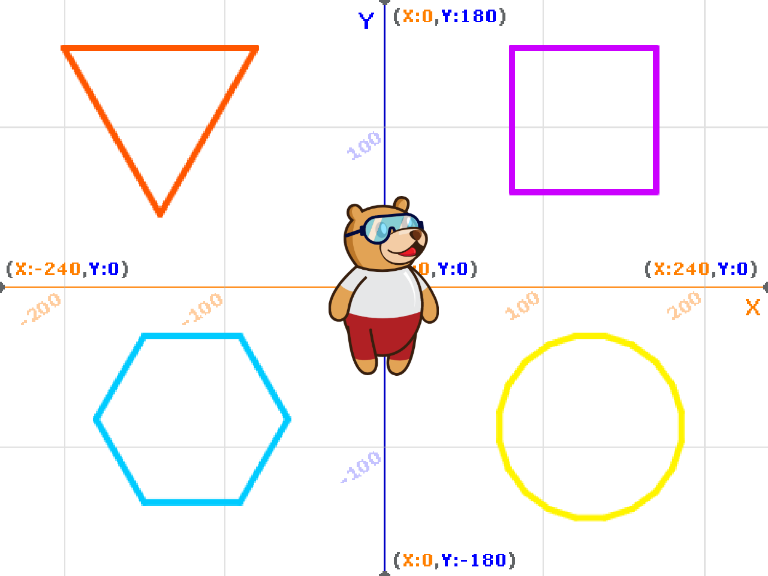
Try creating other shapes:
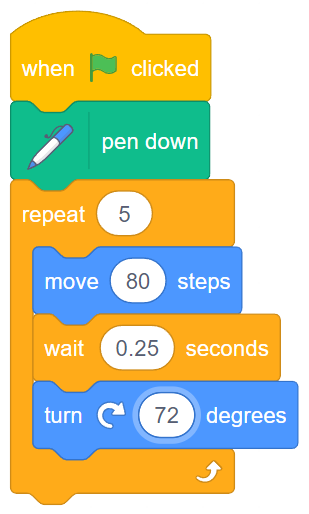
- Pentagon

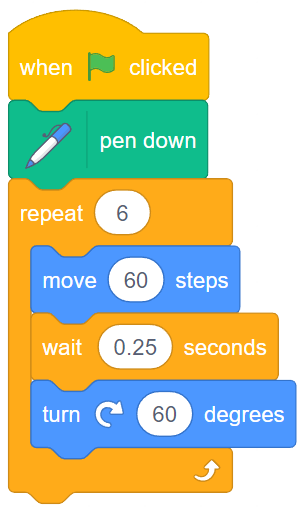
- Hexagon

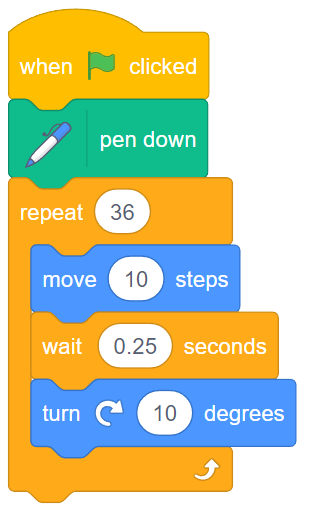
- Circle

Make sure you finish and submit the assignment, as well as take the quiz, before moving on to the next lesson.