
Program / Coding
A program is a computer’s instructions to complete a task. The computer receives the information, handles it, utilizes it, and then gives an output based on it by following a program.

Coding is just like solving a math problem. There may be many ways to solve a problem. Similarly, there could be more than one way to write code for the same task. Just like solving any other problem, some coding approaches are more efficient than others.
According to Linda Liukas, a Finnish computer programmer, children’s writer, and programming instructor, programming consist of three parts:
- Planning the program
- Writing the program in a programming language into a code
- Testing and debugging the program.
How does Traffic Light work?
Have you ever wondered how traffic signal’s function?
The traffic signals have 4 states:
- No Light
- Red Light – STOP
- Yellow Light – LOOK
- Green Light – GO
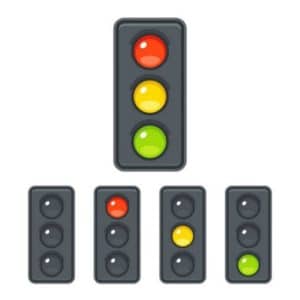
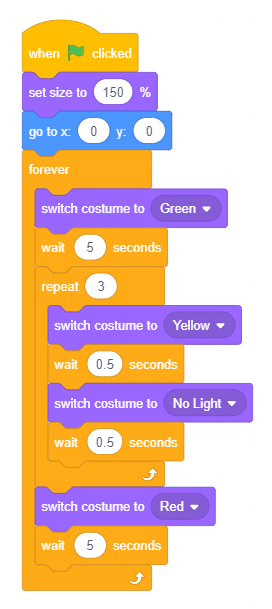
Traffic lights at intersections are a great way to control the flow of traffic and help keep everyone safe. By cycling through the colors green, yellow, and red, the lights work together to prevent accidents and reduce congestion on the roads.
Behind the scenes, a few lines of code tell the traffic lights when to switch between the different colors. This helps keep the traffic running smoothly and safely.
Application of Coding
As a student, you might have seen coding in action in various places like at the local grocery stores, at schools, etc. For example, you must have interacted with bar-code scanners at shopping stores. Moreover, you must be aware of the online ticket-booking services for movies, bus, train, and flights. All these are possible due to coding.
Apart from these, video games and animations we use for entertainment are also made up of coding. It is similar to solving a math problem, where there could be more than one way to solve the same task.
PictoBlox
PictoBlox is a graphical programming software based on Scratch blocks and is the ideal companion for setting the first step into the world of programming.
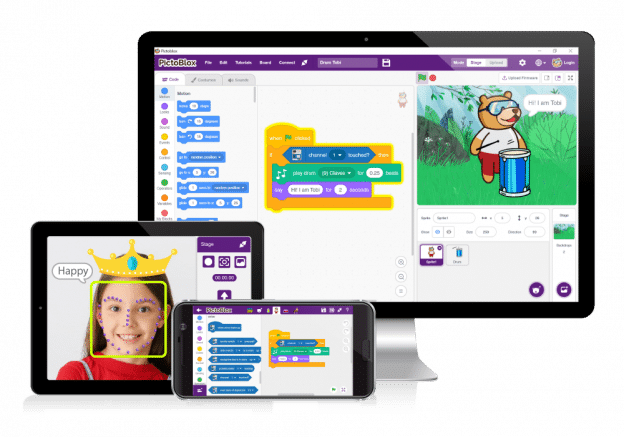
Let’s take you on a tour around it!
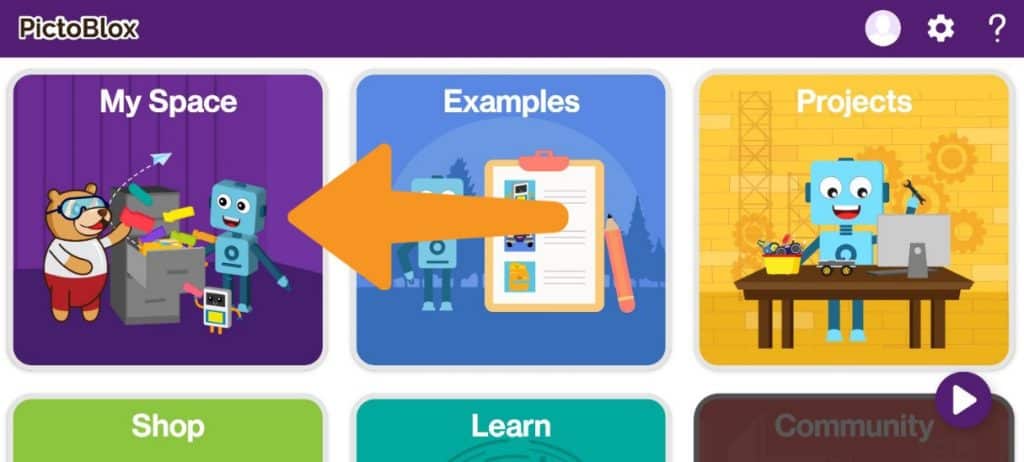
- Open the PictoBlox App in the Mobile/Tablet. You will be greeted with the welcome screen. Click on the
My Spacetab.
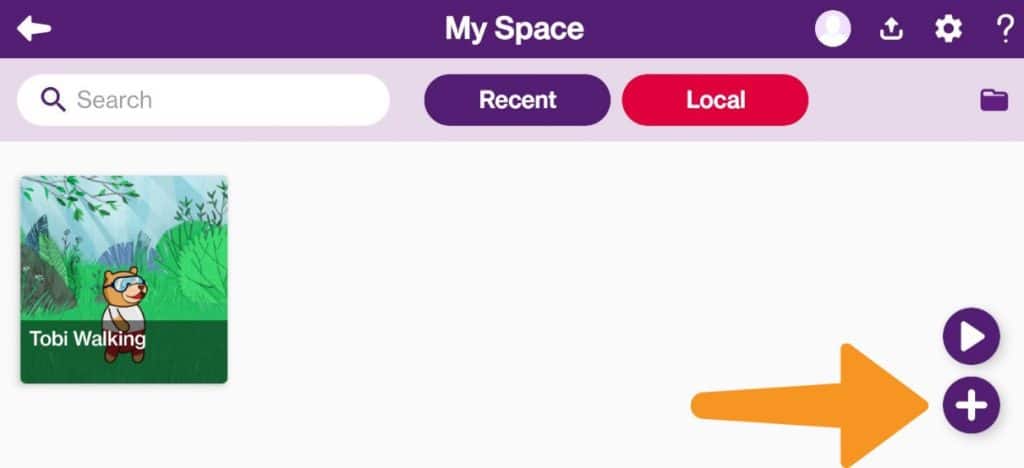
- Inside the My Space tab, you will find all your projects. To start a new project, click on the
+button.
- You will be greeted with the PictoBlox Programming Interface in Mobile App. The app might take some time to load the environment.
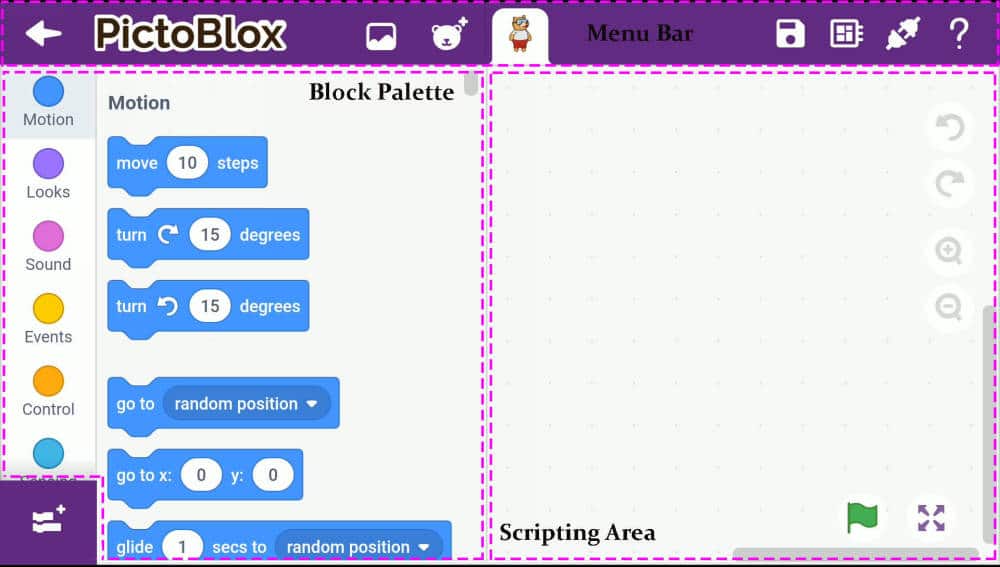
Important Elements of PictoBlox
Stage: The stage is a background or a backdrop for your projects. It is a white background in the top left corner; you will see a bear standing there. The stage is where the sprite moves, draws, and interacts with other sprites and/or hardware.Sprite: A Sprite is an object or a character that performs different actions in the projects. It understands and obeys the instructions that you’ll give them in your projects. It can move and can be moved to any place in the stage.

Blocks: Block is like jigsaw puzzle pieces that fit into each other. They are predefined commands used to create programs by simply dragging and dropping them below one another in the scripting area.

Script: A script is a program or a code in PictoBlox lingo. It is a set of ‘blocks’ that are arranged below one another in a specific order to perform a task or a series of tasks. The scripting area is where you will create your scripts.Scripting Area: The scripting area is where you will create your scripts. Every sprite and stage have a different scripting area.Backdrops: A backdrop is one of the many frames, or backgrounds, that a stage can have. The Stage can change its look to any of its backdrops.Costumes: A costume is one out of possibly many “frames” or alternate appearances of a sprite. Sprites can change their look to any of its costumes. Every sprite has at least one costume.

Animation is a technique used to make static images appear to move. It enables us to observe the movements or actions of a sprite in PictoBlox. To create an animation, we need at least two costumes per sprite. If desired, you can add as many costumes as you need. Animations can be used to make a sprite walk, jump, run, and so on.
Activity 1: Walking Tobi
The student is introducing themselves to PictoBlox software and its interface, then create a script to make Tobi (a sprite) walk.
Coding Steps
Follow the steps below:
- Open
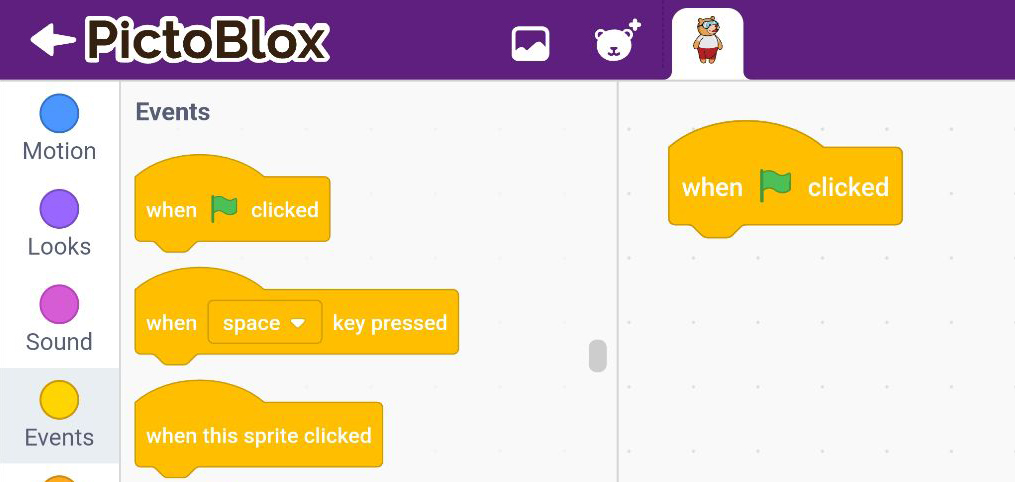
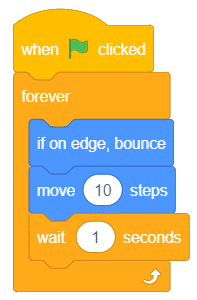
PictoBlox App, go toMy Space, and click on the+button to create a new file. - Drag and drop the when flag clicked block into the scripting area from
EventsThis block is used to start a script. When you click the green flag above the stage, it will cause the script to run.

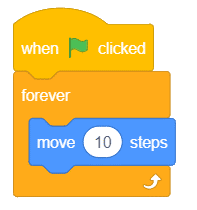
- Drag and drop the forever block from
Controlpalette, below the when flag clicked The forever block will run the code inside it continuously. - Drag and drop the move () steps from
Motioninside the forever This block is used to make the sprite go 10 steps on the stage.

- Drag and drop the wait () seconds from
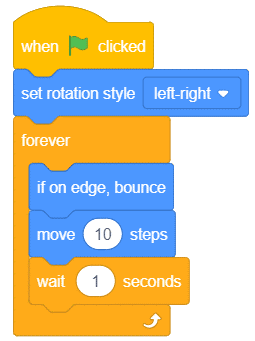
Controlblock below the move () steps block and change the delay value to 0.1 seconds. The wait block is used to pause the script execution by the specified time. - Drag and d drop the if on edge, bounce from
Motionblock inside the forever This block detects whether the sprite has touched the edge of the stage or not and changes the direction if it has.
- Drag and drop the set rotation style () from
Motionbelow the when flag clicked block and select left-right from the drop-down.
 Click the green flag to run the script. Tobi will start running on the stage.
 Click the green flag to run the script. Tobi will start running on the stage.
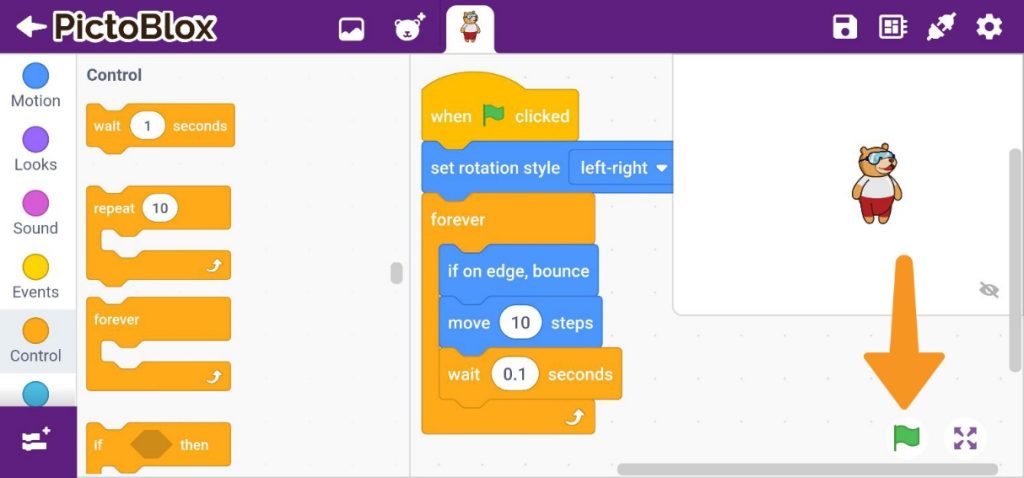
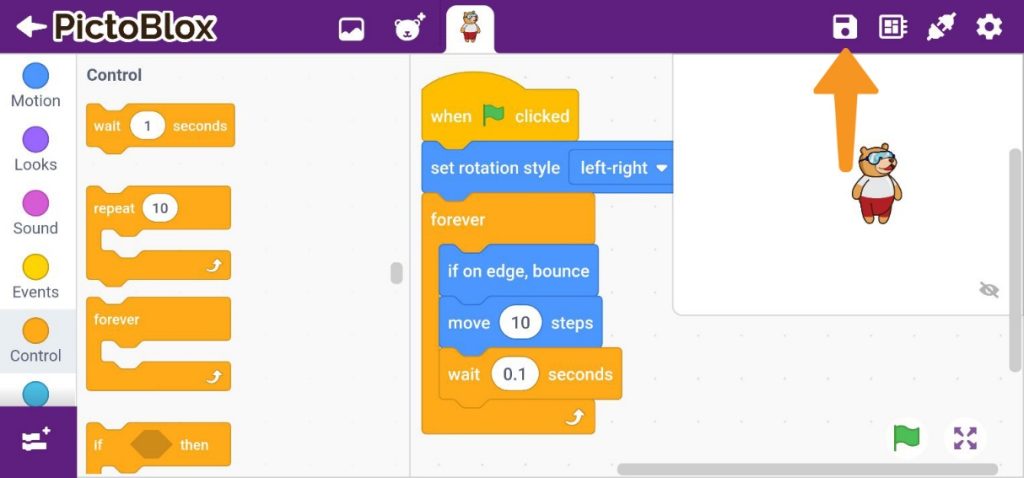
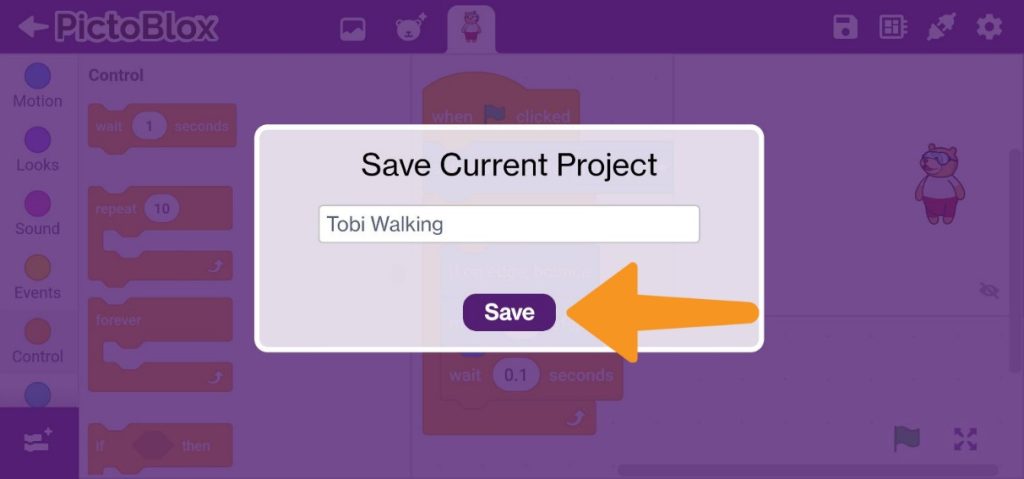
Saving the Program
- Click on
Save Iconto save the program.

- A window will appear. Edit the name of the file as
Tobi Walking. Click on theSavebutton.
- You will find the project in your
My Spacefor future reference.
Activity 1: Output
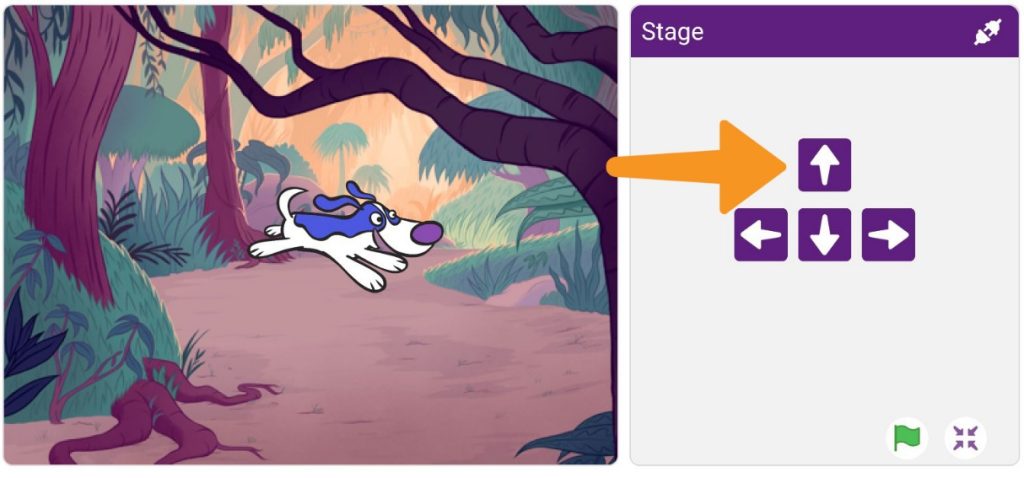
Activity 2: Playing Sound
Let’s create an animation of a barking dog, where each time we press the Up arrow, the dog will bark and move to a random location on the stage.
Coding Steps
Follow the steps below:
- Open
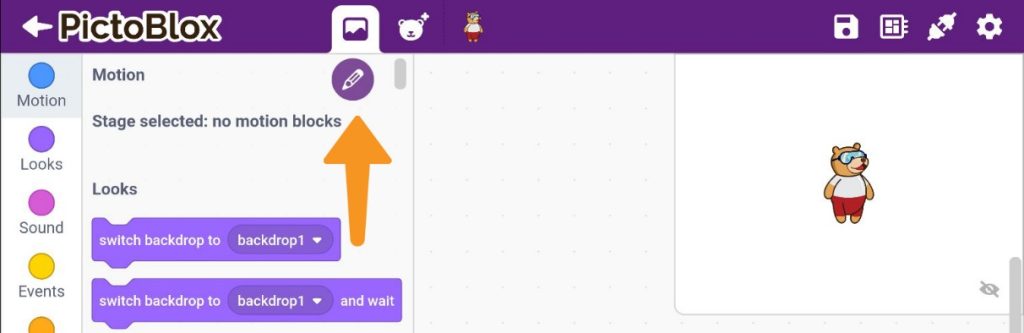
PictoBlox App, go toMy Space,and click on the+button to create a new file. - Now we will add the Jungle Backdrop to the Project.
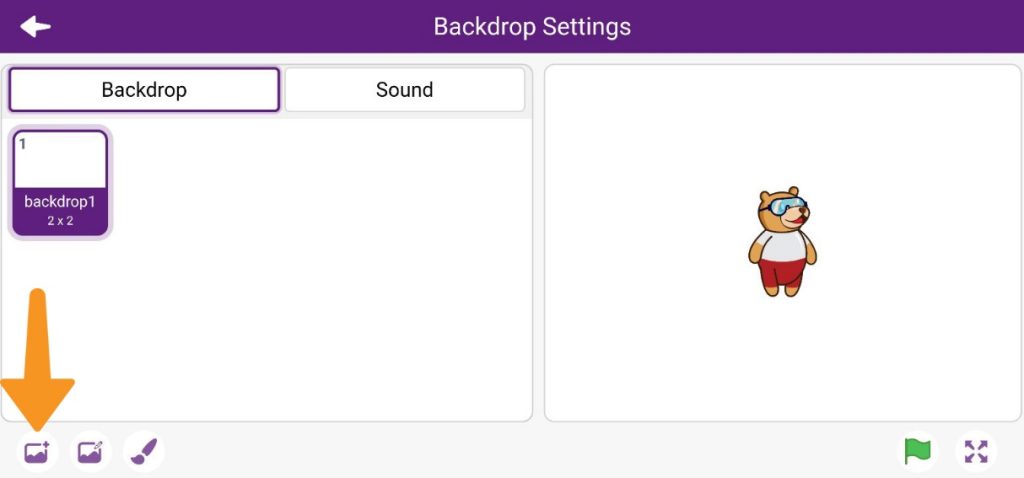
- Double Click the
Backdropbutton as shown. You will get the edit sign. Click it.

- This will open the
Backdrop Settings. Click on the first icon in the bottom corner to add a backdrop.
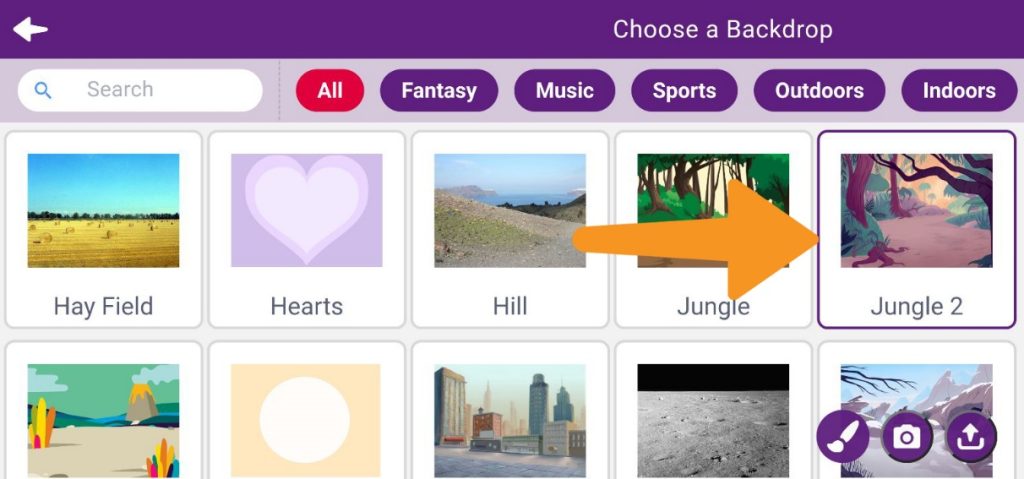
- You will see a vast library of Backdrops. Find and click on the
Jungle 2backdrop.
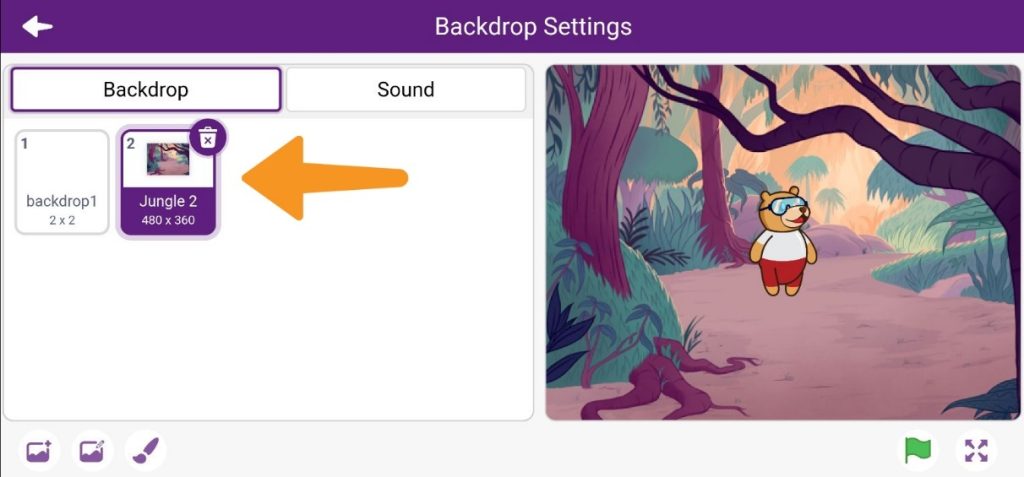
- This will add the Jungle 2 backdrop to the project. Click on the
back buttonto leave the Backdrop Settings.

- Double Click the
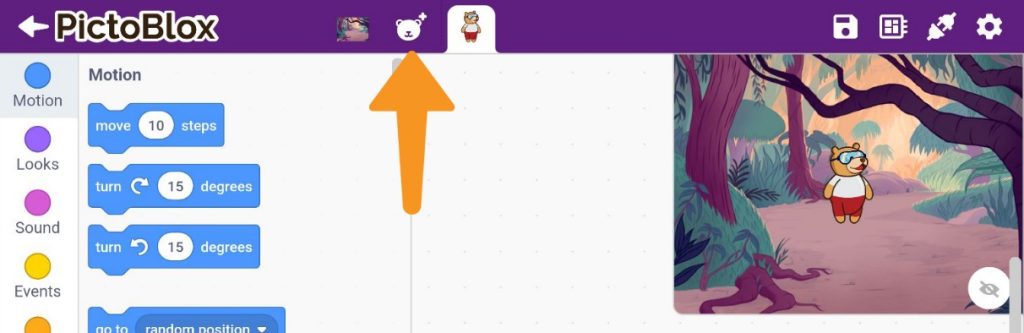
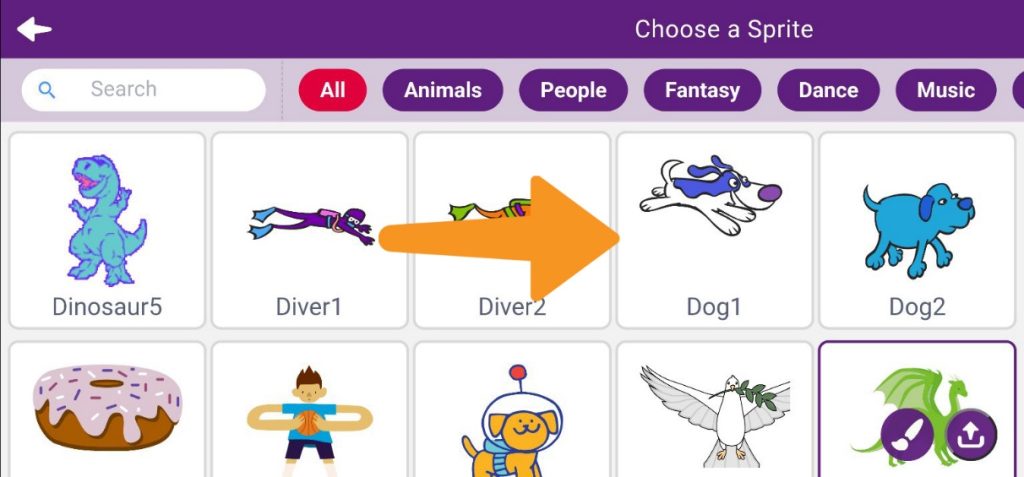
- Next, we will add the Dog Sprite.
- Click on the
Add Spritebutton.
- You will see a vast library of sprites. Find and click on
Dog 1sprite.
- Click on the
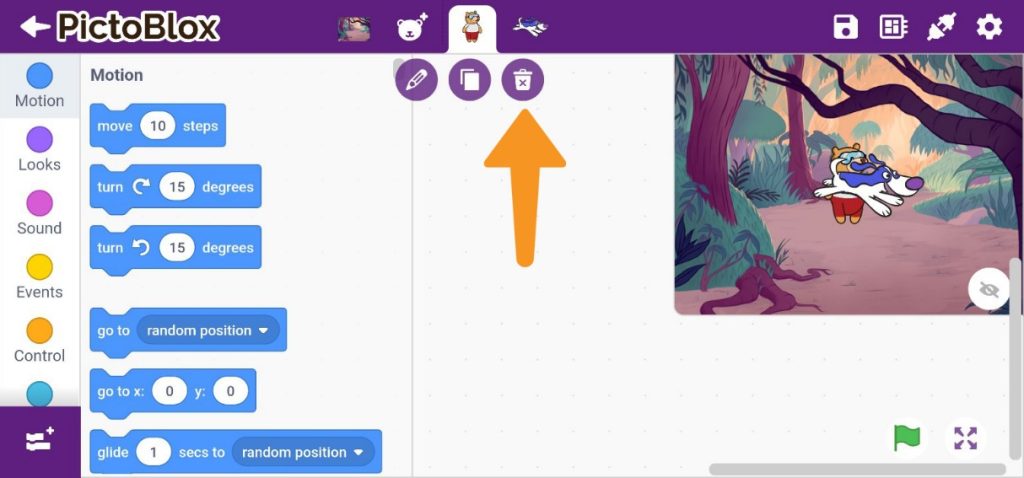
- Delete the Tobi sprite by double-clicking on the Tobi sprite and choosing the delete option.
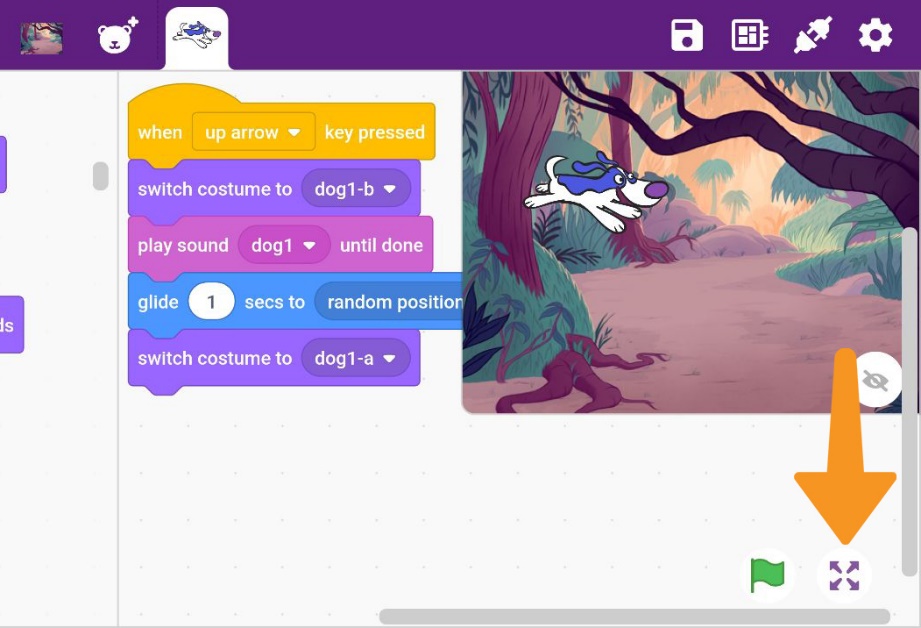
- Dog Script: Click on the
Dogsprite.- Add the switch costume to () block into the scripting area from the
Lookspalette. Select dog1-b as a costume. - Snap the pay sound () until done block from the
Soundpalette. - To make our dog sprite glide randomly, we will use a glide () secs to () block from the
Motionpalette. Select option to a random position. - To switch back to the initial costume, use switches the switch costume to () block. Set the costume this time as dog1-a.
- From the
Eventspalette, add the when () key pressed hat block. Choose the option as an up arrow. The block will sense it when we press the up key and make the script run.
- Add the switch costume to () block into the scripting area from the
- Click on the
full-screenbutton and click on the up arrow to activate the code.
- Save the file as
Barking Dogand test the code by clicking the UP Arrow key.

Activity 2: Output
Make sure you finish and submit the assignment, as well as take the quiz, before moving on to the next lesson.