
Quarky Tactile Switch
Quarky has 2 tactile switches or buttons which allow Quarky to take input from the user.
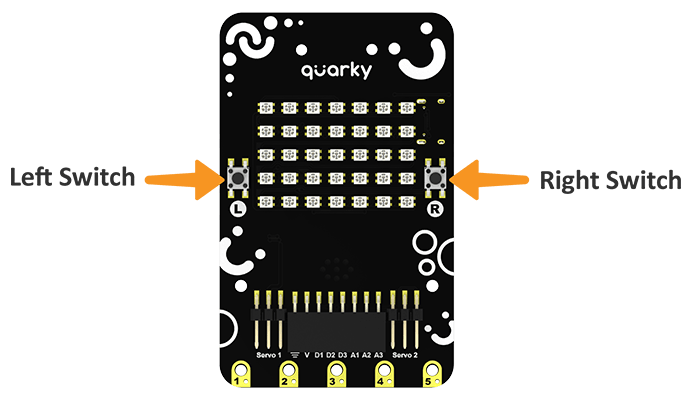
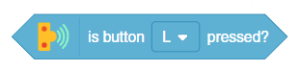
You can get the state of the button in PictoBlox using is button () pressed? block. The block reports 1 when the switch is pressed and 0 when the switch is not pressed.
Forever Block

In the forever block, the blocks held inside will be in a loop — just like the repeat () block, except that the loop never ends (unless the stop sign is clicked, the Stop All block is activated, or the stop script block is activated within the loop). Due to this infinite loop, the block has no bump at the bottom; having a bump would be pointless, as the blocks below it would never be activated.
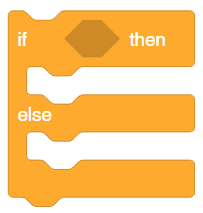
Condition Statement Blocks
Conditional statements allow the program to check the conditions by testing a variable against a value and acting accordingly. A program that has conditional statements is called a Conditional Program, and the process is known as Conditional Programming.
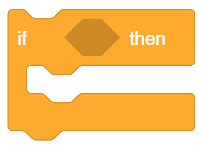
if () then block– The if () then block will check whether the specified condition is true or not. If it is true, the blocks inside it will run, and then the script involved will continue. If the condition is false, the code inside the block will be ignored and the script will move on. The condition is checked only once.
The if () then else blockwill check whether the specified condition is true or not. If the condition is true, the code held inside the first C (below the if arm) will run. Then, the script will continue; if the condition is false, the code inside the second C (below the else arm) will run. (Unlike the if () then block).
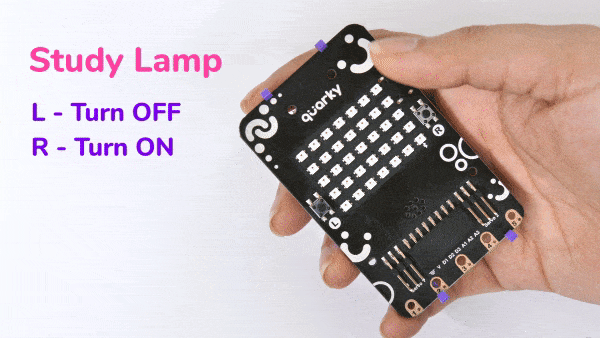
Activity 1: Lamp with Quarky
Let’s make a lamp with Quarky. The logic is simple – if we press the left switch, L, the lamp should turn OFF. If we press the right switch, R, the lamp should turn ON.
Coding Steps
Follow the steps below:
- Open
PictoBlox App, go toMy Space, and click on+button to create a new file. - Connect
QuarkytoPictoBlox. - Go to the
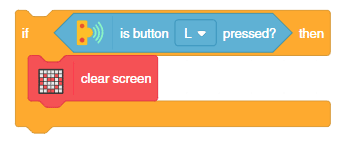
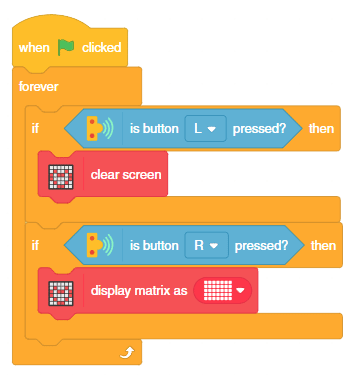
Sensorspalette and add a is button () pressed? block into the scripting area. The button, L, is set as the default option. - To check if Lis pressed, we’ll use an if block. Go to the
Controlpalette and drop an if block into the scripting area. Drop the is button () pressed? block in the white space of the if block. - If Lis pressed, then, according to our logic, the LEDs should turn OFF. Therefore, go to the Display palette and drop a clear screen block inside the if.

- However, if R is pressed, then the LED should turn ON. Therefore, add another if block below the first one and drop a is button () pressed. block in the white space.
- Then, go to the
Displaypalette and drop display matrix as () block inside the if block, and set all the LEDs as white. - Add a forever block around the entire script.
- To add the finishing touch, add a when flag clicked block from the
Eventspalette above the forever block. - Finally, click the green flag to run the script. Press the L switch to turn ON the lights and R to turn OFF the lights.

- Save the file as
Lamp.
Activity 1: Output
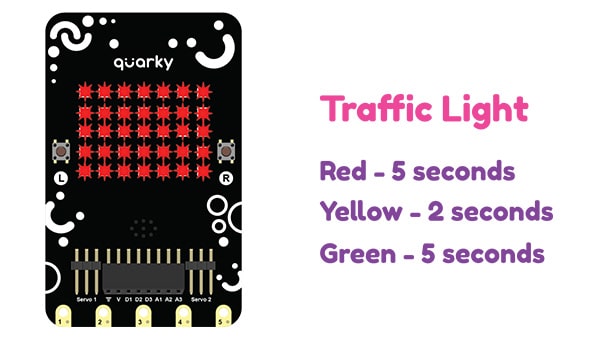
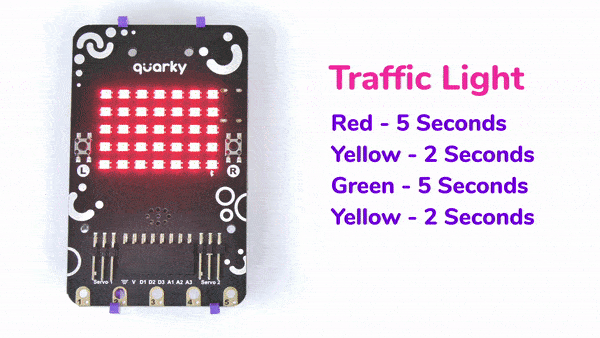
Activity 2: Traffic Light with Quarky
In this activity, we’re going to see how we can display a custom pattern on the matrix by making a script to display a Traffic Light.
Coding Steps
Follow the steps below:
- Open
PictoBlox App, go toMy Spaceand click on+button to create a new file. - Connect
QuarkytoPictoBlox. - Drag and drop a when flag clicked block into the scripting area from the
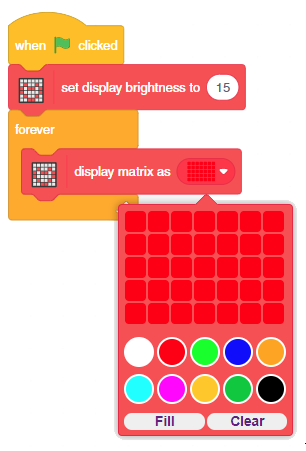
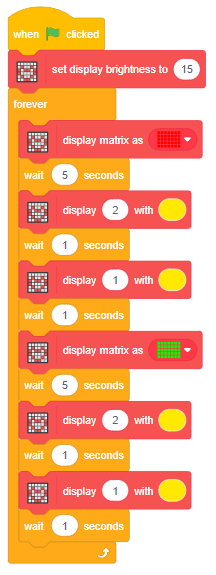
Eventspalette. - Below the when flag clicked block, add the set display brightness to () block. In the space write 15.
- Add a forever block from the
Controlpalette below the set display brightness to () block. - Inside the forever block, add a display matrix as () block from the
Displaypalette. Fill the matrix with red color.
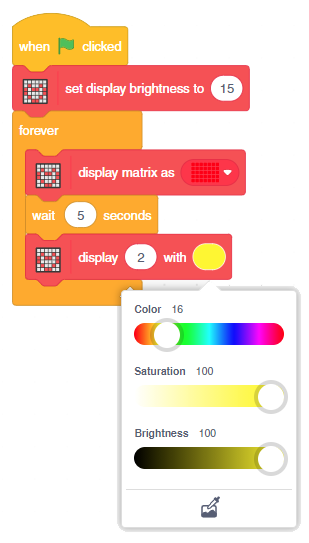
- Add wait () seconds block under the display matrix as () block and set the waiting time as 5 seconds.
- Go to the
Displayextension and add a display () with () block into the scripting area. In the space, enter 2. Then, set the color of the LED to yellow-color (you can always choose the color of your choice) from the drop-down and this will display number 2 in yellow color.
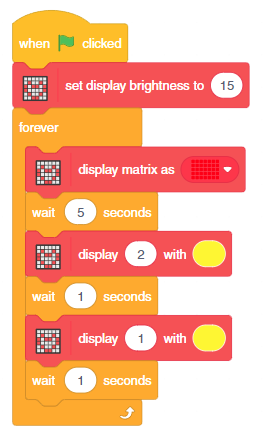
- Add another wait () seconds block under the display () with () block and set the waiting time as 1 seconds.
- Now add another display () with () block below the wait () seconds In the space, enter 1. Then, set the color of the LED to yellow-color from the drop-down and this will display number 1 in yellow color.
- Add another wait () seconds block under the display () with () block and set the waiting time as 1 seconds.

- Right-click on the display matrix as () block and duplicate the code. Set the color as Green in display matrix as () block.

- The code is complete. Click on the green flag and test the code. You will see Quarky running like a Traffic Light.
- Save the file as
Traffic Light.
Activity 2: Output
Make sure you finish and submit the assignment, as well as take the quiz, before moving on to the next lesson.