

Activity: Face Filter
Learn how face filters work hands-on by making a project that lets you choose a filter among the ones displayed on the screen and apply it to your face using the PictoBlox Face Detection extension.

Coding Steps
Follow the steps below:
- Scan the QR Code and open the PictoBlox code.
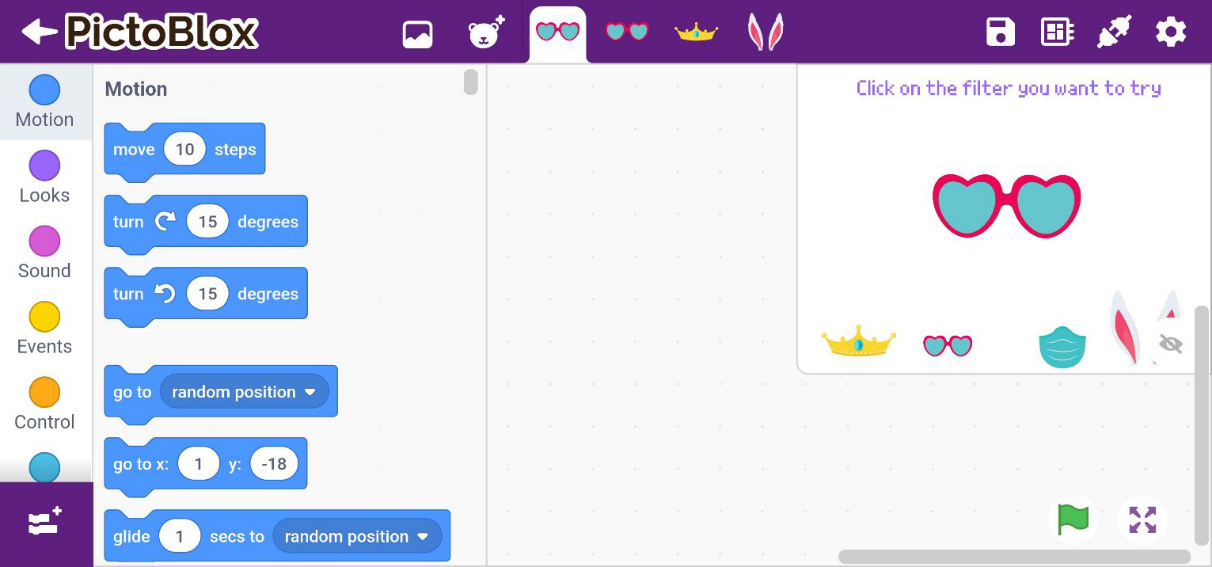
- You will find the stage already set up for the project. There are five main sprites:
- The first one is the main sprite which is the filter at work.
- All the other four sprites are the four options available for the user to select the filter.

- Now we want the main filter to change when we click the filters at the bottom.
- Select Face Filter 2.
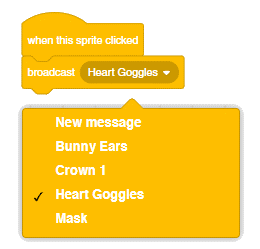
- To trigger a change in the filter we will broadcast a message when a sprite is clicked. Thus, drag and drop when this sprite is clicked block, place broadcast () block from Events palette, and set the new message as heart goggles.

- Repeat above step for all 4 sprites. Add different messages to each sprite.

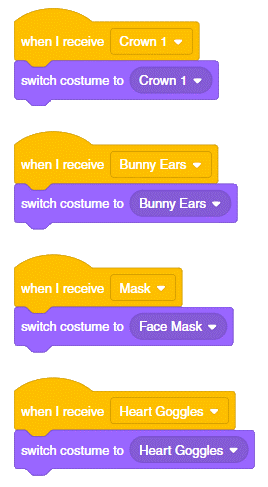
- Now let’s select the main Face filter sprite and make a script to change the costume when it receives the broadcasted message. Place a when I receive broadcast block from the Controls palette and switch the message to heart goggles.
- Drag and drop the switch costume to () block and select Heart Goggles from the drop-down.
- Right-click on this script and duplicate the number of times we have the face filters times and change it for each and every filter by selecting their broadcast message and costume from the drop-down.
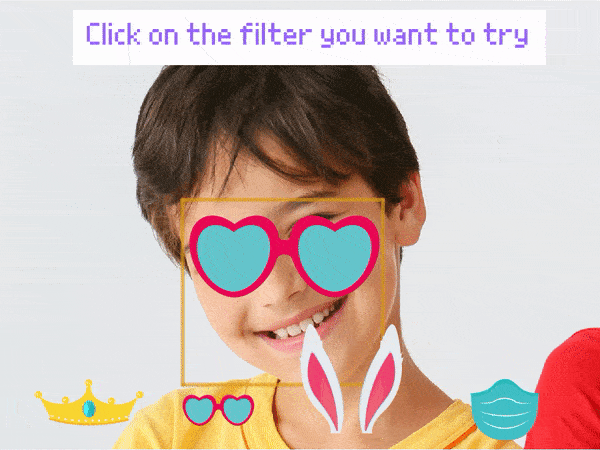
- Click on the flag button and test your filters.
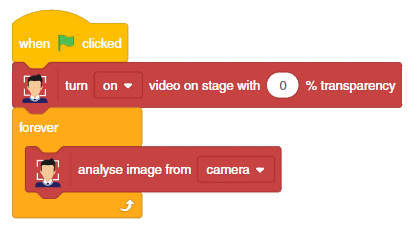
- Basic Face Filter: To track the face and put the face filter on top of it.
- As we want to execute the program every time the green flag is clicked, thus place the when flag clicked hat block into the scripting area.

- To turn on the camera whenever we start the script, select the turn on video on stage with 0% transparency block from the Face Detection palette and select ON from the first drop-down.
- Now get a forever block from Controls
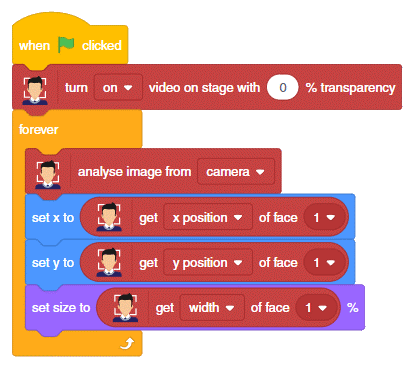
- Drag and drop an analyse image from () block inside the forever block to continuously analyze the image from the camera and apply the filter accordingly. Select camera.

- Next, we need to detect the location where the face filter should be applied, thus add a set x to () block from the Motion
- Add the get () of face () block from the Face Detection palette in the parameter and choose x position from the first drop-down.
- Repeat for Y position.
- Now to make the filter of the size of the face, drag and drop set size to % block from the Looks palette the get () of face () block from Face Detection palette, inside the set size to block and choose the width from the first drop-down.
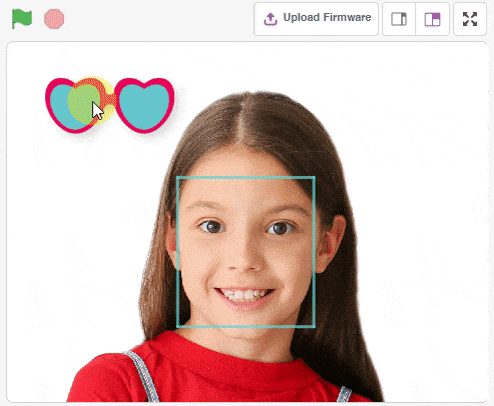
- Click on the green flag and run the project. Your filter should track your face.

- Save the file as Face Filter.
- As we want to execute the program every time the green flag is clicked, thus place the when flag clicked hat block into the scripting area.
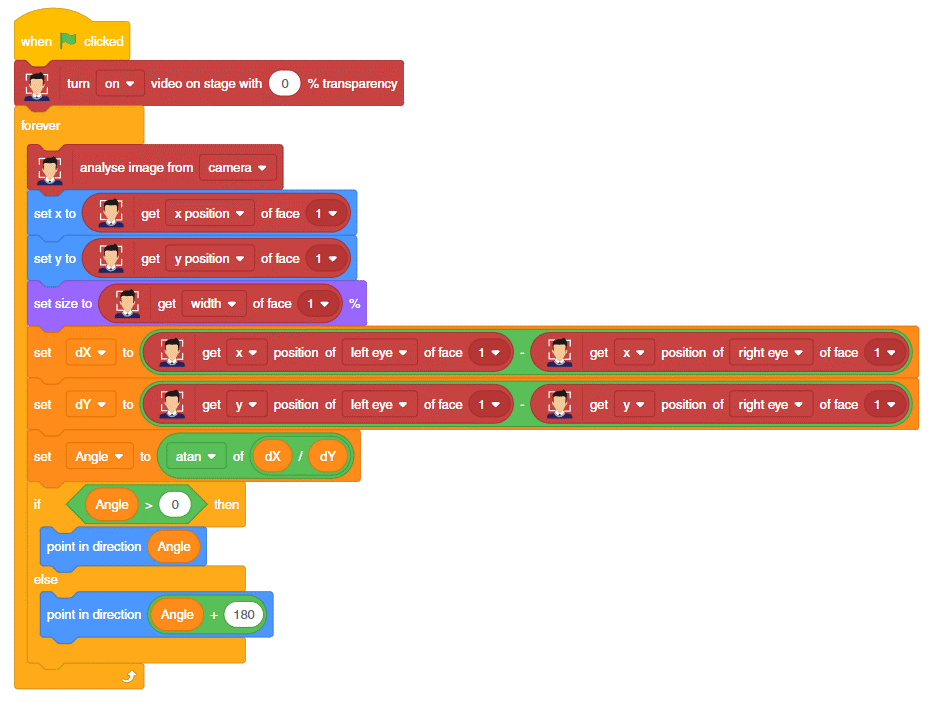
- Making the Face Filter Tilt: As you try out the filters, you would have noticed that filters don’t tilt if you tilt your head. In order to make it tilt, we will need to do a few modifications to the main script.
- To find the tilt angle of your head we will use the slope of a line that joins your eyes.
-
- To find the angle we will apply a Tan inverse function to it.
- If the angle is positive, we will directly make the filter point in direction of the angle.
- And if it is negative, we will add 180 to it to get the angle.

- Test the code.
Activity: Output
Make sure you finish and submit the assignment, as well as take the quiz, before moving on to the next lesson.