
Activity 1: Assembling the Vertical Robot
We will see how to transform the Horizontal Robot into the Vertical Robot.
Coding Step
Follow the steps below:
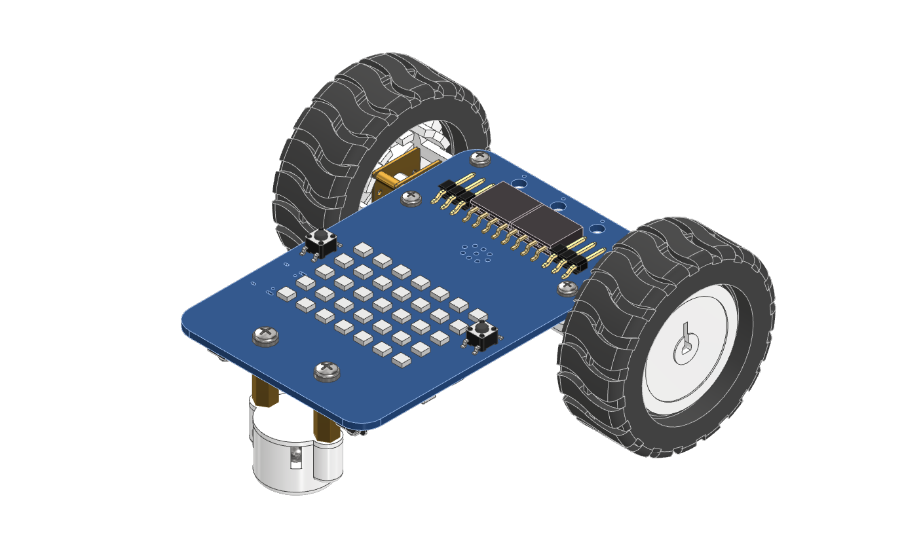
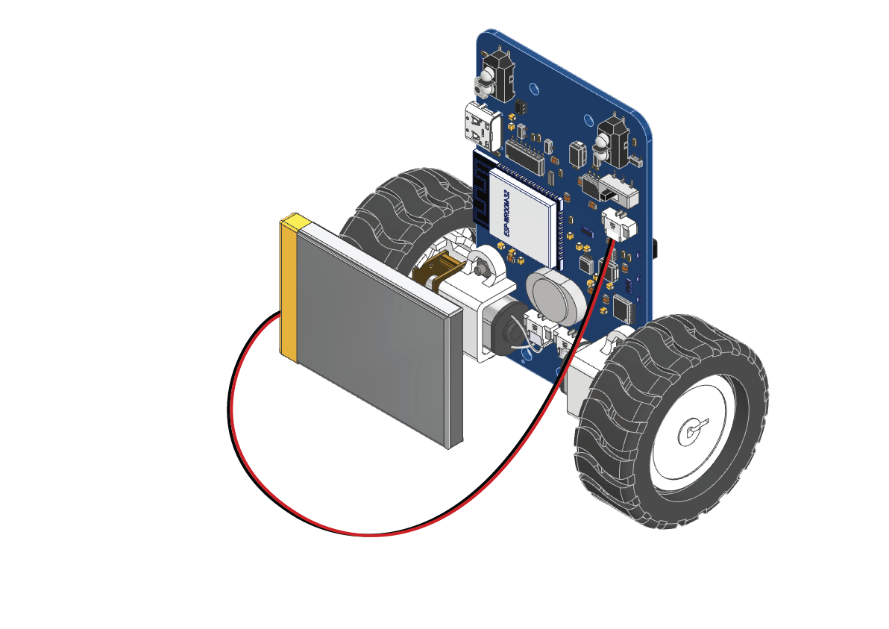
- By far, your robot looks like this.

- Remove the Battery Holder Lock and then the Battery holder. Gently unsnap from the edges.
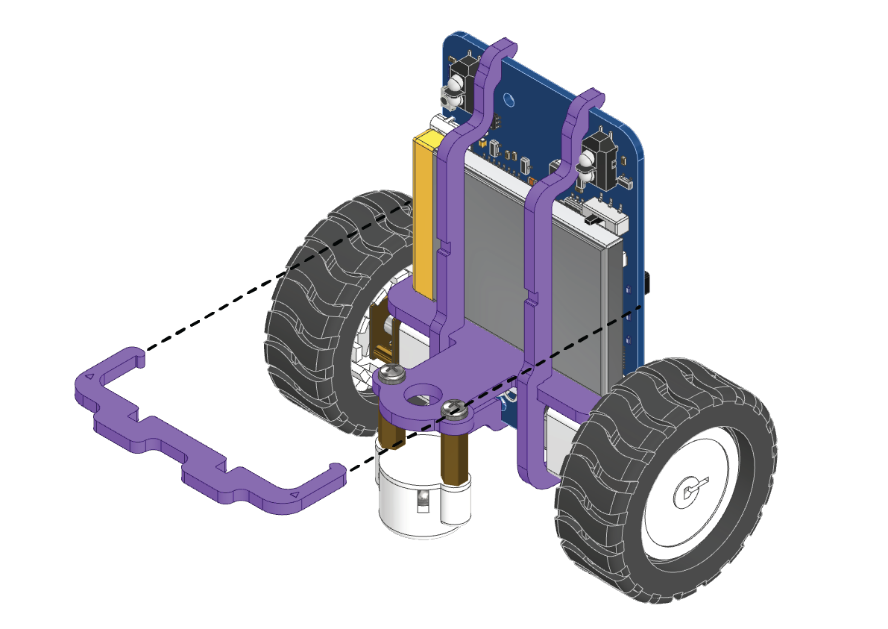
- Remove the Castor Wheel from the Robot.

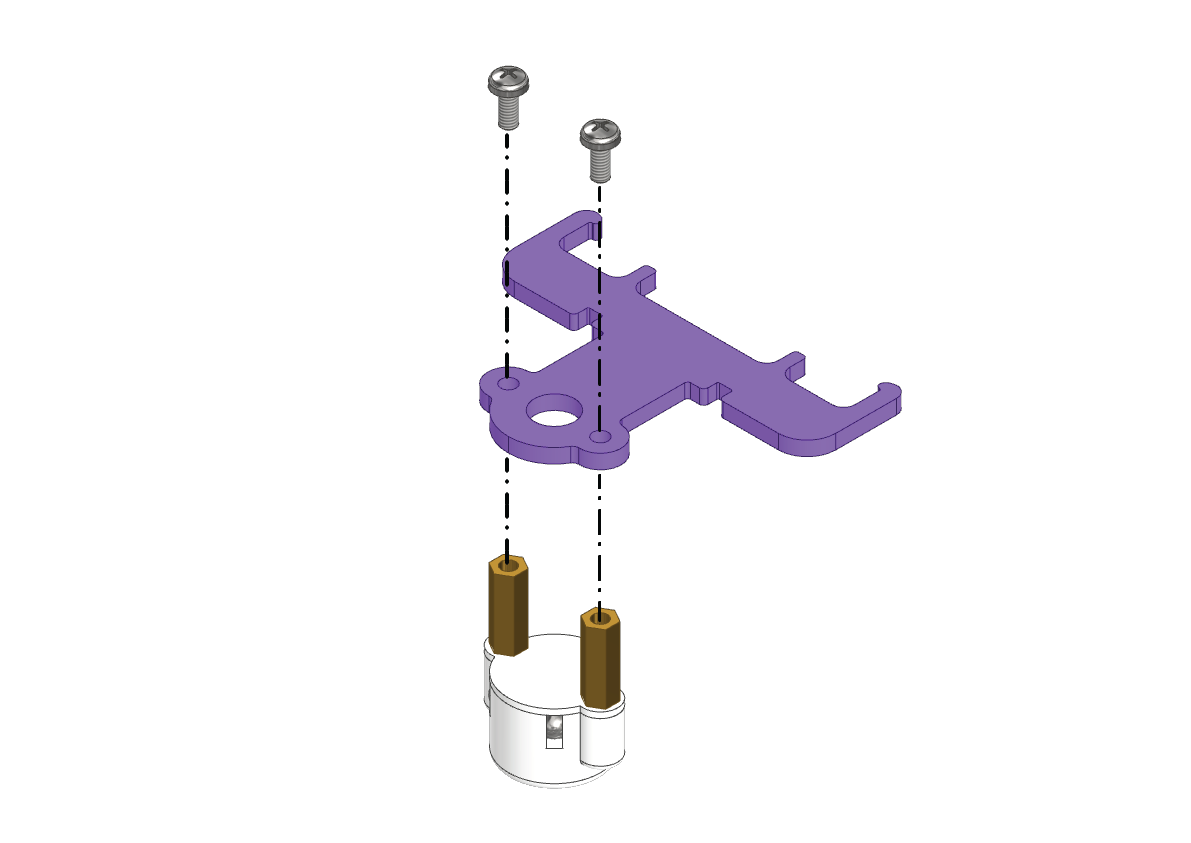
- Attach Castor Wheel to the Castor Plate.

- Attach the Battery to the Robot.

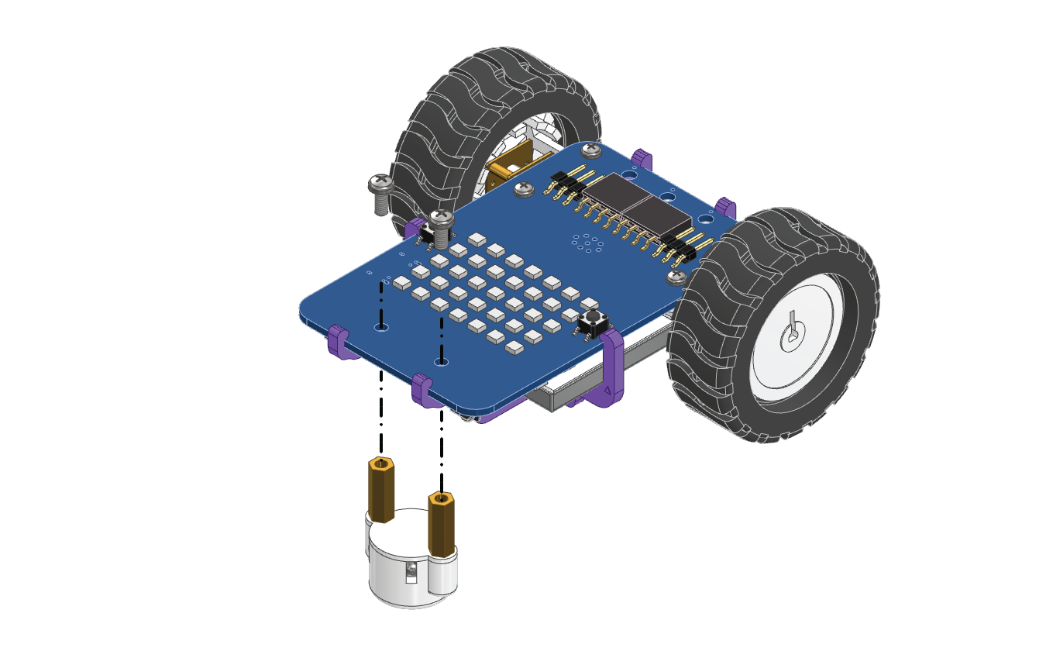
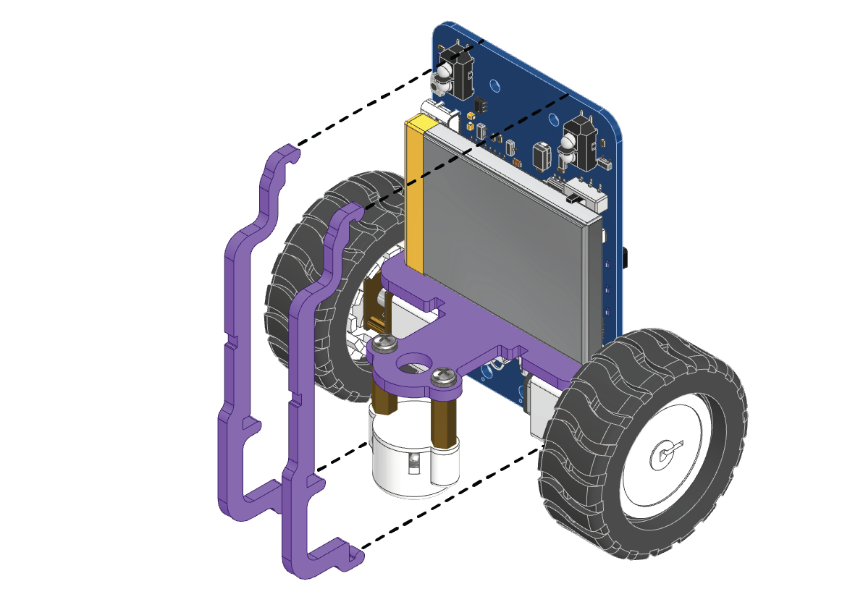
- Snap the Caster Plate to the back side of the Robot as shown.

- Mount the Battery Holders and the Battery Holder Lock to secure the battery.


Your robot is ready.

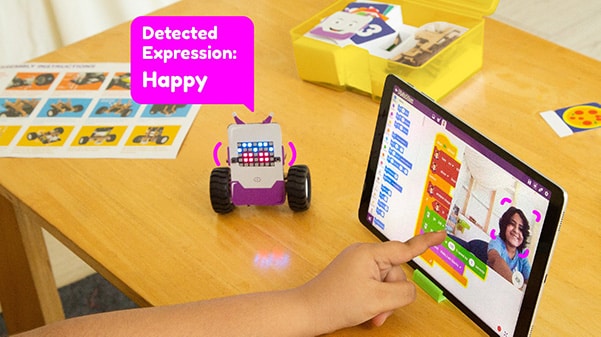
Activity 2: Making a Hand Detection System
In this activity, we will make the Quarky detect the hands.
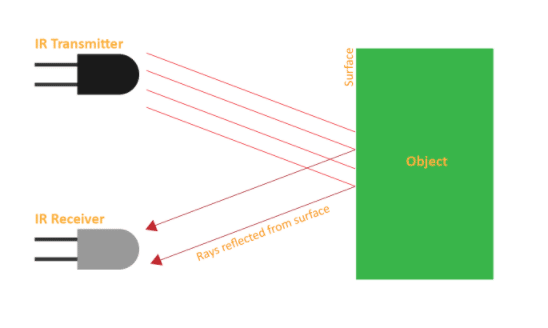
Let us understand the IR Sensors. An infrared (IR) sensor is an electronic device that measures and detects infrared radiation in its surrounding environment. IR is invisible to the human eye.
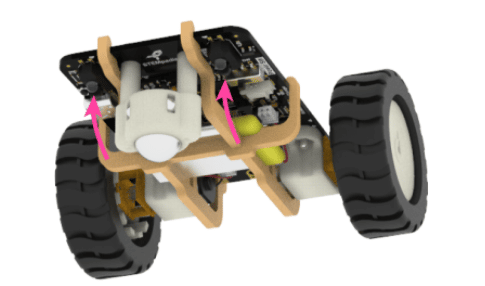
Quarky has 2 IR sensors.
Let’s understand how they work.
An IR sensor consists of 2 LEDs: one which transmits the IR light and one which receives the IR light. When the IR rays are transmitted, they bounce from the nearest surface and get back to the receiver LED. That’s how an IR sensor detects an object.
We can get the sensor values in PictoBlox based on that value. We can estimate whether there is an obstacle.
- If the sensor detects nothing, its output value is increased. This means that the sensor is active.
- If it detects an obstacle, its output value decreases. This means that the sensor is inactive.
We need first to calibrate the IR sensors, i.e., make sure they’re working fine. For that, we’ll make a script in PictoBlox to calibrate them.
Coding Steps
Follow the steps below:
- Open PictoBlox App, go to My Space, and click on + button to create a new file.
- Connect Quarky to PictoBlox.
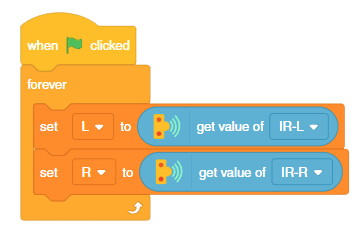
- Go to the Variables palette and create two variables named L and R.

- Next, make the following script to update the variable value to the left and right IR sensor values.
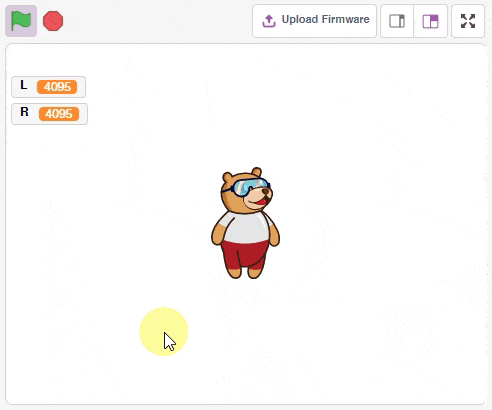
- You will notice that it appears in the top-left corner of the stage. We’ll use the variables to determine the threshold value for our IR sensors.
- Note the values of the Left and Right IR sensors when no obstacle is there in front of the robot. For example, in the above case:
- L_High = __________
- R_High = __________
- Note the value of the Left and Right IR sensors when you put your hands in front of the robot:
- L_Low = __________
- R_Low = __________
- Next, do the average to get the threshold value:
- L_T = (L_High + L_Low)/2 = __________
- R_T = (R_High + R_Low)/2 = __________

- Remember these values.
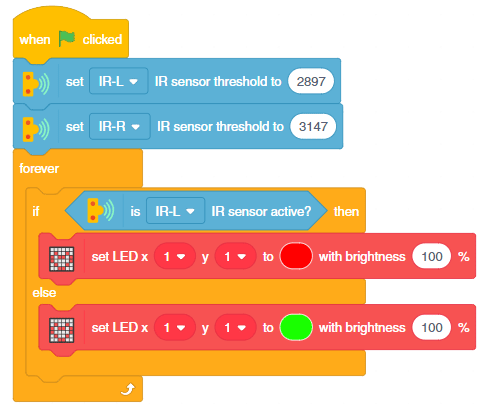
- Getting Feedback via LEDs: Now, to check if the value works fine for our sensors, let’s add a feedback loop, something that will indicate that the sensor has detected the obstacle.
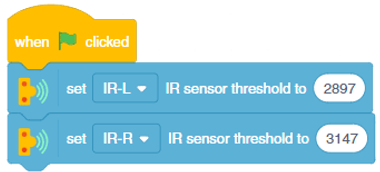
- Add a when flag clicked block from the Events
- Go to the Sensors palette and add two set () IR sensor thresholds to () block and write the threshold value you found before.

- Next, add a forever block from the Control We’re using this block because we want to check if the sensor detects the line continuously.

- Then, add an if-else block inside the forever
- Next, go to the Sensors palette and add an is () IR sensor active? block inside the white space of the if-else The IR sensor will be active when it detects the obstacle.
- To indicate that the sensor is active, let’s light up one of the LEDs of the dot matrix. From the Display palette, add a set LED x () y () to () with brightness () block under the if arm of the if-else Set the color as RED from the drop-down by clicking the color circle on the block.
- Duplicate the block and drop it under the else arm of the if-else Set the color as GREEN.
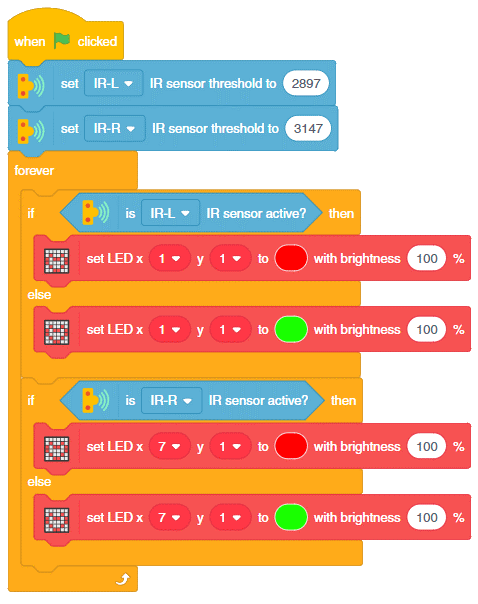
- Duplicate the if block and change the sensor to IR-R.
- Run the program and test the code.
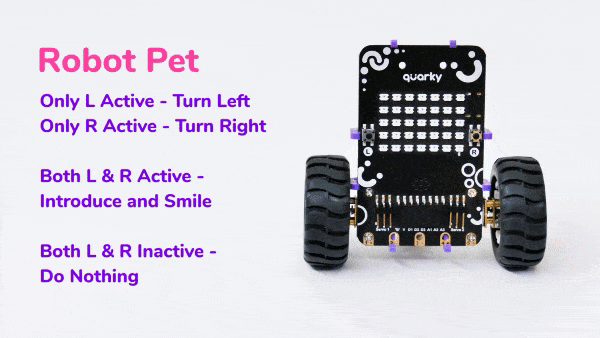
Activity 3: Making a Robot-Pet
Make a robot pet that reacts when it is pampered with hands. The robot can detect the pampering using IR sensors, and act accordingly.
The objective is to make the robot execute certain actions when it detects a hand:
- When the hand is detected on the Left sensor, turn left.
- When the hand is detected on the Right sensor, turn right.
- When the hand is detected on both the left and right sensors, introduce Quarky and smile.
- When nothing is detected, do nothing.
Coding Steps
Follow the steps below:
- Open PictoBlox App, go to My Space, and click on + button to create a new file.
- Connect Quarky to PictoBlox.
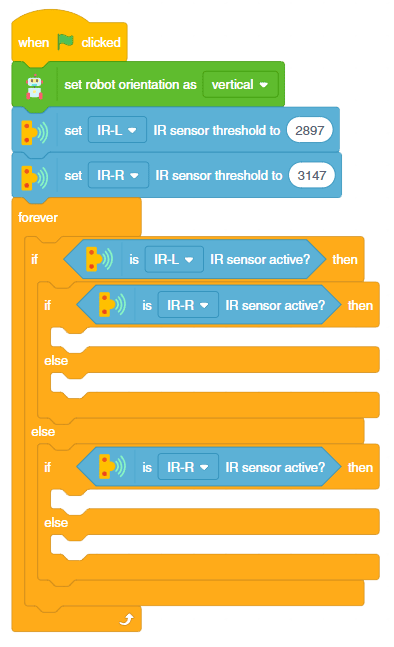
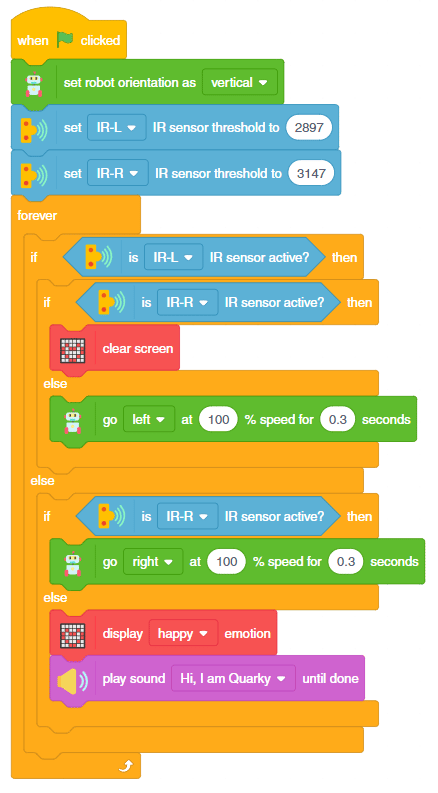
- Add a when flag clicked block from the Events
- Go to the Sensors palette and add two set () IR sensor thresholds to () block and write the threshold value you found in the last activity.
- Add set robot orientation as () block and set the orientation as vertical.
- Next, add a forever block from the Control We’re using this block because we want to check if the sensor detects the line continuously.
- Then, add an if-else block inside the forever
- Next, go to the Sensors palette and add an is () IR sensor active? block inside the white space of the if-else
- Duplicate the if block and put it inside the two branches of the if blocks. Change the value to IR-L.

- Now we have four branches all indicating four conditions. Let’s go over it one by one.
- The first case is when no hand is detected. Add a clear screen block from the Display
- The second case is when the IR-R sensor detects the hand. In this case, the robot will turn Left. Add go () at () % speed for () seconds block from the Robot Set the direction to left and time to 0.3 seconds.
- The third case is when the IR-L sensor detects the hand. In this case, the robot will turn Right. Add go () at () % speed for () seconds block from the Robot Set the direction to right and time to 0.3 seconds.
- Lastly, both sensors detect the hand. Make the Robot smile and play sound – Hi, I am Quarky using the play sound () until done
- The code is complete. Run and test it. Save the file as Robo Pet.
Activity 3: Output
Make sure you finish and submit the assignment, as well as take the quiz, before moving on to the next lesson.