
Introduction
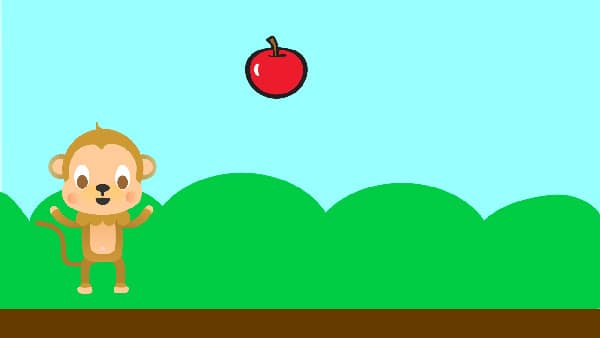
In this lesson, we are going to make a game Catch the Fruit. The game aims to make the Monkey catch as many fruits as possible by controlling it using Quarky’s switches.
Coding Steps
Follow the steps below:
- Open
PictoBlox App, go toMy Space, and click on+button to create a new file. - Connect
QuarkytoPictoBlox. - Stage Setup:
- Add a new backdrop named
Blue Sky. You can refer to the process of adding the backdrop from Lesson 1 Activity 2 Step 2. - Add two new sprites named
MonkeyandApple. You can refer to the process of adding the sprite from Lesson 1 Activity 2 Step 3. - Delete the Tobi sprite by clicking on the sprite and selecting the delete option.

- Add a new backdrop named
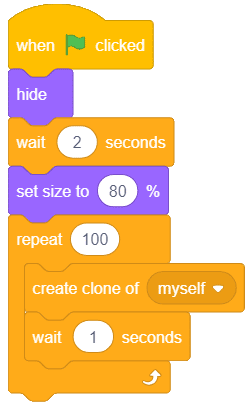
- Script for Bringing the Fruits: Time to add fruits to the game! We’re going to make our Monkey catch some apples.
- Select the
Applesprite by clicking its icon. - Add a when flag clicked block.
- Add a hide block from the
Lookspalette. This will ensure that the Apple sprite is hidden from the stage when the game begins. - Go to the
Controlpalette and add a wait () seconds block and set the waiting time to “2” seconds. - Add a set size to () % block from the
Lookspalette and write “80”. - Go to the
Controlpalette and add a repeat () Write “100” in the white space. - Inside the repeat () block, drop a create clone of () block from the
Eventspalette. This block will ensure that multiple Apples can appear on the stage. - Add a wait () seconds block and set the waiting time to “1” second.

- Select the
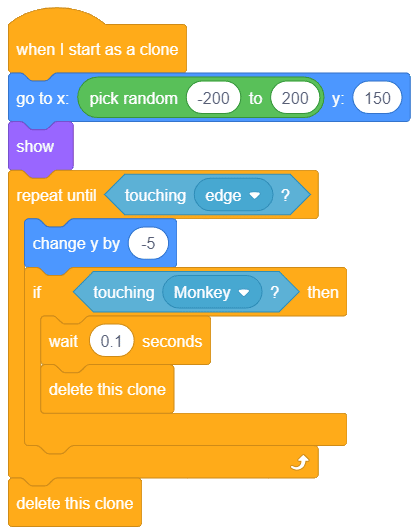
- Random Appearance: A clone of the Apple sprite should appear randomly anywhere from the top of the stage and then disappear if the Monkey has caught it. Follow the steps below to write the script:
- Go to the
Eventspalette and add a when I start as clone hat block into the scripting area. All the blocks under this hat block will run only when a clone of the Apple sprite is created. - Add an go to x: () y: () block below the when I start as clone block from the
Motionblock. In the first space, add a pick random () to () block from theOperatorspalette. In this block, write “-200” in the first space and “200” in the second. This block will ensure that the x coordinate of the starting position of the Apple clone can be any number between -200 and 200. - In the second space of the go to x: () y: () block, write 150. This will fix the y coordinate of the starting position of the Apple clone to 150.
- Now, drop a show block from the
Lookspalette below the go to x: () y: ()
- Add a repeat until () block from the
Controlpalette below the show In the space inside the block, drop a touching () ? block from theSensingpalette and select “edge” from the drop-down. This will ensure that all the blocks inside the repeat until () block will run only until the clone of the Apple sprite touches one of the edges of the stage, in our case, the bottom edge - Add a change y by () block from the
Motionpalette inside the repeat block and write “-5” in the space. The minus sign indicates that the change in the value of the y coordinate of the clone will be in the downward direction. - Add an if block below the change y by () block from the
Controlpalette. In its space, drop a touching () ? block from the Sensing palette and select “Monkey” from the drop-down. - Add a wait () seconds block inside the if block and set the waiting time to “1 seconds”.
- Add a delete this clone block from the
Controlpalette below the wait () seconds block. - Finally, add another delete this clone block below the repeat until () block.

- Test the Code. Apples should start falling down.

- Go to the
- Controlling the Movements Using Quarky:
- Go to the
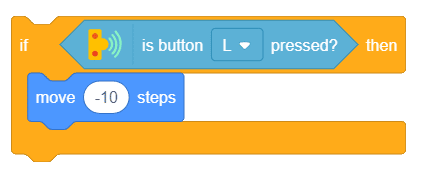
Sensorspalette and add a is button () pressed ? block into the scripting area. The button, L, is set as the default option. - To check if L is pressed, we’ll use an if Go to the
Controlpalette and drop an if block into the scripting area. Drop the is button () pressed ? block in the white space of the if block. - If L is pressed, then, according to our logic, Tobi should move left. Therefore, go to the
Motionpalette and drop a move () steps block inside the if block and write -10 in the space. The “-” sign means that the direction of movement is left.

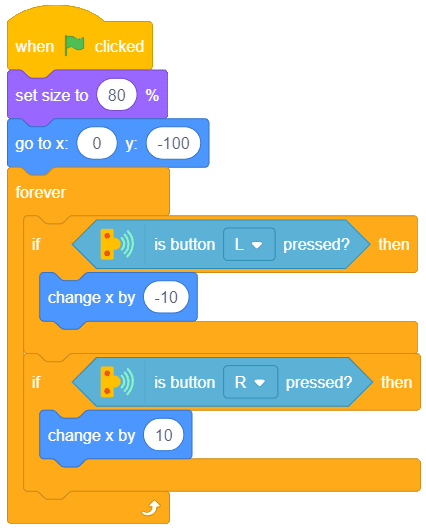
- However, if R is pressed, then Tobi should move right. Therefore, add another if block below the first one and drop a is button () pressed ? block in the white space.
- Then, go to the
Motionpalette and drop a move () steps block inside the if block, and write 10 in the space. - Add a forever block around the entire script.
- To add the finishing touch, add a when flag clicked block from the
Events. - Add set size to () % block from the
Lookspalette. We’re using this block to reduce the size of the sprite to “80%” of the original size. - Add go to x: () y: () We’re using it to fix the position of the sprite at the beginning of the game.

- Test the Code.

- Go to the
- Changing the Costumes:
Monkeysprite should be selected.

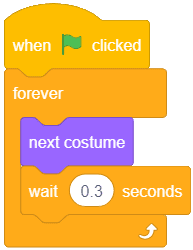
- Drop a when flag clicked block into the scripting area.
- Add a forever block below the when flag clicked block.
- Add a next costume block inside the forever block.
- Add a wait () seconds block below the next costume block and set the waiting time between two costumes as “3 seconds”.
- Sensing and Catching the Fruits:
- Let’s start with sensing the Apple clone first. For that, we’re going to use an if block and a touching (). block. First, drop an if block into the scripting area. Then, drop a touching () ? block inside its space and select “Apple” from the drop-down.
- Go to the
Soundpalette and drop a play sound () until done block inside the if Select “Chomp” from the drop-down. Now, it’s time for the most important thing – tracking the score. Every time the Monkey catches an Apple, the score should increase. To keep track, we’re going to create a variable. - Go to the
Variablespalette and make a new variable named Score by clicking the Make a Variable. - Drop a change () by () block from the
Variablespalette below the play sound () until done “Score” is selected as the default option in the first drop-down. Write “1” in the second space. - Drop a forever block above the if block.
- To start the game with zero, add a set () to () above the forever “Score” is selected as the default option in the first drop-down. Write “0” in the second space.
- Finally, add a when flag clicked block to complete the script.

- Enjoy your game!
- Save the file as
Monkey Game.
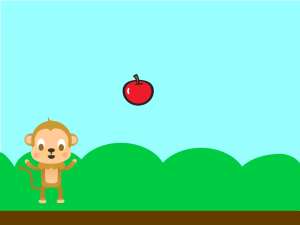

Activity: Output
Make sure you finish and submit the assignment, as well as take the quiz, before moving on to the next lesson.