
Introduction to Robotics
A robot, in simple words, is any machine designed to carry out a task. This would make you say, “So, a calculator, a PC, a vacuum cleaner – all these are also robots?” Not exactly. Robots are machines that use programming to make decisions and carry out tasks.
For e.g. a screwdriver is a machine because it carries out the task of fastening a screw, and reduces human effort. But it is not a robot. If we combine it with a robotic arm, then the entire thing can be called a robot.
Advantages of Robots
- Robots never tire. They can work at the same speed with the same consistency without any breaks or holidays.
- They are useful when you need to perform a particular task over and over again without getting bored. This enables us to utilize our full potential in tasks that can only be done by humans.
- Robots are quick. They can do a lot of work in a short duration of time. This, in turn, helps save time.

- Since robots can do a greater amount of work in a shorter duration, the overall output increases.
- Robots can be used to perform tasks that would be dangerous for a normal human being. They can also work in hazardous environments without the fear of any damage.
- Robots can perform tasks with greater accuracy and quality than humans.
Applications
We can find robots in a multitude of fields – right from cleaning your home to celebrating birthdays on Mars. Jokes apart, in the modern world, robots have found a place in almost every field. Some of their endless applications are given below:
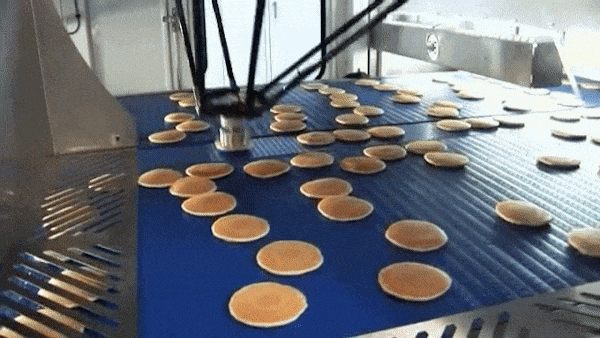
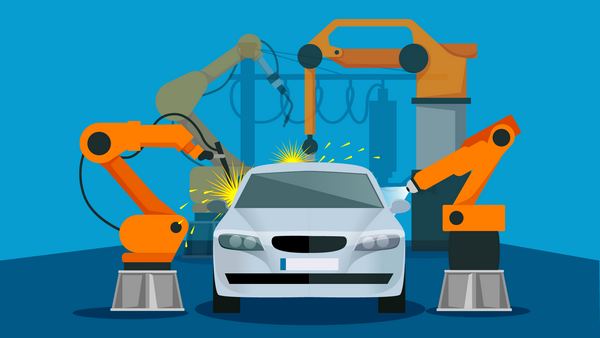
Industry: For handling and moving materials from one place to another, and for other purposes such as painting, manufacturing, welding, etc.
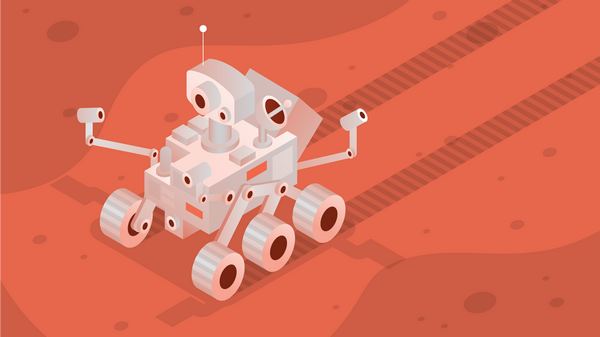
Space: For exploring outer space. E.g., the Curiosity Rover
Hospitals: Surgical robots, rehabilitation robots, pharmacy robots, etc.
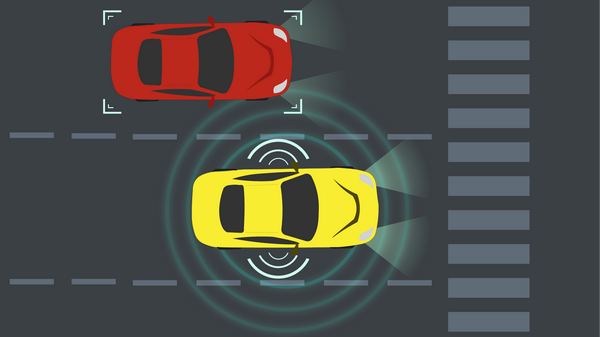
Transportation: Self-driving cars, transportation of goods and services, etc.
Agriculture: For tasks such as vegetable and fruit picking.
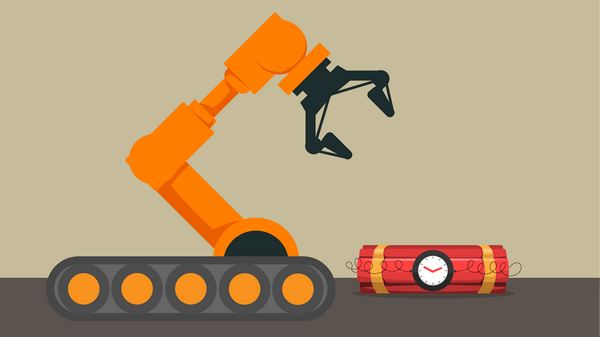
Military: Bomb discarding robots, drone explorations, etc.Households: For cooking, cleaning, and washing purposes.Entertainment: Humanoids, robot dogs, mobile phones, computers, etc. E.g. Aibo the robot dog.


Activity 1: Making Quarky Move
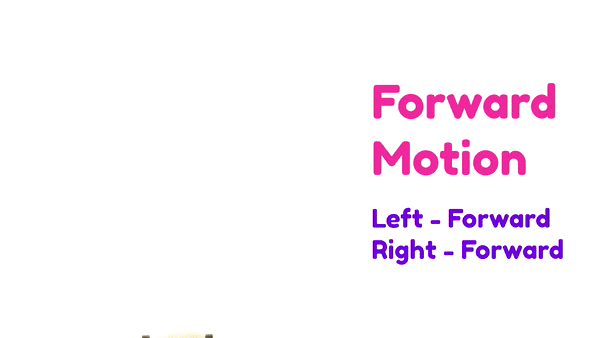
Make your robot move forward, left, right, and back.
Coding Steps
Follow the steps below:
- Open
PictoBlox App, go toMy Space, and click on+button to create a new file. - Connect
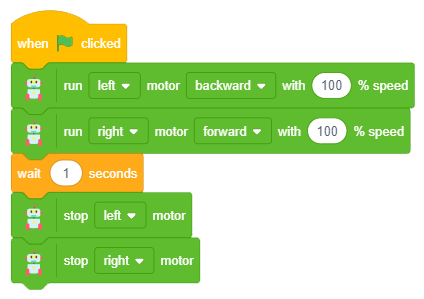
QuarkytoPictoBlox. Forward Movement: Let’s make the script for the robot to run the robot forward for 1 second and then stop. If both the wheels of the robot rotate in the forward direction, then it will move forward. That makes sense, right?
- First, go to the
Robotpalette and add the run () motor () with () speed Select the left motor, the forward direction of motion, and 100% speed are set as the default values. - Now, copy the run () motor () with () speed block and add it below the first one. Select the right motor from the dropdown.
- Next, add a wait () seconds block from the Control palette and set the waiting time as 1 second.

- Drag and drop the when flag clicked block into the scripting area from the
Eventspalette. - Next, add a stop () motor block from the Robot palette below the wait () seconds block and select left as the option.
- Next, add another stop () motor block from the Robot palette and select right as the option.

- Now, run the script by clicking the green flag.
- First, go to the
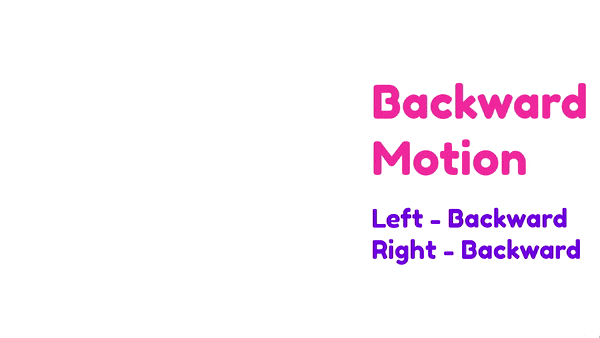
Backward Movement: If both wheels rotate in the backward direction, the robot will move backward. Let’s convert the above script to make the robot run backward for 1 second and then stop.
- Change the direction in the first run () motor () with () speed block to backward. This will make the left motor go backward.
- Change the direction in the second run () motor () with () speed block to backward. This will make the right motor go backward.

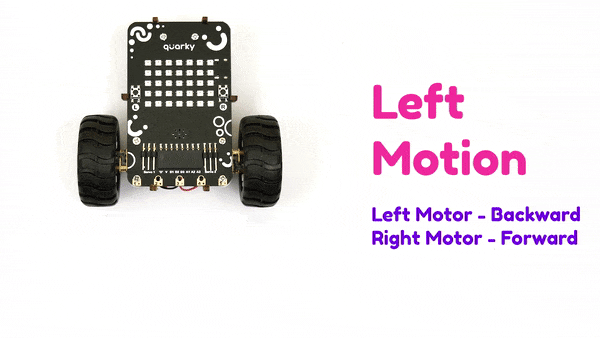
Left Movement: Making the robot turn left and right is the tricky part. To make Quarky turn left, its right wheel should rotate in the forward direction but its left wheel should rotate in the backward direction. Let’s convert the above script to make the robot run to the left for 1 second and then stop.
- Change the direction in the first run () motor () with () speed block to backward. This will make the left motor go backward.
- Change the direction in the second run () motor () with () speed block to forward. This will make the right motor go forward.
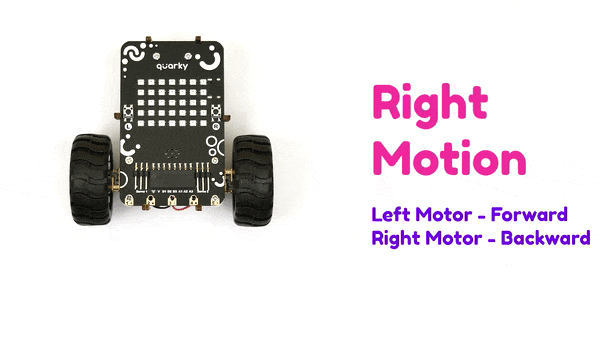
Right Movement: On the other hand, to make Quarky turn right, its left wheel should rotate in the forward direction and the right wheel should rotate in the backward direction. Let’s convert the above script to make the robot run to the left for 1 second and then stop.
- Change the direction in the first run () motor () with () speed block to forward. This will make the left motor go forward.
- Change the direction in the second run () motor () with () speed block to backward. This will make the right motor go backward.


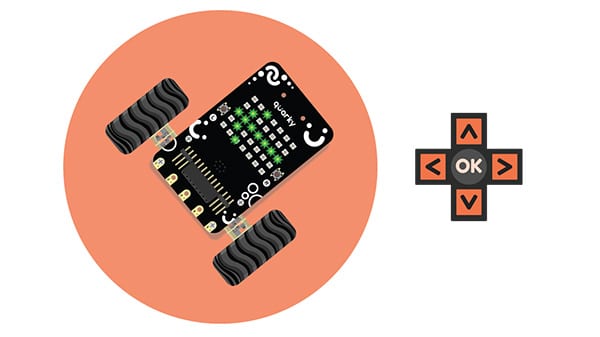
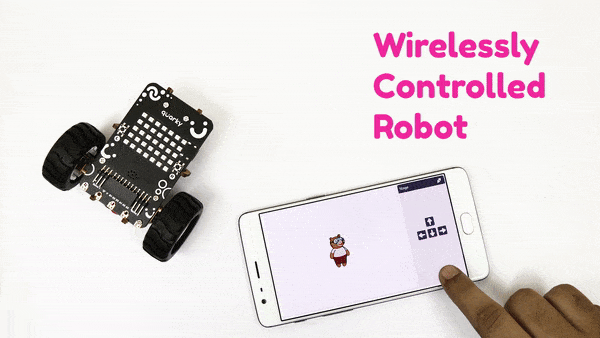
Activity 2: Wirelessly Controlled Robot
Make your robot move forward, left, right, and back with keys.
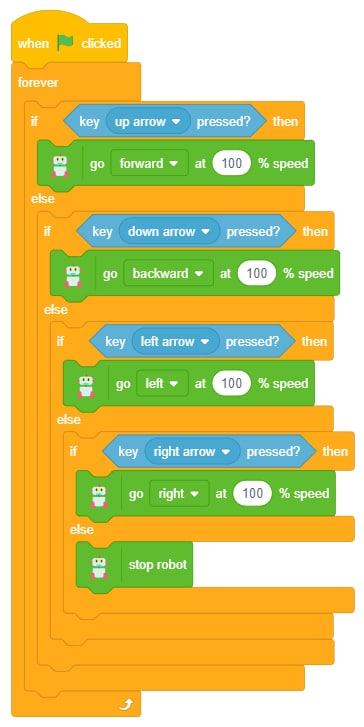
Logic
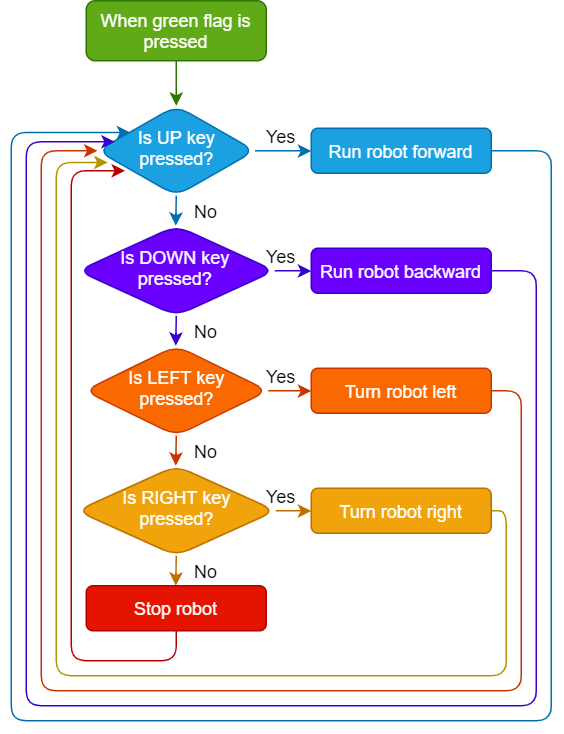
We’re going to control Quarky wirelessly using the arrow keys of the keyboard of your desktop/in the PictoBlox mobile app.
- Using the up arrow key, we will make Quarky move forward.
- Using the down arrow key, we will make it move backward.
- Using the right arrow key, it will move right.
- Using the left arrow key, it will move left.
- When none of the arrow keys is pressed, Quarky should stop moving.

Coding Steps
Follow the steps below:
- Open
PictoBlox App, go toMy Spaceand click on the+button to create a new file. - Connect
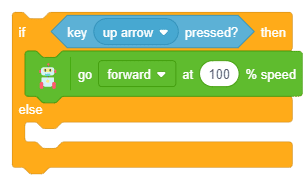
QuarkytoPictoBlox. - We want to ensure that Quarky moves forward only if the up arrow key is pressed. To check if it is pressed, we’re going to use an if block. Go to the
Controlpalette and drag and drop an if-else block. - Now, go to the
Sensingpalette and add a key () pressed? block inside the diamond-shaped space of the if block. This block will check if the selected key is pressed. The up arrow key is the default option. - Go to the
Robotpalette and add a go () at () % speed for () second block inside the if block. Now, we need to do the same for the remaining three directions.
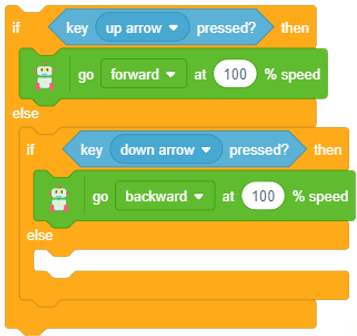
- Duplicate these blocks by right-clicking the if-else block. Then, in the key () pressed ? block, change the key to down and in the go () at () % speed for () second block, change the direction to backward.

- Repeat step 6 two more times for the remaining two directions.
- Now put the stop robot block in the last else branch.
- Complete the script by adding a forever & when flag clicked blocks at the top.

- Now, run the script by clicking the green flag.
- Save the file with the name
Wirelessly Controlled Robot.
Activity 2: Output
Make sure you finish and submit the assignment, as well as take the quiz, before moving on to the next lesson.