
All About – Obstacle Avoidance Robot
The Obstacle Avoidance Robot is an autonomous robot that can be used to detect obstacles and avoid them by turning in different directions to prevent collisions.
They can be used for a variety of tasks that can reduce workload, such as automatic vacuuming.
Logic Behind Obstacle Avoidance
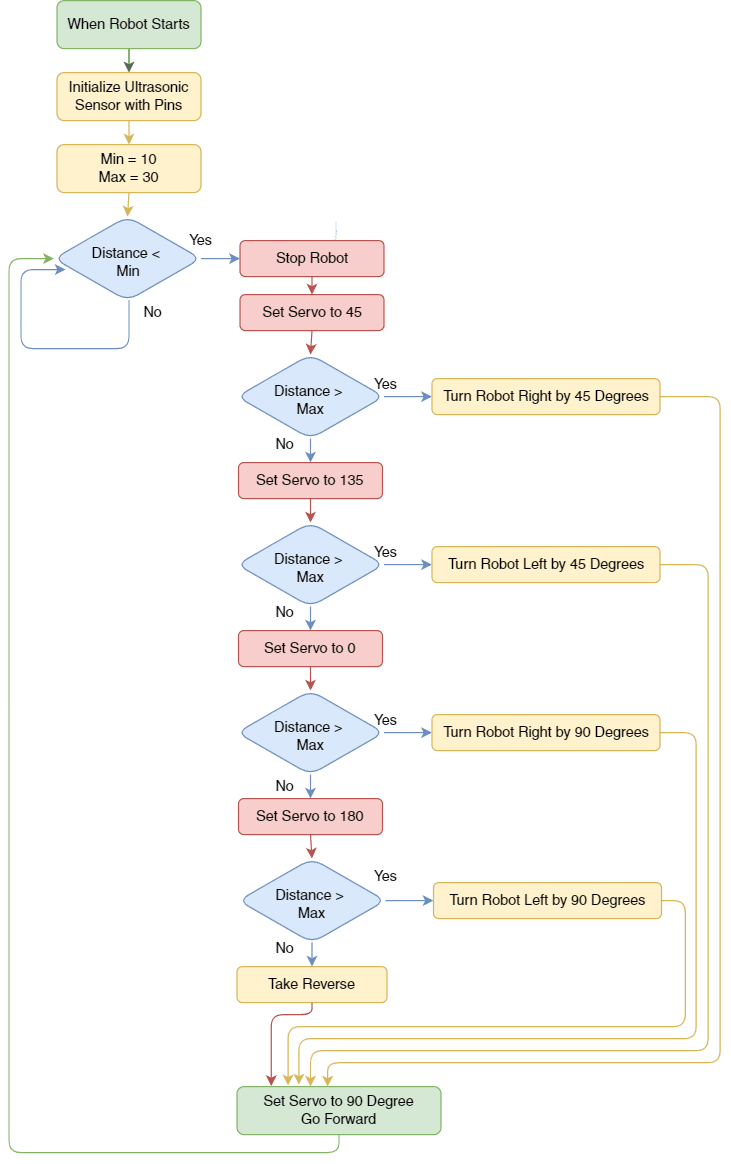
Quarky detects an obstacle, then checks left and right, and turns in that direction if the distance is > 30 cm.
STEP 1: Go forward if there is no obstacle.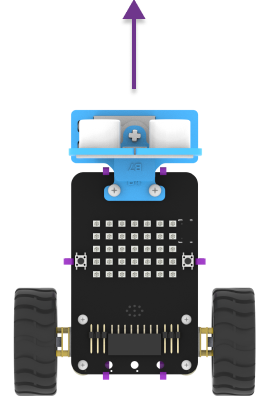
STEP 2: If an obstacle comes at a Min distance. The ultrasonic sensor will detect the obstacle and stop.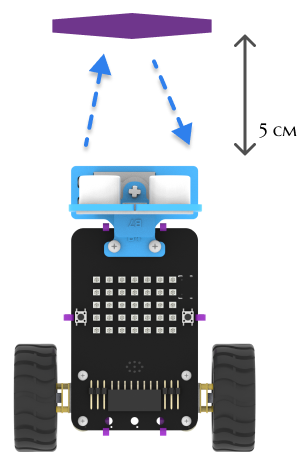
STEP 3: Next, using the servo motor the robot will scan the environment. But first, it will turn the servo to 45 and check for free area obstacles.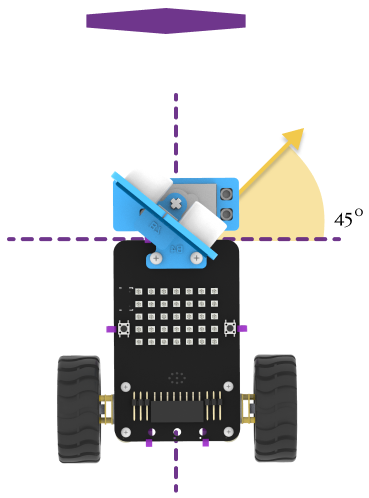
STEP 4: If there is no obstacle in a range of 30 cm at the 45-degree angle. Quarky will take a right turn by 45 degrees.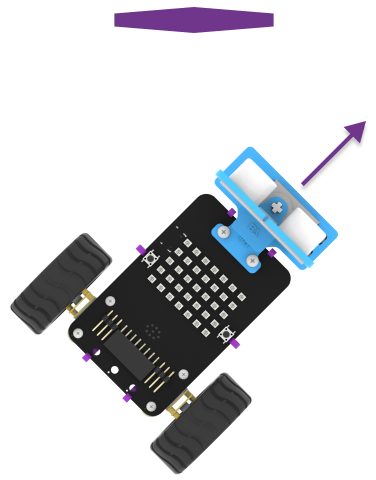
STEP 5: If an obstacle is detected on the right side at a 45-degree angle. Change the angle to 135 degrees.
STEP 6: If there is no obstacle in a range of 30 cm at the 135-degree angle. Quarky will take a left turn by 45 degrees.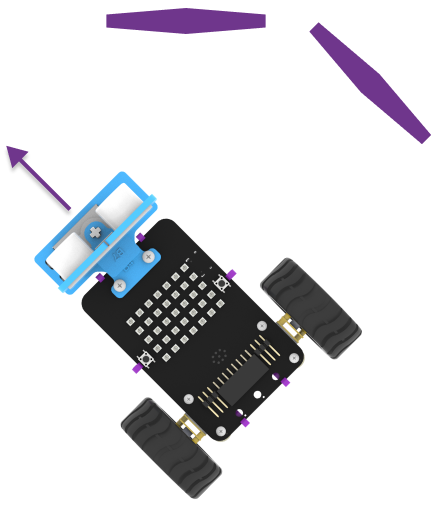
STEP 7: If an obstacle is detected on the right side at the 135-degree angle. Change the angle to 0 degrees.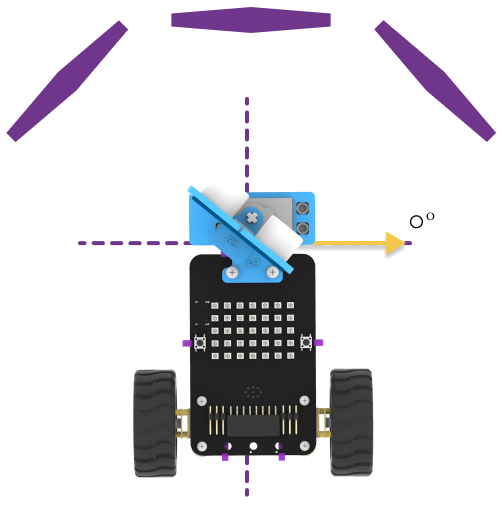
STEP 8: If there is no obstacle in a range of 30 cm at the 0-degree angle. Quarky will take a right turn by 90 degrees.
STEP 9: If an obstacle is detected on the right side at the 0-degree angle. Change the angle to 180 degrees.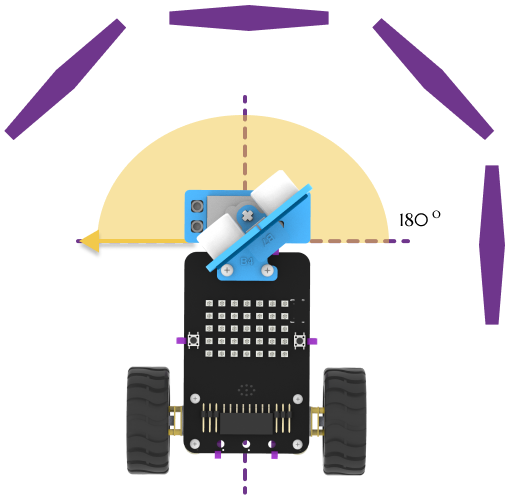
STEP 10: If there is no obstacle in a range of 30 cm at the 180-degree angle. Quarky will take a left turn by 90 degrees.
STEP 11: If an obstacle is detected on the right side at a 180-degrees angle, then take the reverse.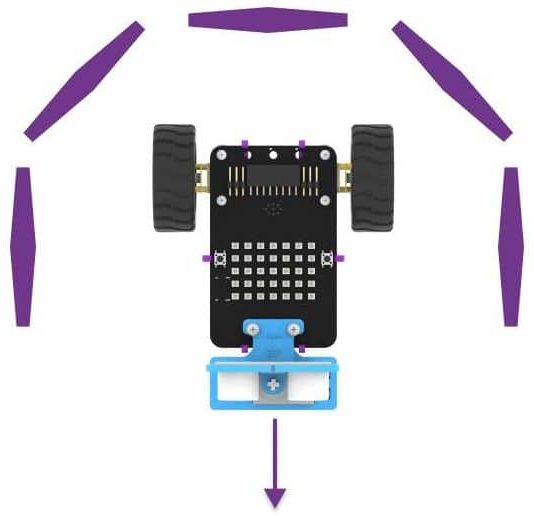
Logic Flowchart
Coding Steps
Now it’s time to program our own Obstacle Avoidance Robot!
Follow the steps below:
- Create a New file in
PictoBlox App. - Connect
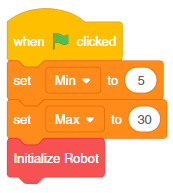
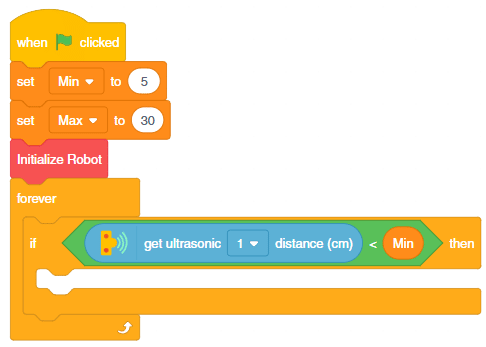
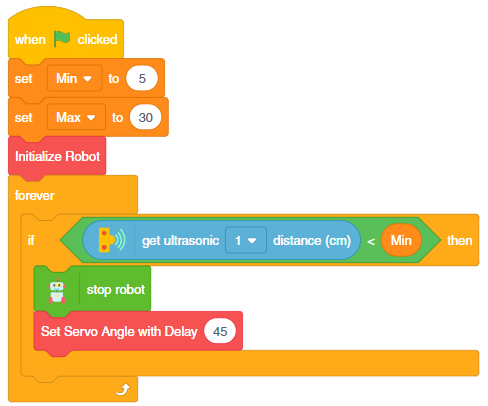
QuarkytoPictoBlox. - Create two variables named Max, and Min from the
Variablespalette. - Drag and drop the when green flag click block from the
Eventspalette. - Then, add the set () to () Set to Min to 5.

- Duplicate this block and set Max to 30. So, we are basically initializing maximum and minimum distances of 30 cm and 5 cm.
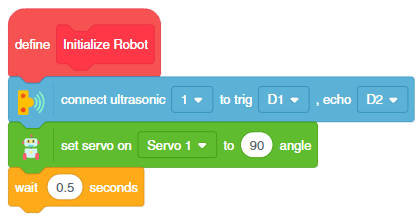
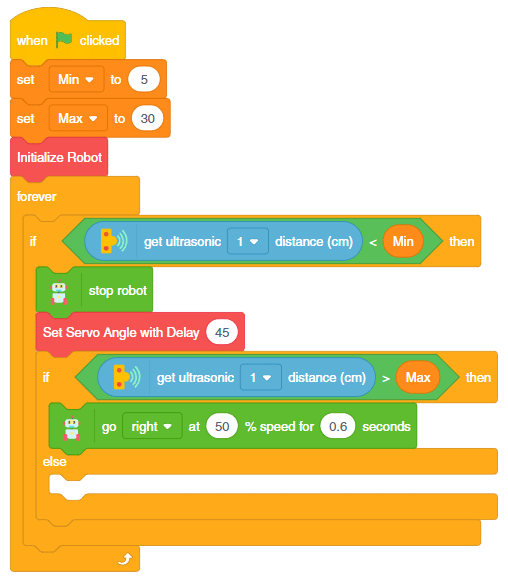
- Create a block named – Initialize Robot. Place the block.
- Now, to initialize the pins go to the
Sensorspalette and add connect Ultrasonic () to trig (), echo() below the Initialize Robot hat block. - The next step would be to set the initial servo angle as 90 degrees, for this drag and drop the set servo on() to () angle from the
Robotpalette. - Add wait () second below-set servo on () to () angle.

- Now, to initialize the pins go to the
- Detecting Obstacle:
- Now, go to the
Controlpalette and add a forever block below the Initialize Robot. - After that, place the if () then block from the
Controlpalette inside the forever block. - Next, go to the
Operatorspalette and put the ()<() block inside the space of the if () then block. - Drag and drop the get ultrasonic () distance block from the
Sensorspalette within the first space of the ()<() block and the Min variable in the second space. This block will help compare the sensor value with the minimum distance.
- Now, go to the
- Checking for Free Area:
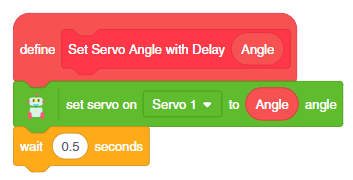
- Next, create a block custom block named Set Servo Angle with Delay ()with Angle as the parameter.
- Put a set servo () to () angle block with the angle as Angle.
- After that add a delay of 0.5 seconds by adding wait () seconds block.

- Come back to the main script. Add the stop robot from the
Robotpalette. Add Set Servo Angle with Delay () block with angle set as 45 degrees. This condition will stop the robot and turn the servo’s angle to 45 degrees whenever an obstacle will come within the minimum distance range.
- Now, we will check the maximum distance by adding if () then else block from the
Controlpalette. - Next, go to the
Operatorpalette and put the ()>() block inside the if () then else block. - Drag and drop the get ultrasonic () distance block from the
Sensorspalette within the first space of the ()>() block and the Max variable in the second. This block will help compare the sensor value with the maximum distance. - If the condition is satisfied, the robot should turn right. This can be done by adding go () at () % speed for () seconds inside the if statement. Set the speed as 50%, and the time as 0.6 seconds.

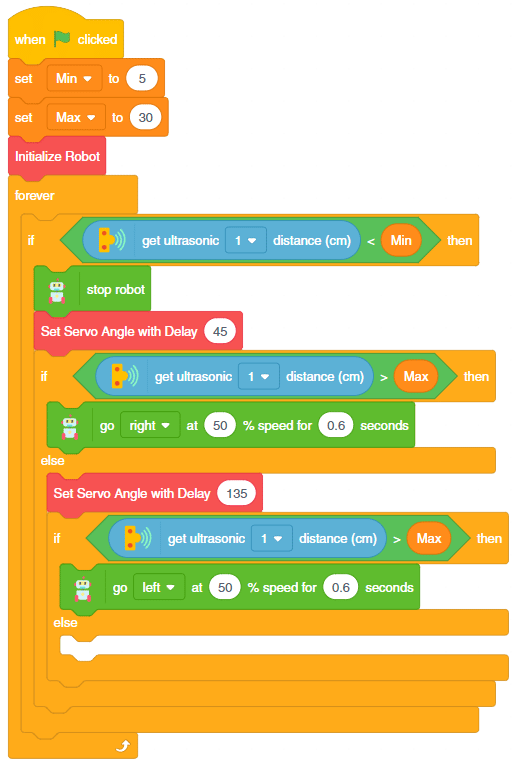
- After that, duplicate the block from Set Servo Angle with Delay () block and place it in the else branch. Change the angle to 135 degrees and the robot’s direction to the left.

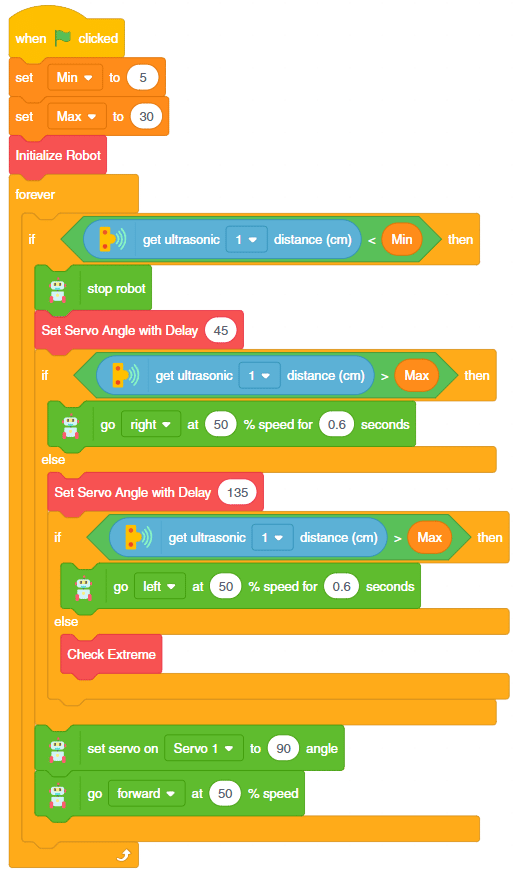
- Create a custom block named – Check Extreme. This block will check the conditions for 0 and 180 degrees. Add the block in the else branch.
- Next, if our robot doesn’t get any obstacles, it should keep going forward. So, for that, put the servo () to the () angle block at the end of the first if branch. Set the angle as 90 degrees.
- Lastly, place the go () at() speed() block. From the dropdown, select the direction as forward, and the speed as 50%.

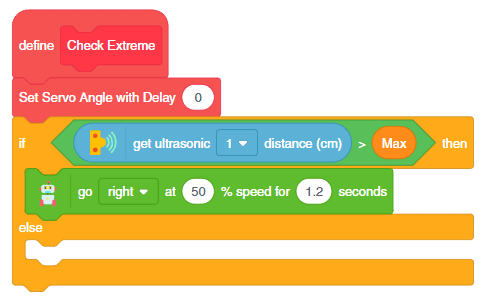
- Checking Extreme Conditions:
- Duplicate the block from Set Servo Angle with Delay () block with the value of 135 and place it below the Check Extreme block. Change the angle to 0 degrees and the robot direction to the right and the time to 1.2 seconds.

- Duplicate the block from Set Servo Angle with Delay () block and place it in the else branch. Change the angle to 180 degrees and the robot’s direction to the left.
- Within the else-branch, add go () at ()% speed for () seconds block. This time set the direction as right, speed as 80%, and time as 1.5 seconds. This will make the robot go reverse.

- Duplicate the block from Set Servo Angle with Delay () block with the value of 135 and place it below the Check Extreme block. Change the angle to 0 degrees and the robot direction to the right and the time to 1.2 seconds.
- Finally, our robot is ready to run! Run the robot and check if it is working properly.
- Save the file as
Obstacle Avoidance.

Activity: Output
Make sure you finish and submit the assignment, as well as take the quiz, before moving on to the next lesson.