
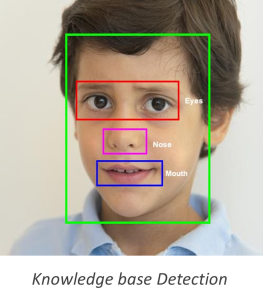
Knowledge-Based Detection
The knowledge-based method depends on a set of rules and is based on human knowledge to detect the faces. For example, a face often appears with two eyes that are symmetric to each other, a nose, and a mouth.
Pros:
- Easy to come up with simple rules.
- Based on the coded rules, facial features in an input image are extracted first, and face candidates are identified.
Cons:
- Difficult to translate human knowledge into rules precisely.
- Detailed rules fail to detect faces, like the rule that, ‘A person must have two eyes’: According to this rule, no face will be identified if the image has 1 eye.
- General rules may find many false positives: Like there is an eye in a face. According to this, the face will be identified in this tattoo of a similar-looking eye.
- This approach alone is insufficient and unable to find many faces in multiple images.
Feature-Based Detection
Feature-based detection uses what are known as face landmarks to detect faces. Face landmarks are a set of easy-to-find points on a face, such as the pupils or the tip of the nose.
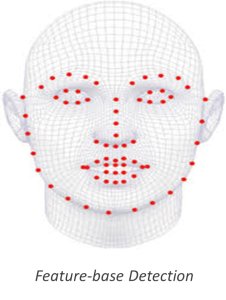
By default, there are 68 predefined landmark points.
Pros:
- Features are invariant to pose and orientation change.
- This method has a higher chance of face detection.
Cons:
- Difficult to locate facial features due to the noise in the images.
- Difficult to detect features in complex backgrounds.
Face Detection in PictoBlox
PictoBlox uses feature-based detection to detect faces. Face landmarks are a set of easy-to-find points on a face, such as the pupils or the tip of the nose. By default, there are 68 predefined landmark points. The following image shows all landmark points:
Users can detect facial expressions using machine learning and algorithms to see emotions and recognize 6 basic facial or universal expressions in human faces. It does this by analyzing faces in images or video through cameras.
Face Recognition in PictoBlox
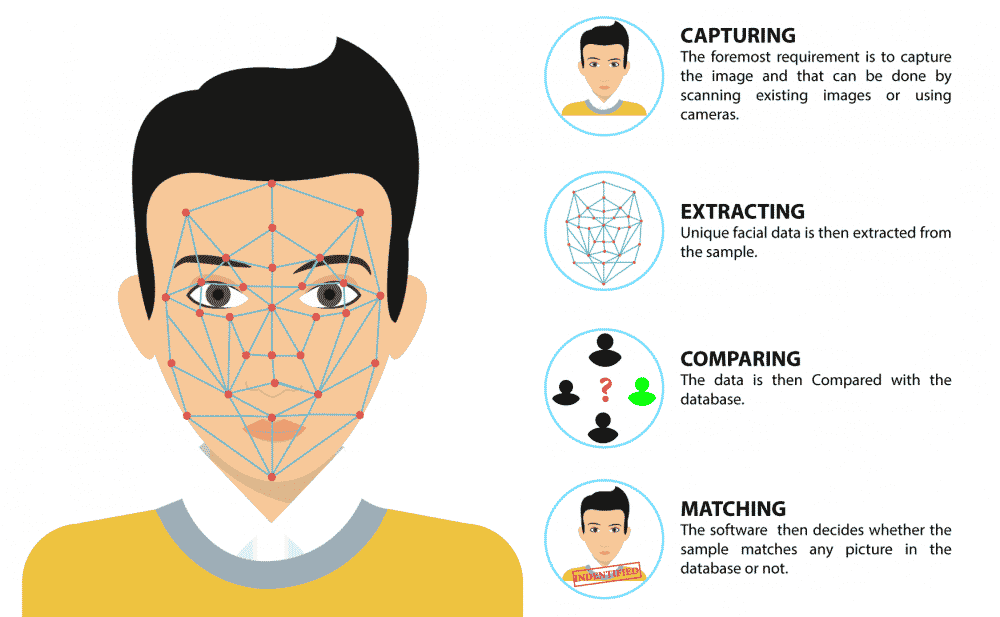
Face recognition systems allow programs to identify a person by analyzing the face landmarks of her/his face in a digital image.
PictoBlox allows you to run face recognition using the following process:
- When a face is analyzed, its geometrical properties, size, and position are obtained.
- A structure is generated that forms a pattern that is later stored in a database.
- Once stored, the user’s facial record is compared with the biometric features of each face that is scanned and allows adding new templates to make the recognition more effective.
- If the image matches a search, the system will alert us that a match has been found.
Face Detection Blocks in PictoBlox
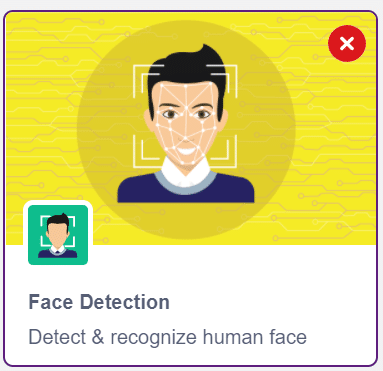
The Face Detection extension in PictoBlox has blocks dedicated to face detection.
Let’s first add the extension to our project:

- Create a new project in PictoBlox.
- Next, click on the Add Extension button and add the Face Detection extension.

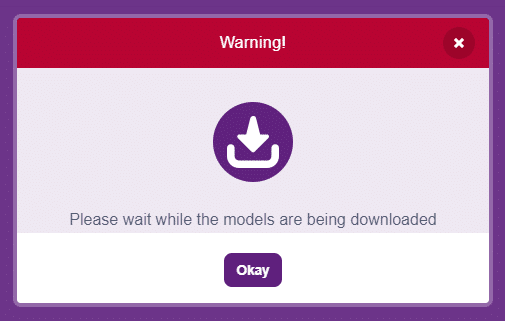
- The face detection models will be downloaded, which may take a few seconds to load.

- Once downloaded, you will get a message saying “Model loaded successfully”.
Facial Detection Block
To execute face detection, we will analyse image from () blocks.
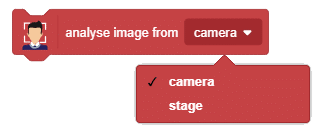
You can input the image in the following ways:
- Camera feed
- Stage
This block analyses the image and saves the face information locally, which can be accessed using other blocks similar to computer vision.
You have to run this block every time you want to analyse a new image from the camera or stage.
Controlling camera feed
You can control the camera feed on the stage using turn () video on stage with () % transparency block.
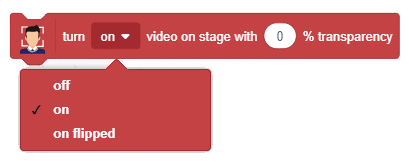
You can change the following parameters of the block:
- Camera state:
- OFF – The video feed on the stage will stop.
- ON – The video feed on the stage will start.
- ON flipped – The video feed on the stage will start with the video mirrored. So, your right hand will show left and vice versa.
- Transparency: This parameter makes the video translucent. O is defined as the camera feed shown on the stage, and 100 is the video that will fade out entirely from the stage.
Edit the parameter and try out this block yourself.
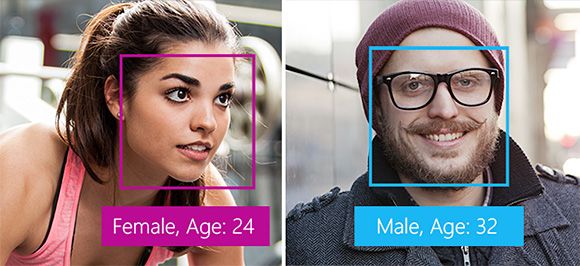
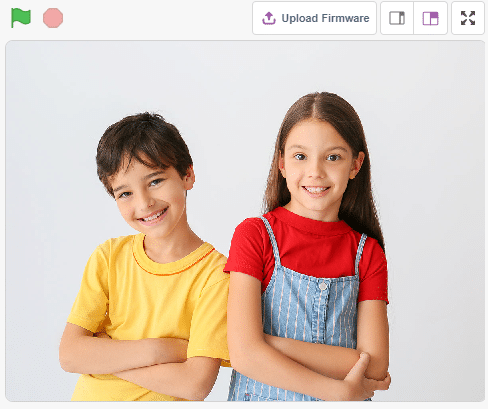
Example – Analyzing Image on Stage
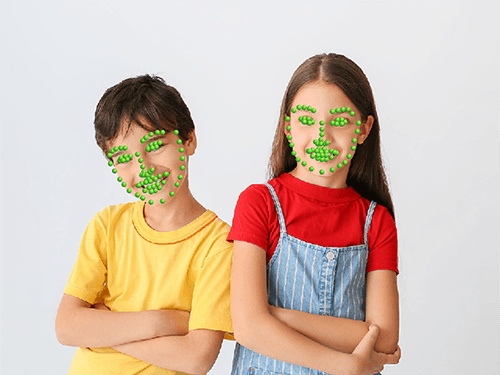
In this topic, we will analyze the following image:

- Download the image from here: https://ai.thestempedia.com/wp-content/uploads/2022/02/Boy-and-Girl.jpg
- In PictoBlox, turn off the camera using turn () video on stage with () % transparency block. Then, click on the block to execute it.

- Next, upload it as the backdrop.

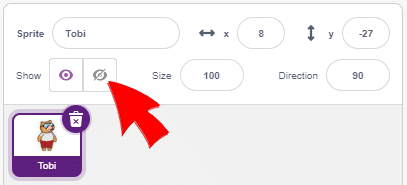
- Select Tobi sprite and hide it.

- You will find the stage like this:

- Drag analyse image from () block, change the feed as stage and click on the block to analyse the image.

- We will now see what we get when we analyse images in face detection.


Get # faces
Once you have analyzed the images, you can use the get # faces block to get the number of faces recognized in the image.

For the image being analyzed, you will get 2.

Get expression of face ()

The get expression of face () block reports the recognized expression of the selected face. If the face selected is not detected, then it reports NULL.
Example: For the first face in the analyzed image, the expression is Happy.

Is expression of face () ()
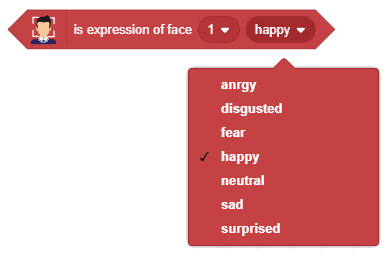
The is expression of face () () block checks whether the selected face has a particular emotion or not. If the emotion matches, then the block returns true; else, false.
E.g. for face 1 in the image, the emotion is Happy.


Get () of face ()
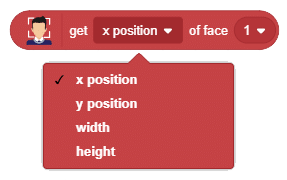
The get () of face () block reports the following attributes of the image:
- X position: X coordinate of the center of the image on the stage
- Y position: Y coordinate of the center of the image on the stage
- Width: Width of the face
- Height: Height of the face
Activity: Emotion Detector
In this project, we will make a script that detects the face using the camera and reports the expression of all the faces detected on the stage.

Let’s begin!
Setting Up the Stage
- Add a new Square Box sprite and delete the Tobi Sprite.

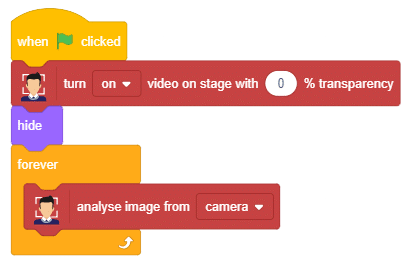
- Drag and drop a when flag clicked block into the scripting area.
- Snap a hide block below the when flag clicked block.
- Snap a turn () video on stage with () transparency block from the Face Detection palette below the hide block. Change the camera option to on and transparency to 0%.
The stage is set. Click the green flag to get the camera feed on the stage.

Recognize Image
- We will continue with the same script.
- Add a forever block from Control palette.
- Snap a analyse image from () block. Select the feed as the camera.
Looping Every Face
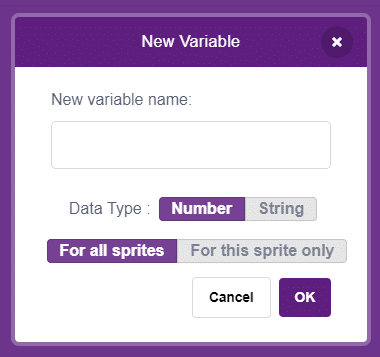
- Make a new variable called Face.

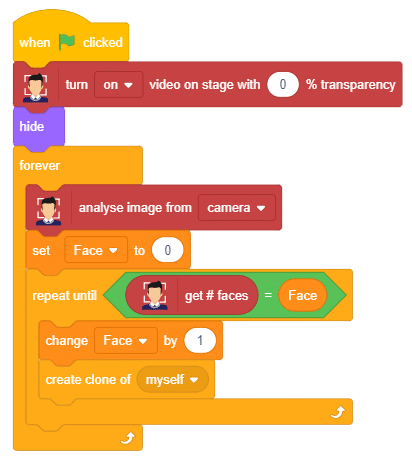
- Snap a set () to () block below the analyse image from () block. Select the variable as Face and set the value as 0.
- Add a repeat until () block below the set () to () block. Add an () = () block from the Operators palette in the condition of the repeat until () block. In the first input, add a recognized face count block and in the second add the Face reporter block from the Variables palette.
- Snap a change () by () block in the repeat until () block loop. Select the variable as Face and set the value as 1.
- Add a create clone of () block below the change () by () block. This will create a clone for every face. The script till now is as follows:
Display Bounding Box
Now we will write the script for each face detected.
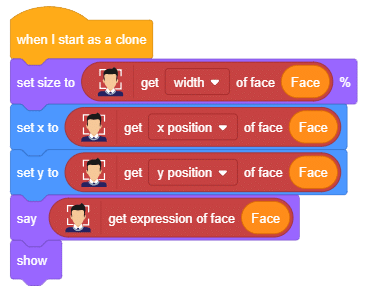
- Drag when I start as a clone block in the scripting area.
- Snap a set size to () % block from the looks palette.
- Next add get () of face () block from the face detection palette. Select the parameter as width and add Face reporter block in the face number input.

- Then, add a set x to () block. Add a get () of face () block in the input. Change the parameter to the x position and add the Face reporter block in the face number input.
- Next, add a set y to () block. Add a get () of face () block in the input. Change the parameter to the y position and add the Face reporter block in the face number input.
- Next, add a say () block. Add a get expression of face () block in the input. Add the Face reporter block in the face number input.
- Snap a show block. Your script for the clone is ready:

Deleting the clones
You have to delete the clones or the square box every time you draw new squares. Otherwise your stage will get filled with unwanted clones. Here is how you can do that:
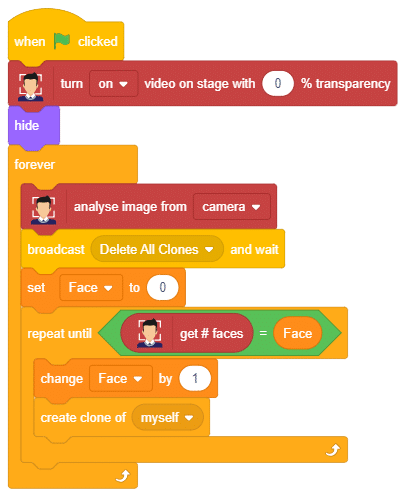
- Add a broadcast () and wait block from the event palette in the main script below analyse image from () block. Edit the message as “Delete All Clones“.

- Next add when I receive () block into the scripting area from event palette and select Delete All Clones message.
- Add delete this clone block from the control palette below the when I receive () block. This will delete all clone.


Your script is now complete. Click the green flag to start the script.