

Introduction to Robotics
A robot, in simple words, is any machine designed to carry out a task. This would make you say, “So, a calculator, a PC, a vacuum cleaner – all these are also robots?” Not exactly. Robots are machines that use programming to make decisions and carry out tasks.
For e.g. a screwdriver is a machine because it carries out the task of fastening a screw, and reduces human effort. But it is not a robot. If we combine it with a robotic arm, then the entire thing can be called a robot.
Advantages of Robots
- Robots never tire. They can work at the same speed with the same consistency without any breaks or holidays.
- They are useful when you need to perform a particular task over and over again without getting bored. This enables us to utilize our full potential in tasks that can only be done by humans.
- Robots are quick. They can do a lot of work in a short duration of time. This, in turn, helps save time.

- Since robots can do a greater amount of work in a shorter duration, the overall output increases.
- Robots can be used to perform tasks that would be dangerous for a normal human being. They can also work in hazardous environments without the fear of any damage.
- Robots can perform tasks with greater accuracy and quality than humans.
Getting Familiar with Quarky
Quarky is going to be your friend throughout this adventurous journey. So it’s better that you get to know about him. In this lesson, we will do the same.
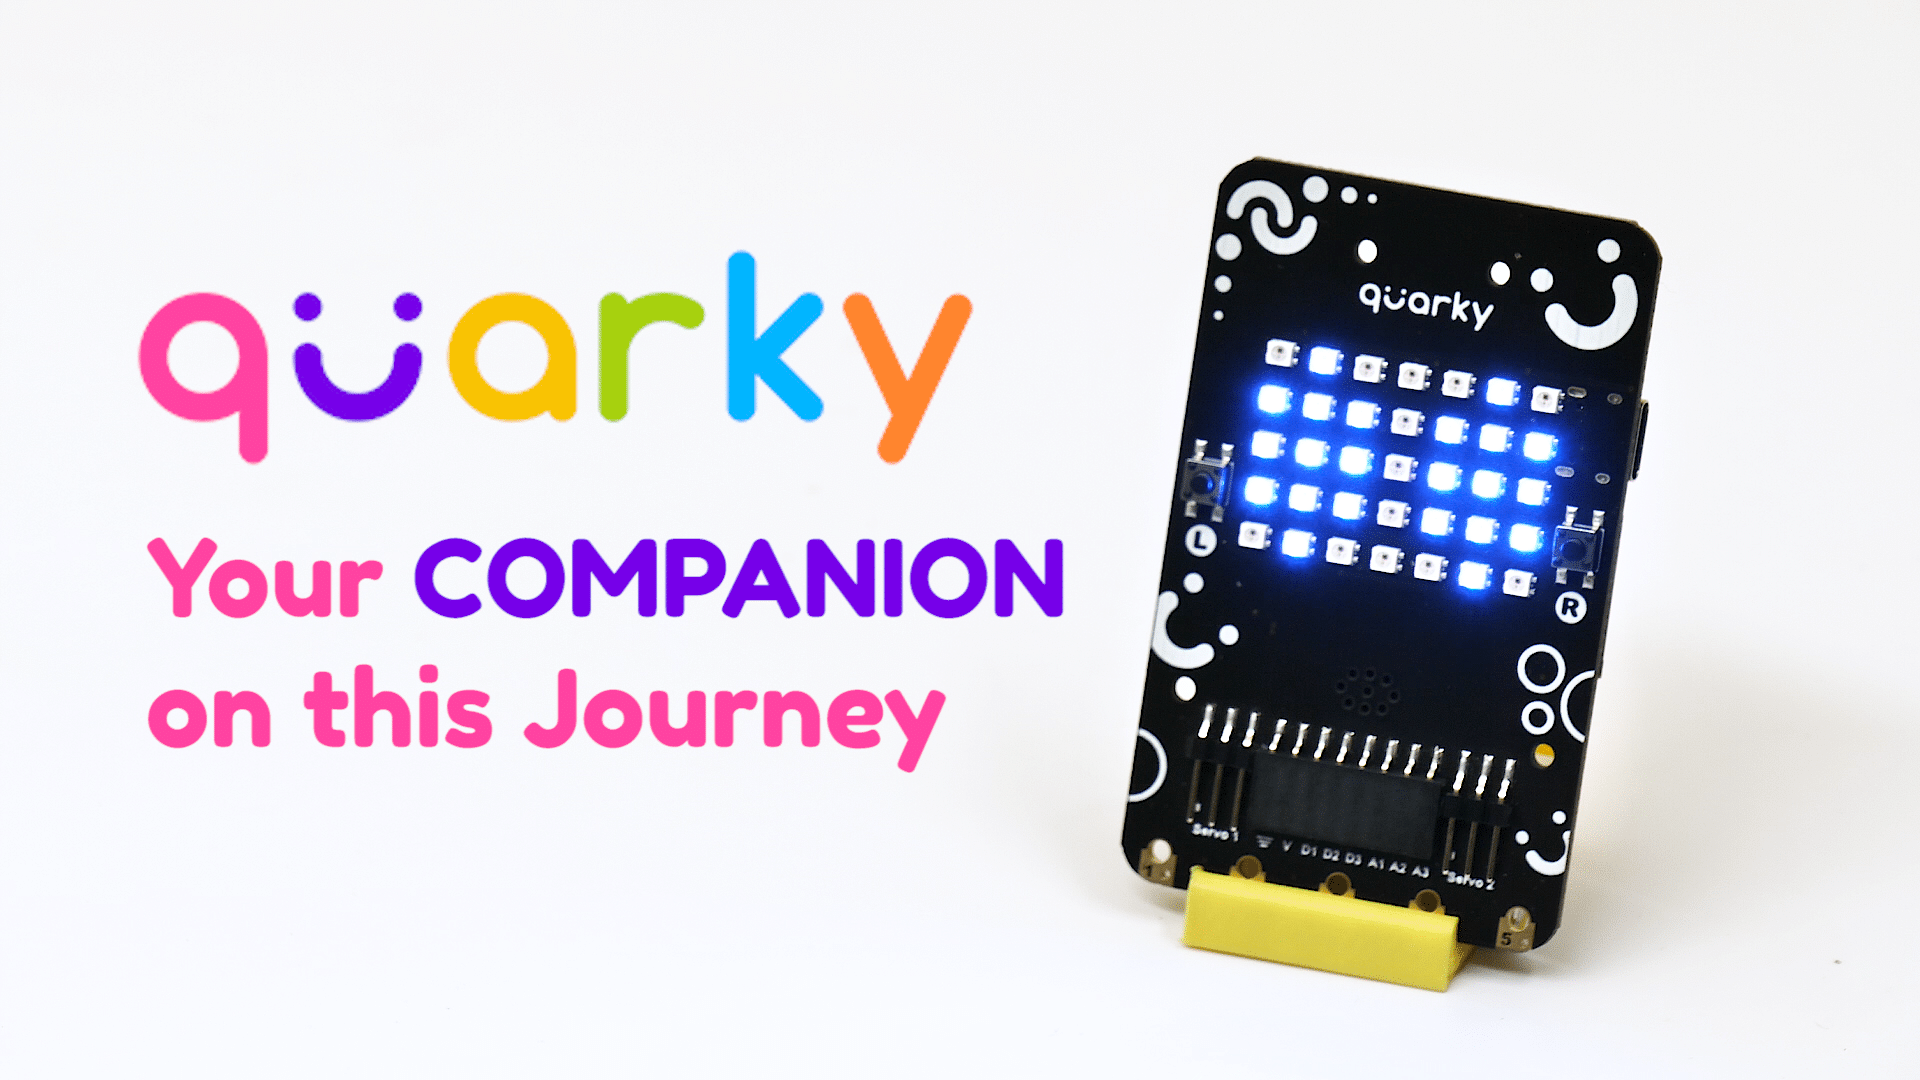
Quarky: Your AI Learning Buddy
Quarky is an electronic board with a lot of features using which you can make numerous exciting projects. You can program Quarky to make expressions, play sounds, detect touch, and much more. Let’s look at its various features.
![]()
You don’t have to remember any of the features right now as we’ll go through each of them in detail in the coming lessons.
Quarky comes with
- 7×5 RGB LED matrix (35 LEDs)
- 2 tactile switches
- 5 touch pins.
- 2 IR sensors
- 2 servo ports
- 6 Generic I/O ports
Quarky Meets PictoBlox
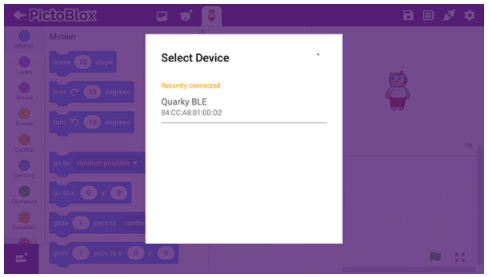
Let’s begin by first connecting Quarky to PictoBlox. Select your preferred type of device i.e. either the desktop/laptop or your smartphone and follow the instructions.
Desktop
Follow the steps below for connecting Quarky to PictoBlox:
- First, connect Quarky to your laptop using USB cable.
- Next, open PictoBlox on your desktop.
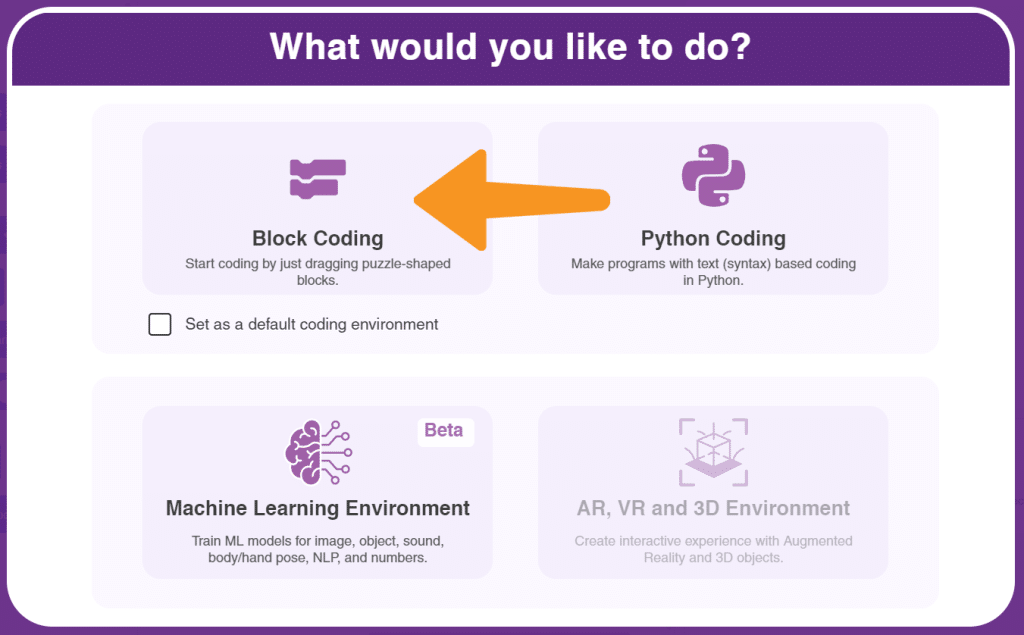
- After that, select Block Coding as your coding environment.

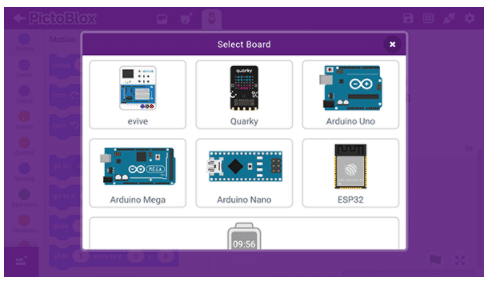
- Then, click the Board button in the toolbar and select board as Quarky.

- Next, select the appropriate Serial port if the Quarky is connected via USB or the Bluetooth Port if you want to connect Quarky via Bluetooth and press Connect.


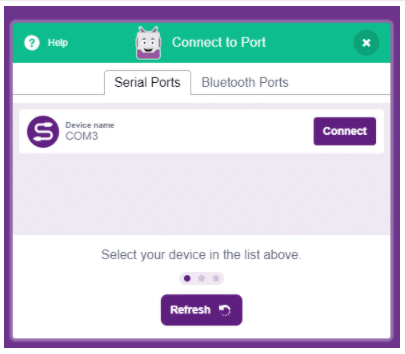
And voila! Quarky is now connected to PictoBlox.
Mobile
Follow the steps below for connecting Quarky to PictoBlox:
- First, power ON Quarky.
- Open PictoBlox on your smartphone. Go to My Space and make a new project by clicking the ‘+(plus)’ button in the bottom-right corner.

- Then, tap the Board button in the top-right corner of the toolbar.
 Select board as Quarky.

- Next, tap the Connect button:
 Select your device from the list.

And voila! Quarky is now connected to PictoBlox. Now, let’s make a script in PictoBlox to display expressions on Quarky’s matrix!
Let’s Code!
One-Time Display
Follow the steps below to make the script for displaying expressions:
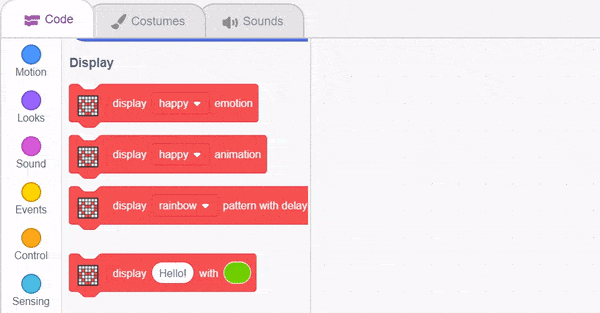
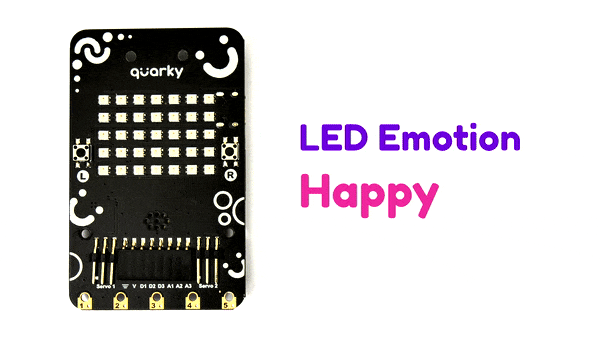
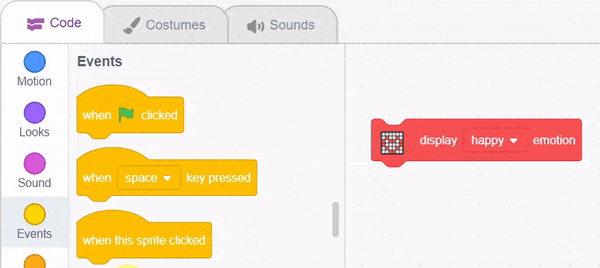
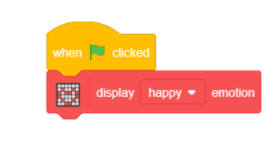
- First, go to the Display palette and add a display () emotion block into the scripting area. Then, from the drop-down, select happy.

- Click the display () emotion block. You’ll notice that Quarky is now happy!
Is there any way through which you don’t have to always click on the block to run it? Yes, there is – the hat blocks. The hat blocks in PictoBlox allow you to decide an event that would automatically execute the script. PictoBlox has several hat blocks in the Events palette. The most commonly used block is the when flag clicked block. - Drag and drop the when flag clicked block into the scripting area from the Events palette.

- Run the script by clicking the green flag.
Beating Heart – Overview
From the previous two activities, you must have realized that you can display anything that you want on the matrix.
Forever block – In the forever block, the Blocks held inside will be in a loop — just like the Repeat () block and the Repeat Until () block, except that the loop never ends (unless the stop sign is clicked, the Stop All block is activated, or the stop script block is activated within the loop). Due to this infinite loop, the block has no bump at the bottom; having a bump would be pointless, as the blocks below it would never be activated.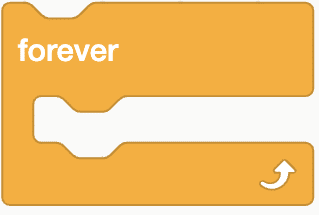
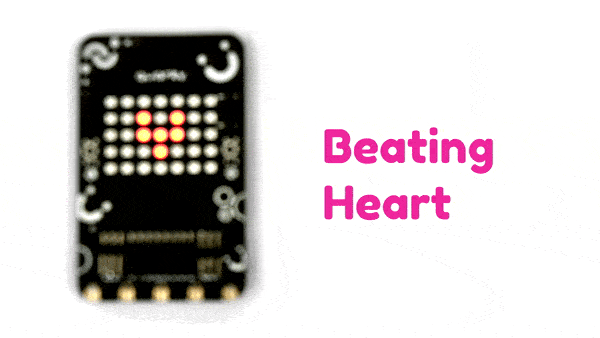
In this activity, we’re going to see how we can display a custom pattern on the matrix by making a script to display a beating heart.

Let’s get started!
Let’s Code!
Follow the steps below:
- Let’s begin by first connecting Quarky to PictoBlox:
- First, connect Quarky to your laptop using the USB cable.
- Open PictoBlox and create a new file. Select the coding environment as Block Coding.
- Select the Board as Quarky. Next, select the Serial port to connect Quarky and press Connect.
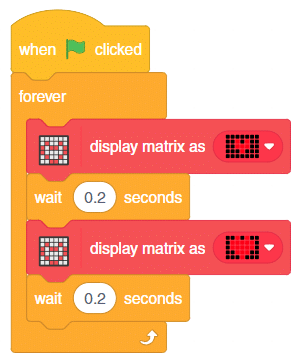
- Drag and drop a when flag clicked block into the scripting area from the Events palette.
- Add a forever block from the Control palette below the when flag clicked block.
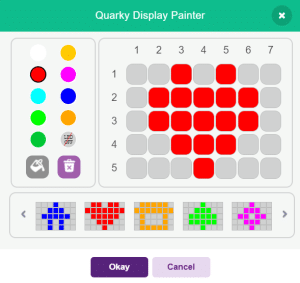
- Inside the forever block, add a display matrix as () block from the Display palette.
- Open the drop-down by clicking on the tiny white arrow as shown in the image.
- Draw a small heart in the middle of the matrix as shown.

- Add a wait () seconds block under the display matrix as () block and set the waiting time as 0.2 seconds.

- Now, add another display matrix as () block and draw a bigger heart in the matrix as shown in the image.

- Add another wait () seconds block under the display matrix as () block and set the waiting time as 0.2 seconds.
 Note: If you’re wondering what the wait () seconds block is for, here’s the answer: the wait block will ensure that there is a pause before the second pattern appears on the matrix.
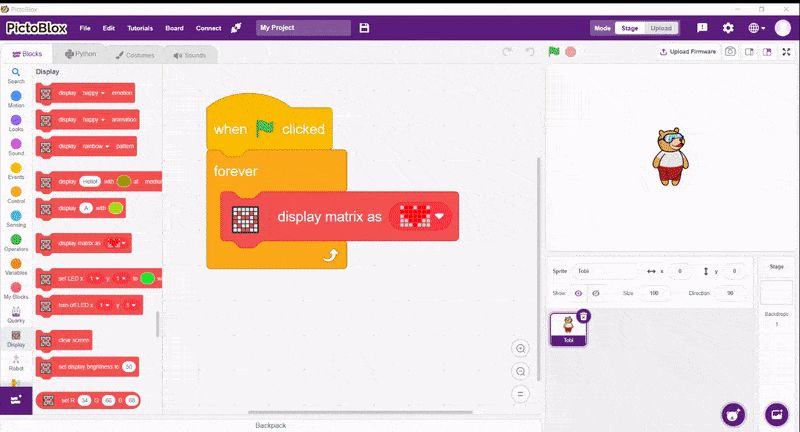


And there you go! Quarky’s heart beats only for you!
Run the script by clicking the green flag.
Save the project file as Beating Hearts.
Making Your Own Name Badge – Overview
You can use Quarky to display text too. Let’s make a script to display Quarky’s name on the matrix.
![]()
![]()
Block
display () with () at () speed block displays the text on Quarky as scrolling text. It has 3 parameters as inputs:
- Text

- Color

- Speed


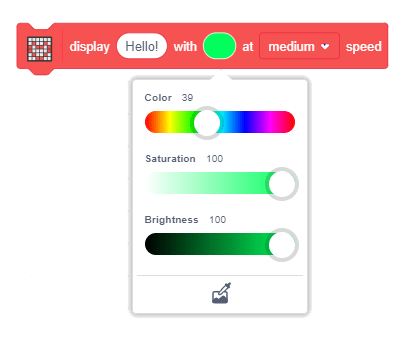
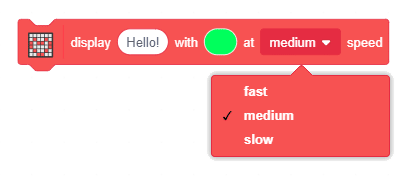
Try to run the block and check these parameters.
Let’s Code!
Follow the steps below:
- Let’s begin by first connecting Quarky to PictoBlox:
- First, connect Quarky to your laptop using the USB cable.
- Open PictoBlox and create a new file. Select the coding environment as Block Coding.
- Select the Board as Quarky. Next, select the Serial port to connect Quarky and press Connect.
- Drag and drop the when flag clicked block into the scripting area from the Events palette.
- Add a forever block from the Control palette below the when flag clicked block.
- Add two display () animation blocks in the forever loop and set the animation to blink.
- Go to the Display palette and add a display () with () at () speed block into the scripting area. In the space, write your Name. Then, set the color of the LED to any color of your choice from the drop-down and select the speed with which you want to display the text.
- Add another display () with () at () speed block and write your hobby.
Finally, run the script by clicking the green flag!
![]()
![]()
Save the file with the file name Name Badge.